Introduction and Summary
PawnTakesPawn is a website created by Treyarch, developers of several Call of Duty games, including Black Ops Cold War. The website serves as the primary source for all the information needed to solve different easter egg puzzles leading up to the release of Call of Duty: Black Ops Cold War.
At the start of the easter egg (Phase 1 - as described below), the PawnTakesPawn website had a completely different look to it. Since then, it has kept changing and evolving to contain more interactive objects and information, as we have progressed towards the release of the Black Ops Cold War.
PawnTakesPawn is an Alternate Reality Game (ARG) that has kept the COD community busy, while we wait for the release of Black Ops Cold War.
In this guide we have separated all the easter egg hunts into different phases to make things easier for you to understand, as there is a lot to cover.
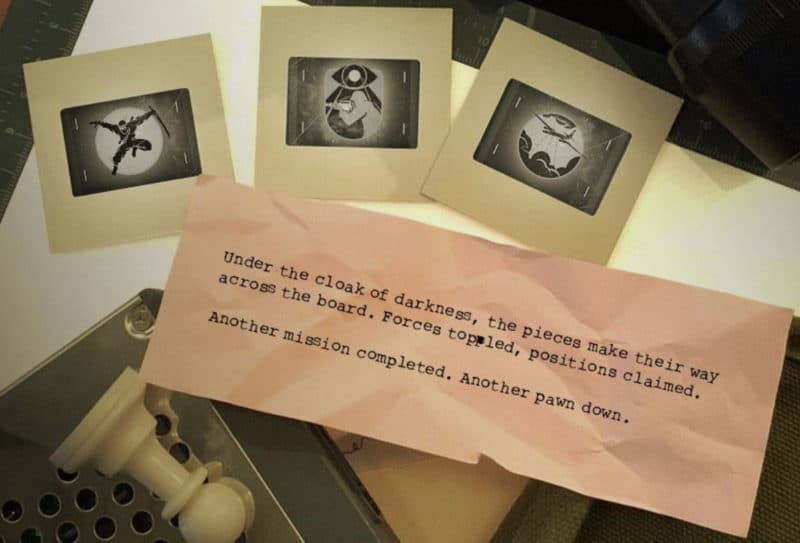
Phase 1 started in early August 2020, when several content creators were sent out different packages that contained projectors and slides. They could not open the packages until August 10, however. The information contained in these projector slides eventually lead them into the Bunkers in Call of Duty: Warzone.

These Bunkers contained several cipher keys and clues that were used to solve different puzzles. After a 2-week long puzzle, the reveal trailer for Black Ops Cold War was given to us through an in-game event in Warzone on August 26, 2020.
Phase 2 began on August 31, 2020, when the PawnTakesPawn website was updated with new content including a computer terminal, dot-matrix, and a text-based adventure game called 'Zork.' You can play the game to get several achievements. This was the start of the Zork achievements and a warm-up for the puzzles to follow in the coming weeks/phases. The site also now had an option to sign up to save your achievements.
Phase 3 began around 4 September 2020 with several postcards being mailed to players who had signed up, asking them to solve the Zork puzzle to get even more achievements and rewards to redeem in Warzone.
In Phase 4, the same content creators from Phase 1 were sent out packages containing items that could be used to solve the puzzles. Phase 4 began on 23 September 2020 and alluded to the zombies mode present in Call of Duty: Black Ops Cold War, cumulating with a trailer for the mode being revealed on 30 September,. This was after teaser video was unveiled on 29 September, being the culmunation of a week-long easter egg hunt and puzzle-solving.

Phase 5 began on October 18, 2020, when PawnTakesPawn users were sent an email with instructions on how to solve the next easter egg and puzzles that were in the Black Ops Cold War Beta that was available to play at the time. Note that Phase 4 had announced an extension of the Black Ops Cold War Beta play period. Originally the beta was supposed to last until October 19, 2020, but after the easter egg, it was extended to October 20, 2020.
Phase 6 began on October 22, 2020, when the participants received yet another email providing instructions on solving the easter egg's next part, utilizing Call of Duty: Mobile.
Phase 7 began on October 26, 2020. Several content creators were sent some more items that will be used for the next and final step of the PawnTakesPawn easter egg.
Below, you will find a complete guide on how each phase was completed, with an in-depth explanation of each and every puzzle. We also have a full Zork guide explaining how to get all the achievements on the PawnTakesPawn website.
Phase 1
To start, Activision sent out mysterious crates to several Call of Duty content creators, including NoahJ456, MrDalekJD, CodeNamePizza, TheXclusiveAce, and CharlieINTEL. They were given a specific date to open up these crates. The date was August 10th, 2020.
Upon opening up the crates, these content creators found an old 1950's projector with projector slides. These projector slides contained several different images, including real-world map locations of several major cities that were numbered (London, Paris, Moscow, New York, and Tokyo), random letters around clock figures with colored circles at the bottom, and parts of the Summit map from the Black ops franchise.


At this point, a discovery was made - there had been a sneaky update to the Black Ops 4 map 'Summit'. The map also contained the numbers next to the major cities in projector slides, along with some clocks with all the city names that were found in the crate, except for Tokyo.

In addition to the clocks, the computer screens in the central control room were now turned on. They had the same kind of images that were seen in the projector slides.

When you loaded up the Summit map, you could notice the same sort of numbers all around the map on different colored walls. These correlated with the numbers that showed the major cities on the projector slides, which ultimately help decide what letter clock figure corresponds to which city.


The clocks in Summit were completely frozen at specific times. Now, since we knew which letter clock figure corresponds to which city, we could overlay them on the clocks and then note down the letters those clock hands were pointing at.

After doing all the cities the following words were discovered: New York: U E W Moscow: H R E London: S B I Tokyo: E E R Paris: Y O H
These letters were an anagram for a sentence that was "BISH YOU WERE HERE." It was discovered that "Bish you were here" was a famous chess game during a world chess championship in 1972 between Boris Spassky (representing Russia) and Robert Fischer (representing the USA).
Moving forward, the remaining images come into play. While everyone was confused about the next step, Treyarch put up an image on their Instagram story that showed a similar circular picture as the ones seen in the project slides, along with a long list of blanks with one letter "K.

The images with yellow circles (both from the projector slides and the in-game computer screens), and the one that Treyarch put in their story, were overlayed on top of the images with letters on them. This gave us a sentence, "TURN ELEVEN WHITE." This was again referencing to the Boris vs. Fischer chess game where on the 11th turn during the game, a pawn takes over another pawn.


This was co-aligned with what Treyarch put on their story, and another word was figured out, which was PAWNTAKESPAWN. And, the "K" in "TAKES" perfectly matched with the Instagram story blank.

Finally, it was discovered that there was a website for the actual easter egg, which then began on August 14, 2020. You could go to www.pawntakespawn.com and see an old TV with a VHS tape player and an ancient telephone. Not only that, but you could also see the Warzone map, hinting about the involvement of Warzone in the next step of the easter egg.

The Ciphers
Every day starting from August 14 through to August 19, 2020, there were multiple VHS tapes released that could be watched on the aforementioned VHS player. These tapes were each 20 minutes long and had a series of numbers flashing, showing the video played.

The time across all these tapes ranged from 2:05 to 14:00 min. The numbers flash across all these tapes at an interval of 0:05 seconds every time. This is an important piece of information that we would need for the final step of this easter egg.

The tapes were also colored, and that helped us decide what tape would help solve what cipher. Basically, there are six ciphers: PSG, Lambda & f, Nix-Charge, Nix Stack, Chem, and Venona. These ciphers are spread in different locked bunkers and shacks around Warzone.

These ciphers are also color-coded, and that helps us understand which tape corresponds to which cipher. There will be more on this as we progress further, since these colors have significance in solving the ciphers, courtesy of new information that was released on the very last day of the easter egg.
While these tapes played, the VHS player flashed Warzone coordinates with keypad code. Those coordinates lead to either a locked room or a bunker that had these cipher images. For example, Venona cipher 1/4 could be in Bunker 4 while Venona cipher 3/4 could be found in the secret locked farm room, and so on.
Every other day, a new tape was released with the previous one titled V2. The third day V2 changed to V3 and so on. Each new version of the tape added more random numbers on top of the already existing ones in them. This caused everyone to re-watch all the tapes to capture all the random numbers on the last day when the final tape was released.
On the first day of the Easter egg (August 14, 2020), there was also a sticky note on the TV that read /tangledweb. This was just a URL to the page www.pawntakespawn.com/tangledweb that had a huge note about war, ciphers, and signals.

There was another sticky note that read /emc2. This one leads to another page where the days of the easter egg were mentioned and were crossed off one by one, as they passed. The day wouldn't be crossed off until the steps for the day were completed. You can see the image of the site below as seen on the sixth day.

On the last day, there were two more sticky notes released on another page: /11thhour. The two sticky notes were "TIMING IS EVERYTHING" and a huge note with time-stamps that were obviously for the tapes. This is important for the final step of this easter egg.

The Tapes and Numbers
There were a total six tapes that each had footage of various historic real-life events. All the videos were from the Cold War era, from 1947 - 1991. Below we have gathered all the numbers found on each tape on the final day.
1981 (Yellow): 1,3,2,2,3,4,1,1,2,1,3,1,2,2,6,2,3,4,3,1,5,1,2,1
1979 (Red): 2,0,9,1,3,3,6,1,7,7,1,6,3,9,7,7,7,0,8,5,9,4,1
1977-78 (Purple): 4,3,7,1,3,2,7,8,8,5,0,8,5,2,9,8,1,5,8,3,0,1,4,7
1972-73 (Blue): 7,50,7,51,2,25,54,54,25,9,57,6,22,54,25,50,25,7,59,58,25,50,25,2
1968-69 (Orange): 15,9,13,21,12,6,10,24,4,11,5,17,25,18,7,11,13,12,22,19,13,1,16,2
1961-62 (Green): 60,8,52,48,80,15,93,37,71,15,80,8,92,25,81,37,80,38,60,48,93,18,63,28
Warzone Coordinates & Access Codes
Video Showcase
Every time a new tape was released, in-game Warzone coordinates and eight-digit keypad access codes were also shown briefly on the VHS player. These coordinates either lead to locked bunkers or secret rooms that we couldn't access until the codes were shown.

We can find all the ciphers inside all these bunkers and rooms, along with amazing legendary loot.
Bunker 10 (with Nuke) - 1981 (Yellow)
VHS Screen: WZ-F8-60274513
Coordinate: F8
Keypad Code: 60274513


TV Station Shack - 1979 (Red)
VHS Screen: WZ-F4-27495810
Coordinate: F4
Keypad Code: 27495810


Bunker 01 - 1977-78 (Purple)
VHS Screen: WZ-B7-97264138
Coordinate: B7
Keypad Code: 97264138


Prison Shack - 1972-73 (Blue)
VHS Screen: WZ-H8-72948531
Coordinate: H8
Keypad Code: 72948531


Bunker 03 - 1968-69 (Orange)
VHS Screen: WZ-B5-87624851
Coordinate: B5
Keypad Code: 87624851


Farmland Secret Room - 1961-62 (Green)
VHS Screen: WZ-H6-49285163
Coordinate: H6
Keypad Code: 49285163


Cipher Colors
The colors of these ciphers are:
PSG (Green)
Nix-Charge (Yellow)
Nix Stack (Red)
Lambda & f (Purple)
Chem (Blue)
Venona (Orange)
Final Key
On the last day of the Easter egg, there was one more key released on /11thhour. This key indicated what colored tape would be used to solve what colored cipher.

The cipher key goes:
- TAPE
GREEN
- CIPHER
GREEN
- TAPE
ORANGE
- CIPHER
YELLOW
- TAPE
BLUE
- CIPHER
RED
- TAPE
PURPLE
- CIPHER
ORANGE
- TAPE
RED
- CIPHER
PURPLE
- TAPE
YELLOW
- CIPHER
BLUE
PSG Cipher

Let's start with the PSG cipher. The PSG cipher had four grids that were found in different bunkers and secret locked rooms. Before continuing with this cipher, you need to get familiar with the four-square cipher invented by Félix Delastelle.
In a four-square cipher, there are four 5x5 matrices that are arranged in a square to make a big 10x10 matric. These matrices contain alphabets, ignoring the letter "Q" or sometimes putting both "I" and "J" to ensure all the alphabets fit together.
The upper-left and lower-right matrices are called plaintext squares that have regular alphabets from a-z omitting the letter "q". The upper-right and lower-left matrices are called ciphertext squares. These contain the alphabets but starting with a known keyword.
The ciphertext squares start with the keyword alphabets followed by filling in the remaining alphabets in order and skipping any repeated alphabets that could be found in the keyword alphabets.
If we take a look at the PSG ciphers 1/4 and 4/4, they both start with A and end with Z. This means that they are the plaintext squares, and we can continue to fill the alphabets ignoring the letter "Q."

You can also notice on PSG 3/4, and there is a small statement that reads, "As usual, each of the 5x5 matrices ignores instances of the letter "Q." This confirms that we will skip "Q."
Now, to fill PSG 2/4 and PSG 3/4, we have the keywords. PSG 2/4 has a code word written on it "ZEPHYR." This is our keyword that we will put in the grid. We also already have the first letter "Z" on it.
After putting in "ZEPHYR," we continue putting the alphabets in order from A to Z, omitting the use of "Q."
We repeat the same with PSG 3/4 with the keyword "TRIDENT."

Once we've completed all the squares, we can arrange them together in a 10x10 grid. After arranging them, we need to plot numbers from 0-9 on both x-axis and y-axis. Another hint has been given on PSG 1/4, and you can see a 0 number beside the letter "A" that confirms this.

Once you have everything plotted, the hard part starts. So the numbers that we get from the green tape are:
60,8,52,48,80,15,93,37,71,15,80,8,92,25,81,37,80,38,60,48,93,18,63,28
If you look at the numbers closely, you will see a repeating pattern that is:
If the first digit is greater than or equal to 5, then the second digit is lower than 5.
If the first digit is lower than 5, then the second digit is greater than or equal to 5.
From this, we can deduce that these are a pair of coordinates that we can use on the 10x10 grid. The first digit is considered as the column number, and the second digit is considered as the row number. This is where most of the people get it wrong, as they treat, for instance, the first number 60 as going across 6 and down 0, which gives them the letter "E."
Most of the people consider this as the correct first letter, but this is wrong. You need to solve this according to Delastelle's rule. That means, according to the pattern discussed above, one pair of coordinates would be 60 and 8 (or 08) as they are the first two numbers from the green tape.
60 gives us the letter "E," and 08 provides us with the letter "M" on the 10x10 grid. Now, to get the actual letters, you need to refer to the alphabets in conjunction or intersection across these letters. You have "E" and "M," these are two corners, now look above "M" but stop at the row where we have "E," you land at "A." This letter "A" is your first alphabet.

Now, look across "M" but to the right and stop at the column where you get "E," and you stop on the letter "R." This is your second letter for this pair, which gives you "AR." Do the same with the rest of the numbers, and you get the final code that is:
AR OP BD TO GC AT ME IN DT ER RU SR
That concludes your PSG cipher.
Nix-Charge Cipher

According to the final key, the Nix-Charge cipher can be solved using the numbers found in the orange tape. The numbers are:
15,9,13,21,12,6,10,24,4,11,5,17,25,18,7,11,13,12,22,19,13,1,16,2
It is quite simple to solve this one. You will notice on Nix-Charge 1/4 and Nix-Charge 2/4 that there are two different images with a bunch of numbers stacked on top of each other. On 1/4, it reads that "FLAT BLACK CROWN ADMINISTERS POSITIVE EFFECTS." And on 2/4, it states that "SILVER CROWN ADMINISTERS POSITIVE EFFECTS."

From this, we can deduce that any number with a black base will be considered as a positive number, and any number with a white base will be considered as a negative number. Going to Nix-charge 3/4 and 4/4, the total numbers available are 24. The numbers from the tapes were also 24 in total.
The Nix-Charge numbers can be found by looking at both 3/4 and 4/4. The numbers that are missing in 3/4 can be seen in the same base on 4/4. And the numbers that are missing in 4/4 can be seen in 3/4. Correlating both of them, you can fill in the Nix-Charge numbers. In the infographic image below, you can see how the first two rows are correlated, the rest are filled in following the same method.

The Nix-Charge numbers are:
-3,-5,+6,-7,+9,+1,+5,-4,+2,+9,-0,3,-2,-4,-1,+8,+5,-3,-4,-7,+2,+3,+2,-1
Now all you have to do is add the numbers from the Nix-Charge to the numbers obtained from the orange tape.

Final Numbers

Then you will translate these final numbers into letters by following the general rule of A=1, B=2, C=3, D=4, and so on.

The letters that you get from the final numbers are:
L D S N U G O T F T E T W N F S R I R L O D R A
That concludes our Nix-Charge cipher.
Nix-Stack Cipher

The Nix-Stack cipher is the red cipher and according to the final key, we use the numbers flashed in the blue tape to solve this cipher. The numbers seen in the blue tape were:
7,50,7,51,2,25,54,54,25,9,57,6,22,54,25,50,25,7,59,58,25,50,25,2
This cipher is based around Nixie tubes. A Nixie tube is a glass tube with a number of cathodes shaped in numeral form. The word nixie is derived from the word "NIX I," which is an abbreviation of "Numeric Indicator eXperimental No. 1". We can also see this name all on Nix-Stack ciphers.
The most common Nixie tubes have ten cathodes in the shape of numbers ranging from 0-9. These cathodes are placed one behind another, and each of these appears at different depths. We can see Nix-Stack 3/3 that the numbers are all stacked together confirming this.
There are different arrangements one such arrangement is called "ИH-12A" or "IN-12A". This is a Russian arrangement where the numbers go 3 8 9 4 0 5 7 2 6 1 from front (3) to back (1). It makes sense as well since the sequence of numbers seen in Nix-Stack 2/3 is matching up with this arrangement of numbers. You can fill in the blank numbers and get precisely the same arrangement.

Now, you will notice that an arrow is pointing down from the last number (1) to the first (3), indicating that the arrangement of the same numbers is reversed. If you go to Nix-Stack 3/3, you have a blank space to fill from 0-9. You can fill in the Russian arrangement numbers (3 8 9 4 0 5 7 2 6 1) but in reverse order since the arrow is pointing from 1 to 3 (1 6 2 7 5 0 4 9 8 3).

This will give you a reference that will help you decode the numbers obtained from the blue tape. Filling in the arrangement you will get:
- 0
1
- 1
6
- 2
2
- 3
7
- 4
5
- 5
0
- 6
4
- 7
9
- 8
8
- 9
3
Once you've established the above. You now know that 0 = 1, 1 = 6, 2 = 2 and so on. We will use this to translate the numbers that we've obtained from the blue tape digit by digit. For instance, the first number from the blue tape is 7 (or 07), which means if we look at it digit by digit, it will be 19. Because 0 = 1 and 7 = 9 making it 19.
You will translate all the numbers using the same method which will give you the final number:
19 01 19 06 12 20 05 05 20 13 09 14 22 05 20 01 20 19 03 08 20 01 20 12
You will again use the same general rule of converting these numbers to the alphabet using the table provided above in the Nix-Charge cipher. Your final answer will be:
S A S F L T E E T M I N V E T A T S C H T A T L
That is your solution for the Nix-Charge cipher.
Chem Cipher

The Chem cipher requires a little bit of Chemistry knowledge. You need to familiarize yourself with the Hill System Order when writing the chemical compound formulas. To summarize, the Hill System states that when writing a chemical formula, the Carbon (C) atoms are written first, Hydrogen (H) second, and all the remaining elements in alphabetical order.
If there is no Carbon present in a formula, then rearrange the formula in alphabetical order. According to the final key, the Chem cipher can be solved by using the numbers acquired from the yellow tape. The numbers are:
1,3,2,2,3,4,1,1,2,1,3,1,2,2,6,2,3,4,3,1,5,1,2,1
There are two ciphers for Chem 1/2 and 2/2. Both these Chem ciphers have a list of 24 chemical compounds (12 chemical compounds in each cipher page). The number of chemical compounds is exactly the same as the numbers that we got from the tape. Both are 24.
On Chem 1/2 cipher page, there is a note that says, "USE THE HILL SYSTEM AND DISREGARD SUBSCRIPT INTEGERS." This means that whatever subscripts we get, including the numbers in a chemical compound formula, we will ignore that after arranging the chemical formulas into a Hill System Order.
The chemical compound formulas and their Hill System Order is:
Chemical Compound | Chemical Formula | Hill System Formula |
Cyanuric Acid | C3H3N3O3 | CHNO |
Lithium Tungstate | Li2WO4 | LiOW |
Mercury (II) Acetate | C4H6O4Hg | CHHgO |
Aluminum Oleate | C54H99AlO6 | CHAlO |
Tartrazine | C16H9N4Na3O9S2 | CHNNaOS |
Yttrium(III) Sulfate Octahydrate | H16O20S3Y2 | HOSY |
Pyrosulfric Acid | H2S2O7 | HOS |
Potassium Iodate | KIO3 | IKO |
Silver Tetrafluoroborate | AgBF4 | AgBF |
Bismuth Borate | BiBO3 | BiBO |
4-Iodoaniline | C6H6IN | CHIN |
Potassium Hydroxide | KOH | HKO |
Yttrium (III) Oxide | Y2O3 | OY |
Lithium Aluminium Hydride | LiAlH4 | AlHLi |
Furosemide | C12H11CIN2O5S | CHCINOS |
Iodine Monofluoride | FI | FI |
Arsenic Oxybromide | AsBr3O | AsBrO |
Potassium Thiocyanate | KSCN | CKNS |
Hydroxycarbamide | CH4N2O2 | CHNO |
Barium Carbonate | BaCO3 | CBaO |
Sulfamethoxazole | C10H11N3O3S | CHNOS |
Thallium (I) Hydroxide | TIOH | HOTI |
Beryllium Nitrate | BeN2O6 | BeNO |
Magnesium Hydroxide | Mg(OH)2 | HMgO |
After arranging the chemical compound formulas into Hill System formation, we will go back to the numbers that we got from the yellow tape. If you look closely at the numbers, you will realize that all the numbers are very small. The max number in this set is 5, and the lowest is 1.
Each number here points to a letter in the Hill System formula of the corresponding chemical element. For instance, our first number is 1, so we will choose the first letter from the first chemical formula (hill system) that is CHNO. The first letter here is "C". Following the same method, we get the following:
- Tape Number
1
- Hill System Formula
CHNO
- Letter
C
- Tape Number
3
- Hill System Formula
LiOW
- Letter
W
- Tape Number
2
- Hill System Formula
CHHgO
- Letter
H
- Tape Number
2
- Hill System Formula
CHAlO
- Letter
H
- Tape Number
3
- Hill System Formula
CHNNaOS
- Letter
N
- Tape Number
4
- Hill System Formula
HOSY
- Letter
Y
- Tape Number
1
- Hill System Formula
HOS
- Letter
H
- Tape Number
1
- Hill System Formula
IKO
- Letter
I
- Tape Number
2
- Hill System Formula
AgBF
- Letter
B
- Tape Number
1
- Hill System Formula
BBiO
- Letter
B
- Tape Number
3
- Hill System Formula
CHIN
- Letter
I
- Tape Number
1
- Hill System Formula
HKO
- Letter
H
- Tape Number
2
- Hill System Formula
OY
- Letter
Y
- Tape Number
2
- Hill System Formula
AlHLi
- Letter
H
- Tape Number
6
- Hill System Formula
CHClNOS
- Letter
S
- Tape Number
2
- Hill System Formula
FI
- Letter
I
- Tape Number
3
- Hill System Formula
AsBrO
- Letter
O
- Tape Number
4
- Hill System Formula
CKNS
- Letter
S
- Tape Number
3
- Hill System Formula
CHNO
- Letter
N
- Tape Number
1
- Hill System Formula
CBaO
- Letter
C
- Tape Number
5
- Hill System Formula
CHNOS
- Letter
S
- Tape Number
1
- Hill System Formula
HOTI
- Letter
H
- Tape Number
2
- Hill System Formula
BeNO
- Letter
N
- Tape Number
1
- Hill System Formula
HMgO
- Letter
H
That gives us our final solution for the Chem cipher that is:
C W H H N Y H I B B I H Y H S I O S N C S H N H
Venona Cipher

The Venona cipher has a total of four pages, and it uses the concept of the "one-time pad" key. The cipher might seem complicated at first glance, but once you understand the main idea, everything becomes much clearer. We highly recommend you read Smithsonian Magazine's article on this specific cipher to grasp the central concept.
Venona has an orange color, and accordingly, the numbers from the purple tape are used to solve this cipher. The purple tape gives us the following numbers:
4,3,7,1,3,2,7,8,8,5,0,8,5,2,9,8,1,5,8,3,0,1,4,7
To solve this cipher, you should know how to open up Bunker 11. Feel free to check our full guide on how to do the Bunker 11 easter egg and access it. Once you're inside the Bunker, you will notice several random words on the walls of the Bunker.


And as we suspected back when the Bunker was first opened, those words are indeed part of this easter egg and helps decipher the Venona cipher. Visiting Bunker 11 ever since this easter egg's solution, we've observed that these words are not on the wall anymore. The words are:
"RESUME"
"COVER"
"AWAIT"
"FURTHER"
"INSTRUCTIONS"
If you look at Venona 3/4, you can find all these words there with their codes that are: "RESUME" = 0643 "COVER" = 2518 "AWAIT" = 2354 "FURTHER" = 7866 "INSTRUCTIONS" = 1164

The order is exactly as stated above, and according to Venona 3/4, it becomes:
0643 2518 2354 7866 1164
We get a 20 digit code.
Taking a look at Venona 2/4, you can see that there is a red note that reads "HELI EVAC," pointing the first empty box of the last row. You can get this code by looking at the winning screen of Warzone. When you win and get into the helicopter, you will notice a code beside your Operator on an orange "bag." The code is "J4722."

According to the Venona rule, you need to shift the first digit from the second group to the first, first two digits from the third group to the second, first three from the fourth to the third, and finally, all four from the fifth group to the fourth group. Doing so, you will get the following number now:
06432 51823 54786 61164
Now we add the "HELI EVAC" code at the beginning of this code which makes it look like:
J4722 06432 51823 54786 61164

You will notice that these numbers now fit perfectly in the last empty row of Venona 2/4. But, we are still not done, as we need to use the numbers that we obtained from the purple tape.
The numbers from the purple tape are indeed our "One-time pad" key. They are precisely the same as our code. Both are 24 numbers in total. Now, we will take the "One-time pad" key and add it to our existing code using a non-arithmetic carrying addition method.
If you add 5+8, you usually get 13, but according to non-arithmetic carrying addition, it will be 3. If you add 6+6, it will be 2.
Adding the code and the "One-time pad" key we get (ignoring "J"):
- 4
4
- 7
3
- 2
7
- 2
1
- 0
3
- 6
2
- 4
7
- 3
8
- 2
8
- 5
5
- 1
0
- 8
8
- 2
5
- 3
2
- 5
9
- 4
8
- 7
1
- 8
5
- 6
8
- 6
3
- 1
0
- 1
1
- 6
4
- 4
7
Code after non-arithmetic addition:
Coming back to the "HELI EVAC" code "J4722," we can see that the letter is "J." This is useful information as you can find a bunch of letters on Venona 4/4 that does not make any sense. But, we have our code now and the letter "J."

We need to use the column with the heading "J" from Venona 4/4 to decipher the final code. The "J" column states:
0 = I 1 = E 2 = G 3 = A 4 = D 5 = O 6 = S 7 = C 8 = L 9 = T
We can use the above information to translate our code into letters, which gives us:
- CODE
8
- LETTER
L
- CODE
0
- LETTER
I
- CODE
9
- LETTER
T
- CODE
3
- LETTER
A
- CODE
3
- LETTER
A
- CODE
8
- LETTER
L
- CODE
1
- LETTER
E
- CODE
1
- LETTER
E
- CODE
0
- LETTER
I
- CODE
0
- LETTER
I
- CODE
1
- LETTER
E
- CODE
6
- LETTER
S
- CODE
7
- LETTER
C
- CODE
5
- LETTER
O
- CODE
4
- LETTER
D
- CODE
2
- LETTER
G
- CODE
8
- LETTER
L
- CODE
3
- LETTER
A
- CODE
4
- LETTER
D
- CODE
9
- LETTER
T
- CODE
1
- LETTER
E
- CODE
2
- LETTER
G
- CODE
0
- LETTER
I
- CODE
1
- LETTER
E
The final code for the Venona cipher is:
L I T A A L E E I I E S C O D G L A D T E G I E
Lambda & f Cipher

This cipher is quite complicated to understand, and the fact that the red tape, which is used to solve this cipher, missed one number, made it a whole lot difficult to solve it. In all the tapes, we've had 24 numbers, but in the red tape, a number was missing at 8:25 time-stamp. Either way, the number was determined by looking at the layout of this cipher.
The following numbers were obtained from the red tape:
2,0,9,1,3,3,6,1,7,7,1,6,3,9,7,7,7,0,8,5,9,4,1
The following code is the correct code if there was no number missing:
2,0,9,1,3,3,6,1,7,7,1,6,3(missing number),3,9,7,7,7,0,8,5,9,4,1
You might be wondering how that missing number was determined. For that, you need to look at the cipher images and the name of the cipher. If you look closely, you will notice that the image on Lambda & f 1/5 looks similar to the Dual Tone Multi-Frequency (DTMF) keypad.

If you look at the 23 numbers and the frequencies across the dial-pad, you will notice that they match going across the top and bottom. The missing number 3 was determined by looking at the last frequency value at the top, which is 1633 Hz. The numbers from the tape were "163", only that gave us a hint that another "3" would go in there. The rest of the frequency values match perfectly. And it makes sense as the name also suggests the use of wavelength and frequency, which is the main working principle in the DTMF.
By looking at the rest of the overlay, you can determine the other frequencies as well and fill in the Lambda & f 1/5 cipher page.

Once you've got the dial-pad, you can overlap the remaining ciphers 2/5 and 3/5 to find what number is overlapping what word to get the values of alpha, bravo, charlie, delta, echo, foxtrot, and golf.

The values turn out to be:
- Word
Alpha
- Number
0
- Word
Bravo
- Number
2
- Word
Charlie
- Number
7
- Word
Delta
- Number
6
- Word
Echo
- Number
5
- Word
Foxtrot
- Number
9
- Word
Golf
- Number
8
These values were used to identify the phone number on Lambda & f 5/5. The phone number is not complete, and it goes +1 (831) _ _ - _ _ _. You will see on Lambda & f 4/5, you have "BRAVO, FOXTROT, ALPHA," and accordingly, that translates to Bravo = 2, Foxtrot = 9 and Alpha = 0. These are three numbers that go well with the first three blanks of the phone number.
The rest of the four words are found on the phone number cipher image itself that are "DELTA, ECHO, CHARLIE, GOLF," and this translates to Delta = 6, Echo = 5, Charlie = 7 and Golf = 8. This gives us the full phone number +1 (831) 290 - 6578.

When you called this number, there was a voice on the other side that asked for a six-digit verification code. This verification code appeared on the telephone, which can be seen on the pawn takes pawn website (www.pawntakespawn.com). The code is 274058. When you enter this code then a message is played giving you the final code in the military language that is:
OSCAR ALPHA TANGO ALPHA INDIA LIMA MIKE HOTEL SIERRA KILO GOLF ROMEO ECHO DELTA ECHO INDIA ECHO CHARLIE MIKE NOVEMBER OSCAR ECHO ECHO ECHO
We can translate this to a full code by taking the first letter of each word and getting:
O A T A I L M H S K G R E D E I E C M N O E E E
All Cipher Solutions
The cipher solutions are:
**PSG**: AR OP BD TO GC AT ME IN DT ER RU SR
**Nix-Charge**: L D S N U G O T F T E T W N F S R I R L O D R A
**Nix-Stack**: S A S F L T E E T M I N V E T A T S C H T A T L
**Chem**: C W H H N Y H I B B I H Y H S I O S N C S H N H
**Venona**: L I T A A L E E I I E S C O D G L A D T E G I E
**Lambda & f**: O A T A I L M H S K G R E D E I E C M N O E E E
Putting The Cipher Solutions Together
We now have all the cipher solutions. You must be thinking, what to do with all these random string of letters? Well, these random strings of letters came into play when Treyarch once again updated their
. If you went to the site, you would see a sticky note that read "TIMING IS EVERYTHING" and another sticky note with a number of time-stamps.

These time-stamps, as expected, belonged to the tapes. The time stamps were also in an interval of 0:05, and if you go across all the tapes from start to the beginning, you will notice that the numbers flashed after every 0:05 seconds.
Since they are spread across all the tapes, you wouldn't have noticed, but putting them together according to the time stamp, it makes perfect sense.
Time-stamps with Numbers
Here are the time-stamps for all the tapes with the numbers.
1981 (24 numbers)
- Time-stamp
2:20
- Number
1
- Time-stamp
2:45
- Number
3
- Time-stamp
3:25
- Number
2
- Time-stamp
3:50
- Number
2
- Time-stamp
4:10
- Number
3
- Time-stamp
5:25
- Number
4
- Time-stamp
5:35
- Number
1
- Time-stamp
5:55
- Number
1
- Time-stamp
6:15
- Number
2
- Time-stamp
6:30
- Number
1
- Time-stamp
6:40
- Number
3
- Time-stamp
7:50
- Number
1
- Time-stamp
8:20
- Number
2
- Time-stamp
9:10
- Number
2
- Time-stamp
9:45
- Number
6
- Time-stamp
10:10
- Number
2
- Time-stamp
10:30
- Number
3
- Time-stamp
11:15
- Number
4
- Time-stamp
11:40
- Number
3
- Time-stamp
11:55
- Number
1
- Time-stamp
12:10
- Number
5
- Time-stamp
12:35
- Number
1
- Time-stamp
13:00
- Number
2
- Time-stamp
14:00
- Number
1
1979 v2 (23 Numbers)
- Time-stamp
2:25
- Number
2
- Time-stamp
2:50
- Number
0
- Time-stamp
3:20
- Number
9
- Time-stamp
4:25
- Number
1
- Time-stamp
5:05
- Number
3
- Time-stamp
5:15
- Number
3
- Time-stamp
6:00
- Number
6
- Time-stamp
6:10
- Number
1
- Time-stamp
6:45
- Number
7
- Time-stamp
7:10
- Number
7
- Time-stamp
7:25
- Number
1
- Time-stamp
8:15
- Number
6
- Time-stamp
8:55
- Number
3
- Time-stamp
9:15
- Number
9
- Time-stamp
9:30
- Number
7
- Time-stamp
9:55
- Number
7
- Time-stamp
10:25
- Number
7
- Time-stamp
10:35
- Number
0
- Time-stamp
10:45
- Number
8
- Time-stamp
11:10
- Number
5
- Time-stamp
11:50
- Number
9
- Time-stamp
12:15
- Number
4
- Time-stamp
13:10
- Number
1
- Time-stamp
14:00
- Number
1
1977-78 v3 (24 Numbers)
- Time-stamp
2:15
- Number
4
- Time-stamp
3:05
- Number
3
- Time-stamp
3:55
- Number
7
- Time-stamp
4:20
- Number
1
- Time-stamp
4:35
- Number
3
- Time-stamp
4:50
- Number
2
- Time-stamp
5:10
- Number
7
- Time-stamp
6:05
- Number
8
- Time-stamp
7:15
- Number
8
- Time-stamp
7:40
- Number
5
- Time-stamp
8:00
- Number
0
- Time-stamp
8:30
- Number
8
- Time-stamp
8:40
- Number
5
- Time-stamp
8:45
- Number
2
- Time-stamp
9:25
- Number
9
- Time-stamp
10:50
- Number
8
- Time-stamp
11:05
- Number
1
- Time-stamp
11:35
- Number
5
- Time-stamp
11:45
- Number
8
- Time-stamp
12:25
- Number
3
- Time-stamp
12:40
- Number
0
- Time-stamp
13:05
- Number
1
- Time-stamp
13:25
- Number
4
- Time-stamp
13:45
- Number
7
1972-73 v4 (24 Numbers)
- Time-stamp
2:05
- Number
7
- Time-stamp
2:40
- Number
50
- Time-stamp
3:10
- Number
7
- Time-stamp
3:30
- Number
51
- Time-stamp
4:15
- Number
2
- Time-stamp
4:45
- Number
25
- Time-stamp
4:55
- Number
54
- Time-stamp
5:40
- Number
54
- Time-stamp
5:45
- Number
25
- Time-stamp
6:25
- Number
9
- Time-stamp
7:00
- Number
57
- Time-stamp
7:20
- Number
6
- Time-stamp
8:05
- Number
22
- Time-stamp
8:35
- Number
54
- Time-stamp
9:05
- Number
25
- Time-stamp
9:40
- Number
50
- Time-stamp
9:50
- Number
25
- Time-stamp
10:15
- Number
7
- Time-stamp
11:00
- Number
59
- Time-stamp
11:30
- Number
58
- Time-stamp
12:30
- Number
25
- Time-stamp
12:55
- Number
50
- Time-stamp
13:35
- Number
25
- Time-stamp
13:55
- Number
2
1968-69 v5 (24 Numbers)
- Time-stamp
2:30
- Number
15
- Time-stamp
2:35
- Number
9
- Time-stamp
3:00
- Number
13
- Time-stamp
3:15
- Number
21
- Time-stamp
3:40
- Number
12
- Time-stamp
3:45
- Number
6
- Time-stamp
4:05
- Number
10
- Time-stamp
4:40
- Number
24
- Time-stamp
5:00
- Number
4
- Time-stamp
5:50
- Number
11
- Time-stamp
6:35
- Number
5
- Time-stamp
6:55
- Number
17
- Time-stamp
7:35
- Number
25
- Time-stamp
8:50
- Number
18
- Time-stamp
9:00
- Number
7
- Time-stamp
9:35
- Number
11
- Time-stamp
10:00
- Number
13
- Time-stamp
10:40
- Number
12
- Time-stamp
11:25
- Number
22
- Time-stamp
12:00
- Number
19
- Time-stamp
12:05
- Number
13
- Time-stamp
12:50
- Number
1
- Time-stamp
13:15
- Number
16
- Time-stamp
13:50
- Number
2
1961-62 v6 (24 Numbers)
- Time-stamp
2:10
- Number
60
- Time-stamp
2:55
- Number
8
- Time-stamp
3:35
- Number
52
- Time-stamp
4:00
- Number
48
- Time-stamp
4:30
- Number
80
- Time-stamp
5:20
- Number
15
- Time-stamp
5:30
- Number
93
- Time-stamp
6:20
- Number
37
- Time-stamp
6:50
- Number
71
- Time-stamp
7:05
- Number
15
- Time-stamp
7:30
- Number
80
- Time-stamp
7:45
- Number
8
- Time-stamp
7:55
- Number
92
- Time-stamp
8:10
- Number
25
- Time-stamp
9:20
- Number
81
- Time-stamp
10:05
- Number
37
- Time-stamp
10:20
- Number
80
- Time-stamp
10:55
- Number
38
- Time-stamp
11:20
- Number
60
- Time-stamp
12:20
- Number
48
- Time-stamp
12:45
- Number
93
- Time-stamp
13:20
- Number
18
- Time-stamp
13:30
- Number
63
- Time-stamp
13:40
- Number
28
Combined Time-stamps
Now that we have all the time-stamps, we can combine them together in ascending order from the lowest time (2:05) to the maximum time (14:00). This is important as "TIMING IS EVERYTHING," combined with a list of time-stamps shown on /11thhour, was a hint at this very thing.
Another hint that was given was two letters next to 2:10 and 3:10. 2:10 had a letter "A" and 3:10 had a letter "S". Now, what we need to do is to take the 24 letters from each cipher and line them up with the time-stamps from the tape that gave us those particular numbers for the solution. If done correctly, you will have the following list:
- Time-stamp
2:05
- Letter
S
- Time-stamp
2:10
- Letter
A
- Time-stamp
2:15
- Letter
L
- Time-stamp
2:20
- Letter
C
- Time-stamp
2:25
- Letter
O
- Time-stamp
2:30
- Letter
L
- Time-stamp
2:35
- Letter
D
- Time-stamp
2:40
- Letter
A
- Time-stamp
2:45
- Letter
W
- Time-stamp
2:50
- Letter
A
- Time-stamp
2:55
- Letter
R
- Time-stamp
3:00
- Letter
S
- Time-stamp
3:05
- Letter
I
- Time-stamp
3:10
- Letter
S
- Time-stamp
3:15
- Letter
N
- Time-stamp
3:20
- Letter
T
- Time-stamp
3:25
- Letter
H
- Time-stamp
3:30
- Letter
F
- Time-stamp
3:35
- Letter
O
- Time-stamp
3:40
- Letter
U
- Time-stamp
3:45
- Letter
G
- Time-stamp
3:50
- Letter
H
- Time-stamp
3:55
- Letter
T
- Time-stamp
4:00
- Letter
P
- Time-stamp
4:05
- Letter
O
- Time-stamp
4:10
- Letter
N
- Time-stamp
4:15
- Letter
L
- Time-stamp
4:20
- Letter
A
- Time-stamp
4:25
- Letter
A
- Time-stamp
4:30
- Letter
B
- Time-stamp
4:35
- Letter
A
- Time-stamp
4:40
- Letter
T
- Time-stamp
4:45
- Letter
T
- Time-stamp
4:50
- Letter
L
- Time-stamp
5:00
- Letter
F
- Time-stamp
5:05
- Letter
I
- Time-stamp
5:10
- Letter
E
- Time-stamp
5:15
- Letter
L
- Time-stamp
5:20
- Letter
D
- Time-stamp
5:25
- Letter
Y
- Time-stamp
5:30
- Letter
T
- Time-stamp
5:35
- Letter
H
- Time-stamp
5:40
- Letter
E
- Time-stamp
5:45
- Letter
T
- Time-stamp
5:50
- Letter
T
- Time-stamp
5:55
- Letter
I
- Time-stamp
6:00
- Letter
M
- Time-stamp
6:05
- Letter
E
- Time-stamp
6:10
- Letter
H
- Time-stamp
6:15
- Letter
B
- Time-stamp
6:20
- Letter
O
- Time-stamp
6:25
- Letter
M
- Time-stamp
6:30
- Letter
B
- Time-stamp
6:35
- Letter
E
- Time-stamp
6:40
- Letter
I
- Time-stamp
6:45
- Letter
S
- Time-stamp
6:50
- Letter
G
- Time-stamp
6:55
- Letter
T
- Time-stamp
7:00
- Letter
I
- Time-stamp
7:05
- Letter
C
- Time-stamp
7:10
- Letter
K
- Time-stamp
7:15
- Letter
I
- Time-stamp
7:20
- Letter
N
- Time-stamp
7:25
- Letter
G
- Time-stamp
7:30
- Letter
A
- Time-stamp
7:35
- Letter
W
- Time-stamp
7:40
- Letter
I
- Time-stamp
7:45
- Letter
T
- Time-stamp
7:50
- Letter
H
- Time-stamp
7:55
- Letter
M
- Time-stamp
8:00
- Letter
E
- Time-stamp
8:05
- Letter
V
- Time-stamp
8:10
- Letter
E
- Time-stamp
8:15
- Letter
R
- Time-stamp
8:20
- Letter
Y
- Time-stamp
8:25
- Letter
E (guessed)
- Time-stamp
8:30
- Letter
S
- Time-stamp
8:35
- Letter
E
- Time-stamp
8:40
- Letter
C
- Time-stamp
8:45
- Letter
O
- Time-stamp
8:50
- Letter
N
- Time-stamp
8:55
- Letter
D
- Time-stamp
9:00
- Letter
F
- Time-stamp
9:05
- Letter
T
- Time-stamp
9:10
- Letter
H
- Time-stamp
9:15
- Letter
E
- Time-stamp
9:20
- Letter
I
- Time-stamp
9:25
- Letter
D
- Time-stamp
9:30
- Letter
I
- Time-stamp
9:35
- Letter
S
- Time-stamp
9:40
- Letter
A
- Time-stamp
9:45
- Letter
S
- Time-stamp
9:50
- Letter
T
- Time-stamp
9:55
- Letter
E
- Time-stamp
10:00
- Letter
R
- Time-stamp
10:05
- Letter
N
- Time-stamp
10:10
- Letter
I
- Time-stamp
10:15
- Letter
S
- Time-stamp
10:20
- Letter
D
- Time-stamp
10:25
- Letter
C
- Time-stamp
10:30
- Letter
O
- Time-stamp
10:35
- Letter
M
- Time-stamp
10:40
- Letter
I
- Time-stamp
10:45
- Letter
N
- Time-stamp
10:50
- Letter
G
- Time-stamp
10:55
- Letter
T
- Time-stamp
11:00
- Letter
C
- Time-stamp
11:05
- Letter
L
- Time-stamp
11:10
- Letter
O
- Time-stamp
11:15
- Letter
S
- Time-stamp
11:20
- Letter
E
- Time-stamp
11:25
- Letter
R
- Time-stamp
11:30
- Letter
H
- Time-stamp
11:35
- Letter
A
- Time-stamp
11:40
- Letter
N
- Time-stamp
11:45
- Letter
D
- Time-stamp
11:50
- Letter
E
- Time-stamp
11:55
- Letter
C
- Time-stamp
12:00
- Letter
L
- Time-stamp
12:05
- Letter
O
- Time-stamp
12:10
- Letter
S
- Time-stamp
12:15
- Letter
E
- Time-stamp
12:20
- Letter
R
- Time-stamp
12:25
- Letter
T
- Time-stamp
12:30
- Letter
T
- Time-stamp
12:35
- Letter
H
- Time-stamp
12:40
- Letter
E
- Time-stamp
12:45
- Letter
R
- Time-stamp
12:50
- Letter
D
- Time-stamp
12:55
- Letter
A
- Time-stamp
13:00
- Letter
N
- Time-stamp
13:05
- Letter
G
- Time-stamp
13:10
- Letter
E
- Time-stamp
13:15
- Letter
R
- Time-stamp
13:20
- Letter
U
- Time-stamp
13:25
- Letter
I
- Time-stamp
13:30
- Letter
S
- Time-stamp
13:35
- Letter
T
- Time-stamp
13:40
- Letter
R
- Time-stamp
13:45
- Letter
E
- Time-stamp
13:50
- Letter
A
- Time-stamp
13:55
- Letter
L
- Time-stamp
14:00
- Letter
H
That was a long list, but if you look at the letters, you will notice that it somewhat makes a sentence. To make it easier for you to read here's the full list condensed:
SALCOLDAWARSISNTHFOUGHTPONLAABATTLEFIELDYTHETTIMEHBOMBEISGTICKINGAWITHMEVERYESECONDFTHEIDISASTERNISDCOMINGTCLOSERHANDECLOSERTTHERDANGERUISTREALH
The sentence that we can make from the above string of letters is:
A COLD WAR ISNT FOUGHT ON A BATTLEFIELD THE TIME BOMB IS TICKING WITH EVERY SECOND THE DISASTER IS COMING CLOSER AND CLOSER THE DANGER IS REAL
The remaining letters that were not used in the above sentence are not pointless. The remaining letters spell out:
SLASH PLAY THE GAME FIND THE TRUTH
This is a new URL that takes us to a website where we can see the teaser of the latest Call of Duty Black Ops: Cold War. The site is www.pawntakespawn.com/playthegamefindthetruth.
The teaser is a Youtube video (unlisted at the time of discovery) on Call of Duty's official Youtube channel. And that concludes our huge easter egg!
Also, if you read the description of the teaser, it states, "Know your history...or be doomed to repeat it. Verdansk. August 26th.

This confirms that the reveal trailer for the new Black Ops is going to take place inside Warzone on August 26, 2020, during a live event. You can also see a "Live" written next to Warzone on the main menu screen when you boot up your Modern Warfare.
nextpage
Phase 2
Video Showcase
We Are All Pawns Tape
What is Zork?
is a text-based adventure game requiring you to travel to different areas and find treasures. You need to use various resources and navigate dangerous areas with caution to bring back the treasures and put them in a trophy case.
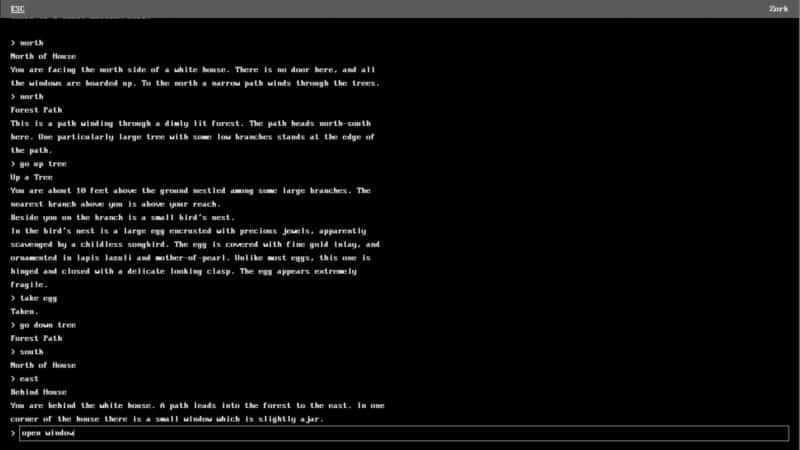
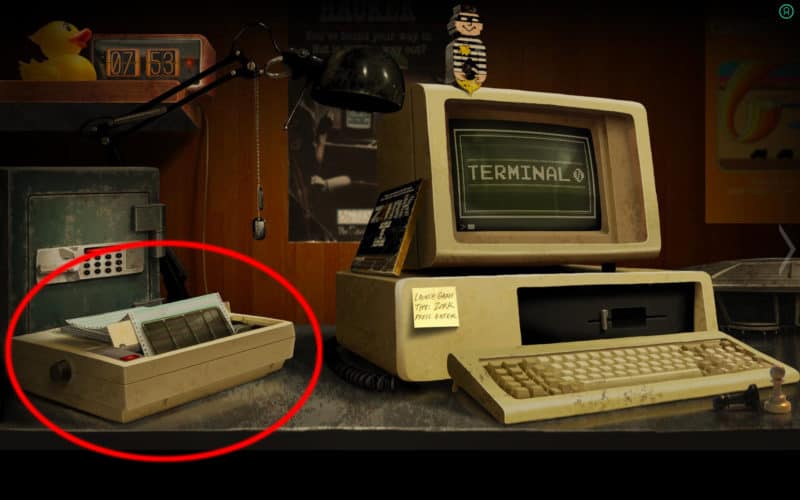
There are several different achievements that you can get in this game, by replaying the game several times. These achievements are saved when you sign up on the site —more on the achievements below. Dot Matrix Dot-matrix is found on the left side of the screen. There is a dot matrix printer that you can click on to reveal a dot-matrix note.
This note gives you instructions for the main achievements and how to get started on this game.

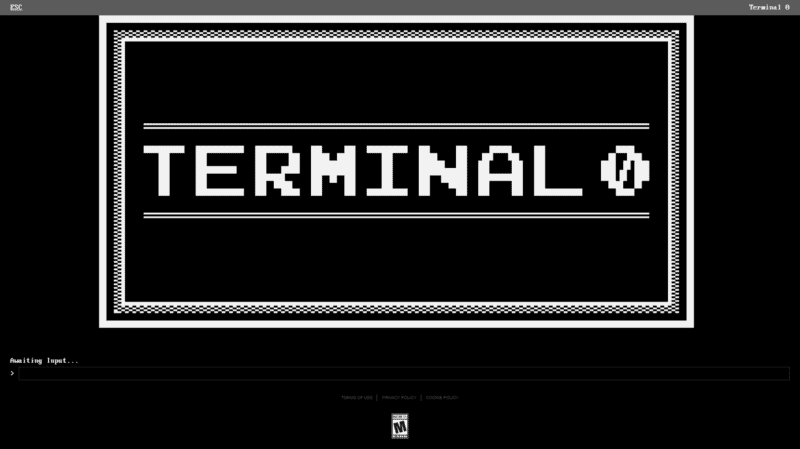
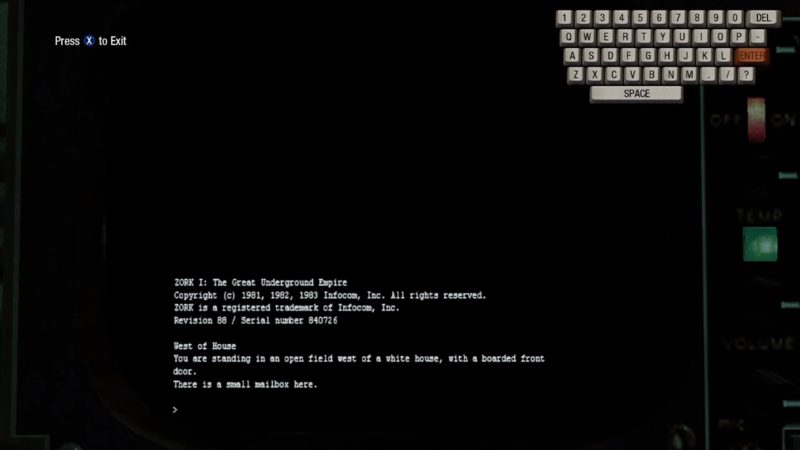
You will see a sticky note on the computer that says, "LAUNCH GAME. TYPE: ZORK." This is referring to the computer screen that reads "Terminal 0." Click on the screen, and you will be prompted to type the name of the game to start it. You will type 'Zork,' and the game will begin.
Main Achievements
As stated, there are several achievements in Zork that you can get. We found a total of 28 achievements, to be precise. There could be more, but that is for you to find in your playthrough.

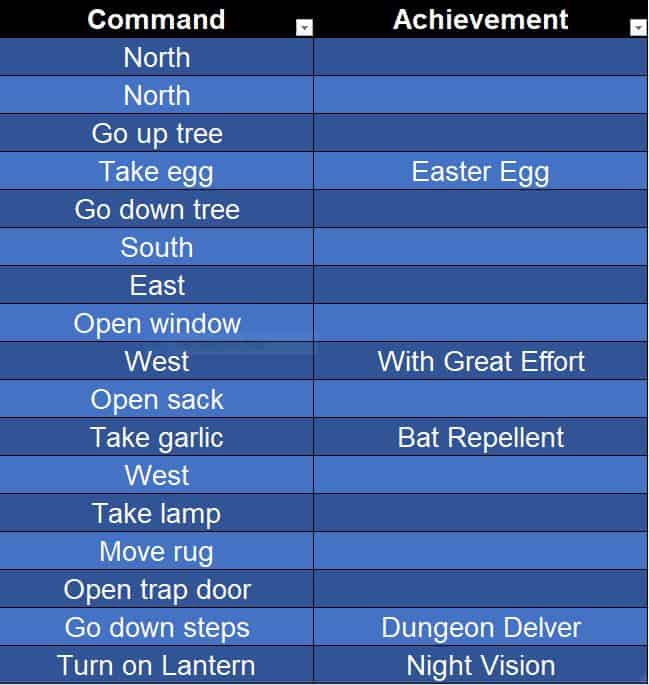
There are five main achievements that you must get in order to get to the next part of the easter egg. These achievements are: Easter Egg: Get the jeweled egg With Great Effort: Enter the house Bat Repellent: Get the Garlic Dungeon Delver: Enter the Great Underground Empire Night Vision: Light up the Cellar or the Attic Zork Adventurer: Earn your first achievements in Zork
You will also notice an achievement called 'Opening Move.' This achievement is not essential. You get this achievement for signing up on the site.
To get these achievements, simply copy the following commands. You will get all the achievements following the same route as us, as shown below, when the game starts.
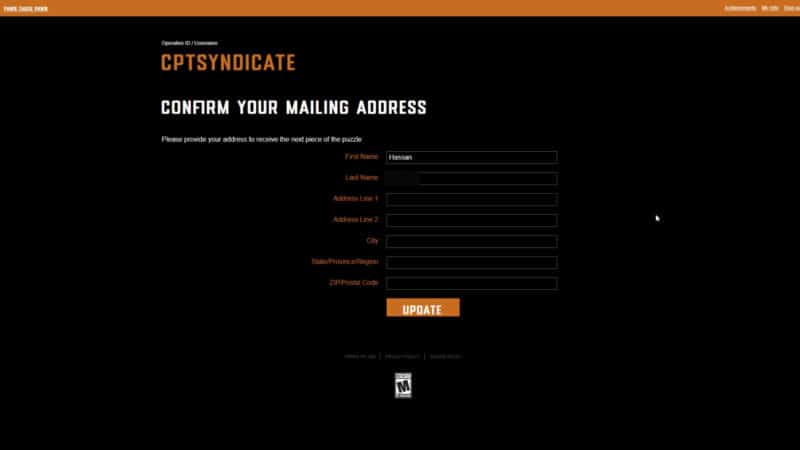
Once you've unlocked all these achievements, you will get a link to go to and put in your mailing address. We're assuming that the developers will mail something to your address that will be used for the next part of the easter egg.
All Achievements
Apart from the achievements mentioned earlier, Zork has a total of 28 achievements that you can get. This game is based around trial and error method since the events that occur are entirely random and not in our control.

But, completing the full game will give you another achievement called 'Escaped From Zork' and this one gives you a link to another PawnTakesPawn URL (pawntakespawn.com/pitchblack). This site is brand new and has a note in the middle that reads as follows:
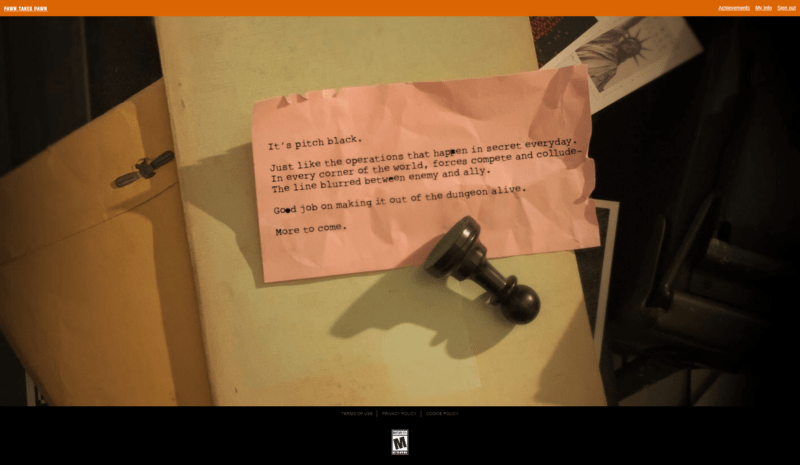
The last words, "More to come," indicates this easter egg will continue in Warzone and Black Ops Cold War. Zork's Link to Black Ops If you're a fan of the original Black Ops, then you should remember that Zork is also available to play in Black Ops as part of an easter egg. You can free Mason from his chair on the main menu screen and find an old computer right behind the chair.

You could play this exact same game on that computer- some classic nostalgic throwback for fans!
nextpage
Phase 3
Video Guide
Postcards
Moving forward with the Zork easter egg, many people were mailed different postcards numbered 1-15. Some people received similar cards, while others got different numbers but only in the range of 1-15.
These postcards had random names on them along with a map schematic and pictures of various treasures found in Zork. The images of all the postcards with other treasures could not be found - perhaps they were not all mailed as of writing this article.
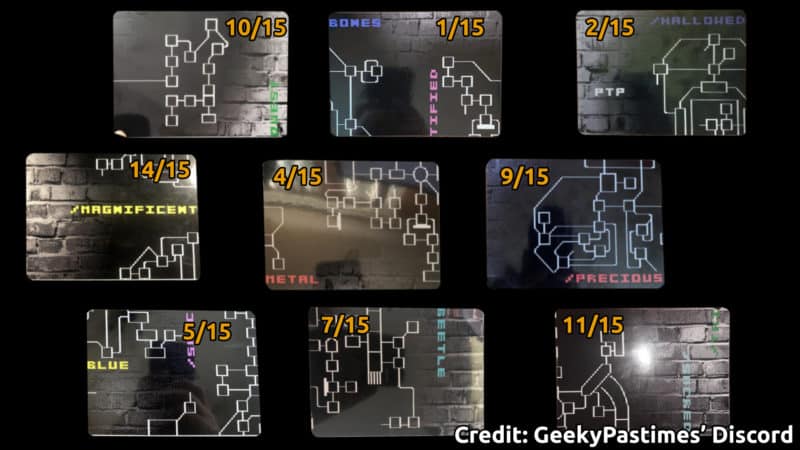

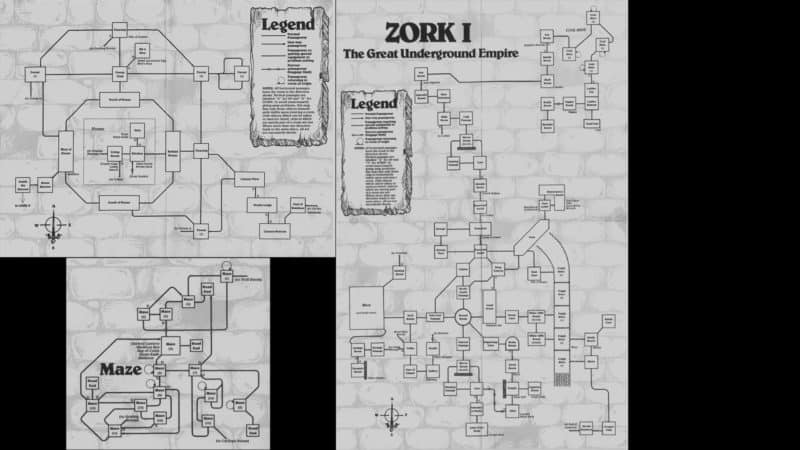
The map layout turned out to be the map of Zork. You could easily overlay the postcards (when combined) on top of the map of the whole Zork underground empire, and it fit perfectly.
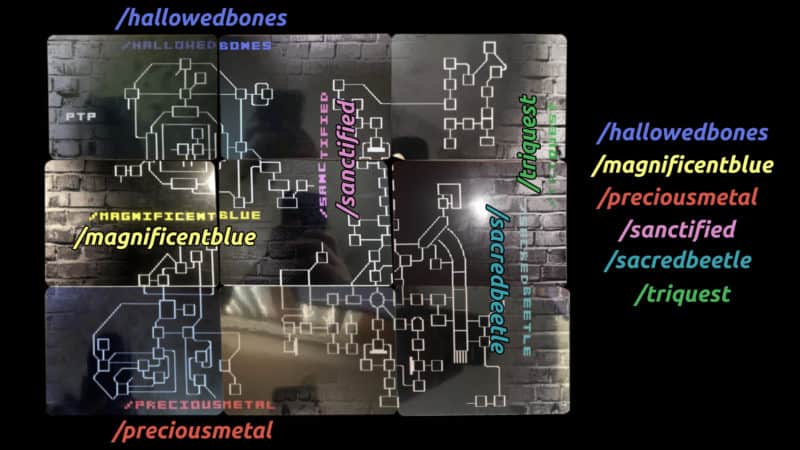
Along with the map layout, the postcards had random names on them, and these names started with a "/" that indicated that these were URLs. There were a total of six URLs discovered once all the postcards were combined.
The six URLs are: www.pawntakespawn.com/sacredbeetle www.pawntakespawn.com/hallowedbones www.pawntakespawn.com/sanctified www.pawntakespawn.com/preciousmetal www.pawntakespawn.com/magnificentblue www.pawntakespawn.com/triquest
These URLs contain various chapters. These chapters form a written story about the great underground empire that is within the world of Zork. The URLs mentioned above are written in order from one to six incantations.
Each of these pages contain part of the story, and the letters of the words in these links are circled in red. When you combined all the words, you make up a sentence. For instance, if you go to www.pawntakespawn.com/sacredbeetle. You will see that the first circled letter is "C" in the title "THE BELLICUSE KING."
So that letter "C" is your first word. Moving forward, you have "O" in "Quendor" in the second line of the first paragraph, and then the next one is "N" in the third line of the same section.
The following are the pages seen on respective URLs:
www.pawntakespawn.com/sacredbeetle
www.pawntakespawn.com/hallowedbones
www.pawntakespawn.com/sanctified
www.pawntakespawn.com/preciousmetal
www.pawntakespawn.com/magnificentblue
www.pawntakespawn.com/triquest
You need to note down all of these going across all the links in order, and you will get the following long sentence:
"Construct map from printed intelligence, travel as the crow flies, bring six pictured treasures to the trophy case, and recite incantations."
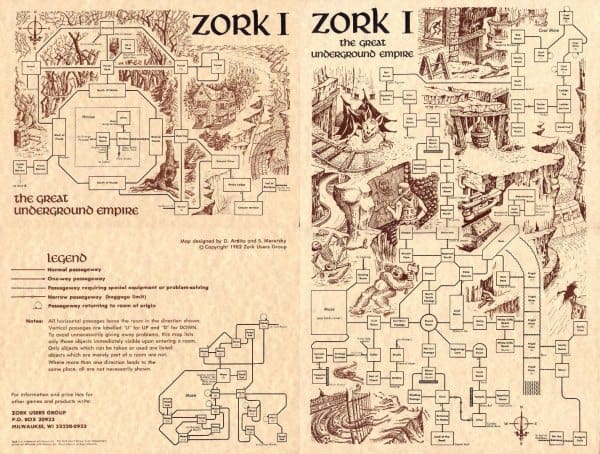
Zork Map
Before moving forward with this, you should assemble the whole Zork map according to the layout seen on the combined postcards. You can find a high resolution copy of the Zork map
. Once assembled, you will get:
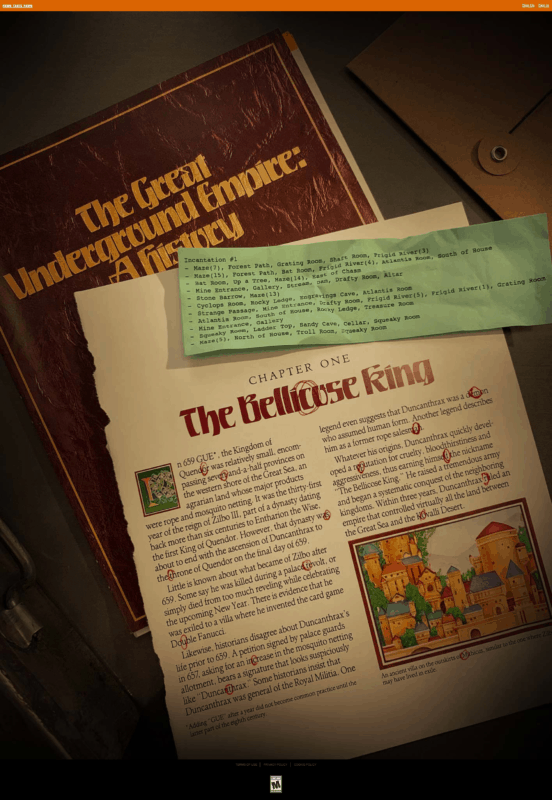
Incantations
If you read the formed sentence, you will notice that it says "Construct map from printed intelligence" that suggests using the map of Zork to come up with something. It also states, "...bring six pictured treasures to trophy case and recite incantations."
These pictured treasures are also part of the postcards. When completed, the postcards also have different pictures. The pictures are of the same treasures that were collected during your Zork playthrough. The six treasures out of all of those collected are (as seen on the postcards): Scarab Skull Bag of Coins Pot of Gold Bracelet Trident
We will come back to Zork later, first we need to come up with the incantations that we will use inside Zork. You can see the incantations numbered from one to six in the form of green sticky notes on each URL.
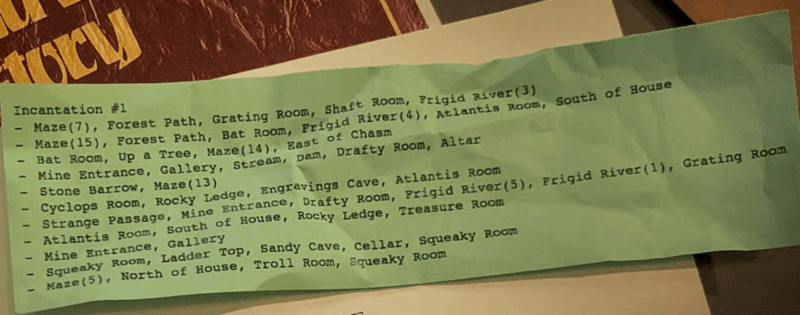
These incantations are written in the form of the locations found in Zork. One full line is equivalent to a word. For instance, in incantation #1, the first line is Maze(7), Forest Path, Grating Room, Shaft Room, Frigid River(3).
This whole first line is a single word, and the first location that is Maze(7), is a part of the entire letter. This means that if you assemble the map of Zork according to the layout seen in the combined postcards, then you can move from Maze(7) to Frigid River(3) to make up the first letter "M."
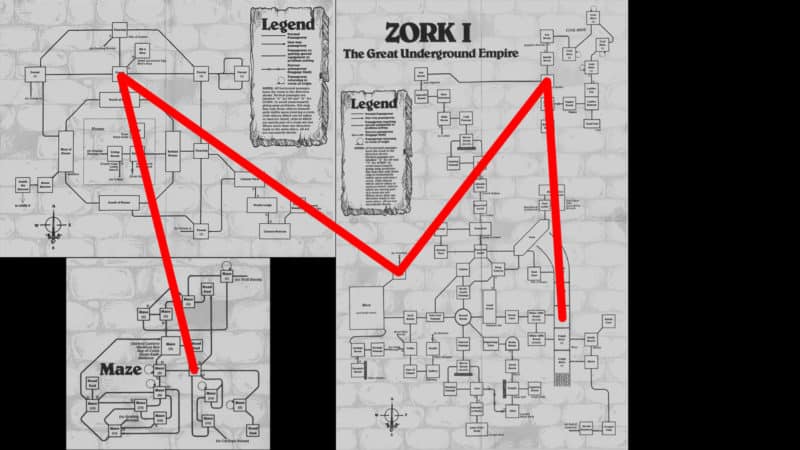
Here are the second and third lines drawn from Incantation #1:
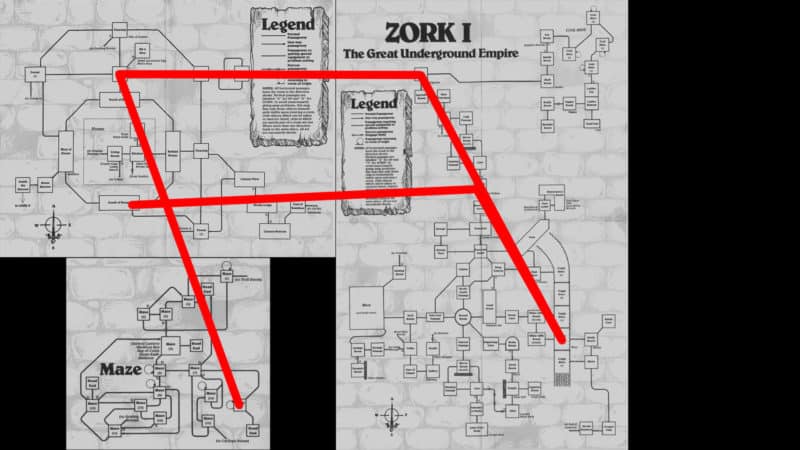

Once you've done the same with all six incantations, you will end up with the following words: MACHINATION INSIGHT TRIBUTE SPECTRUM AVARICE TEMPEST
These six incantations will be used in the Zork game.
Back Into Zork
After identifying of all six incantations, you need to head back into Zork and put all the pictured treasures into the trophy case. By now, all the treasure should already be in the trophy case.

If we go back to the original sentence that was created from the circled letters, it states, "...bring six pictured treasures to trophy case and recite incantations." This means that we need to recite the incantations while the treasure is inside the trophy case.
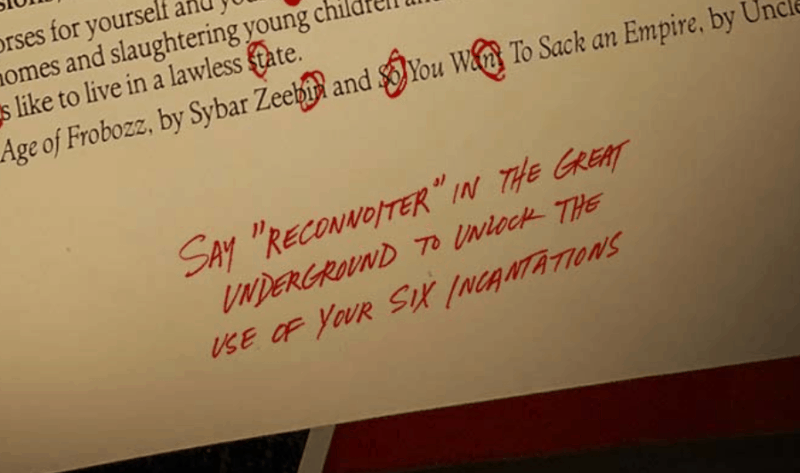
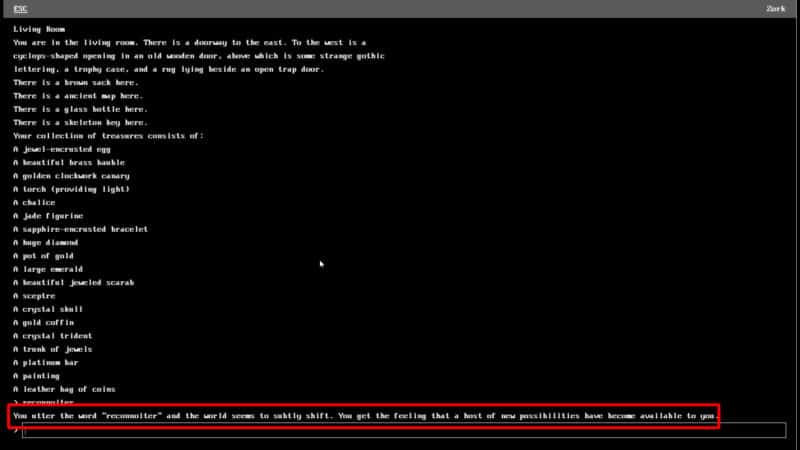
But before reciting these incantations, you need to get into Zork and type "reconnoiter," and you will see a message pop up that reads, "You utter the word 'reconnoiter' and the world seems to subtly shift. You get the feeling that a host of new possibilities have become available to you."
We know we have to say this specific word from the last URL (/triquest) as at the bottom, it states, "Say 'reconnoiter' in the great underground to unlock the use of your six incantations."
Upon reciting each incantation, you will receive a word in return. Each of these incantations is associated with a single treasure piece. Typing each incantation will give you achievements as well.

The following table shows the incantations, associated treasure piece, and the returning words.
- Incantation
MACHINATION
- Treasure
Scarab
- Returning Word
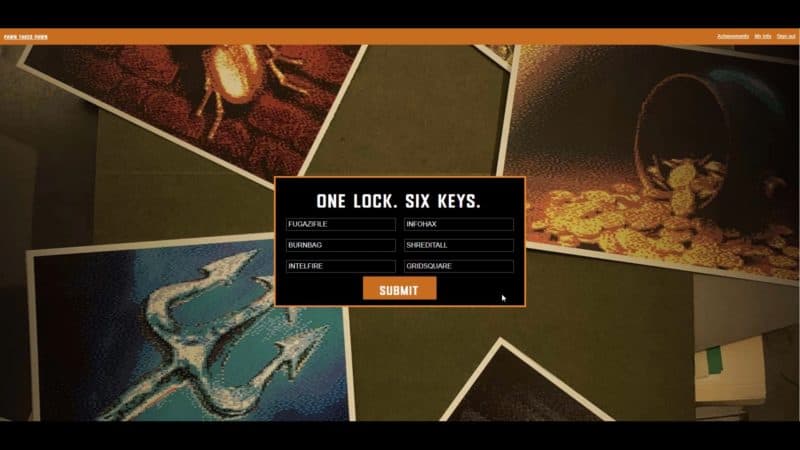
FUGAZIFILE
- Incantation
INSIGHT
- Treasure
Skull
- Returning Word
BURNBAG
- Incantation
TRIBUTE
- Treasure
Bag of Coins
- Returning Word
INTELFIRE
- Incantation
SPECTRUM
- Treasure
Pot of Gold
- Returning Word
INFOHAX
- Incantation
AVARICE
- Treasure
Bracelet
- Returning Word
SHREDITALL
- Incantation
TEMPEST
- Treasure
Trident
- Returning Word
GRIDSQUARE
The Reward
The next step includes decoding the QR code (as seen beside the treasure pictures above) that leads to another URL where you can redeem your reward using these words that you got in return. The new URL is
. This URL was decoded using the parts of QR codes that came with some of the postcards.
The full QR code was decoded even without receiving the rest of the QR code from Treyarch. This was achieved by one of the discord members of GeekyPastimes, HaxorSnake.
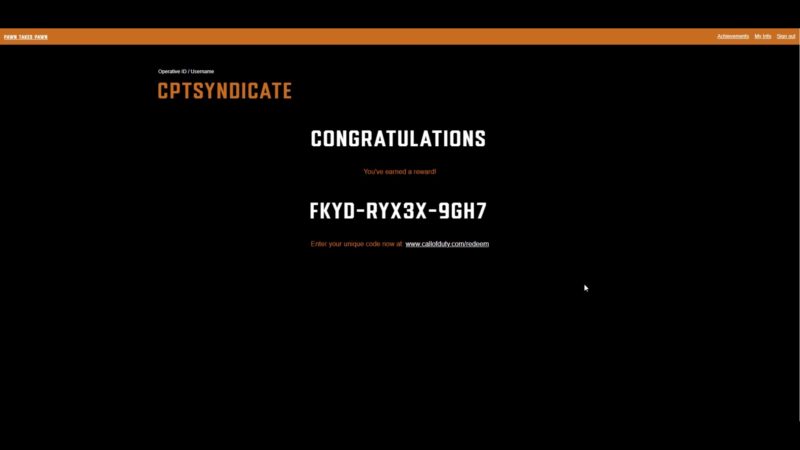
When you go to the site, you will be asked to enter six "keys," and these six keys are the six words that were returned upon reciting the incantations in Zork. After putting all these keys in the blank spaces, you will get a final achievement - "Advanced Pawn."
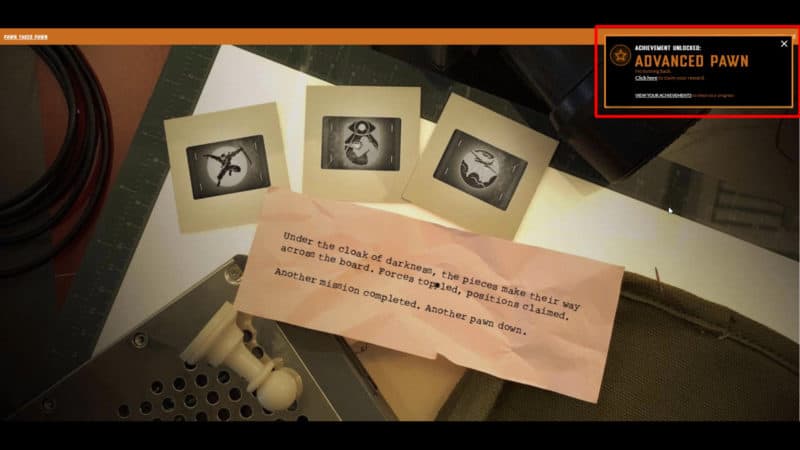
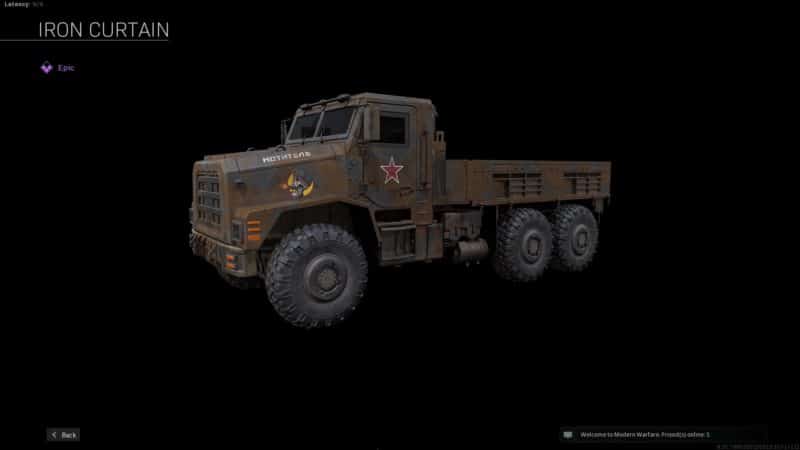
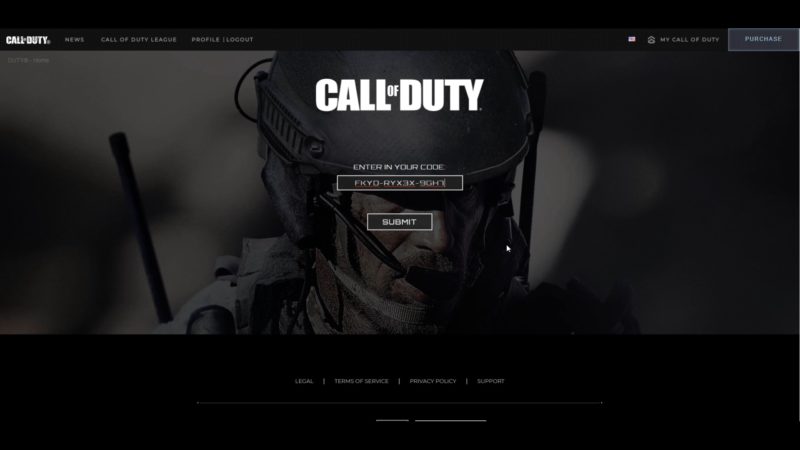
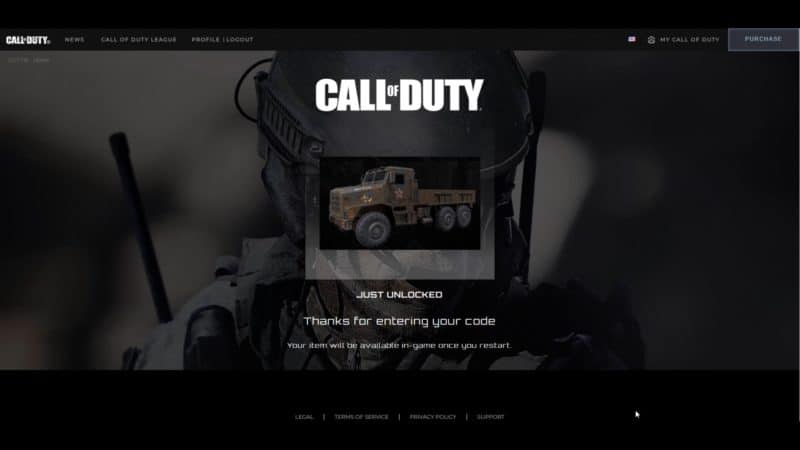
This achievement will have another link that will take you to your redeem code, which can be used on Call of Duty's official website. Once you've redeemed the code, you will be rewarded with an epic truck skin called "Iron Curtain."
The best part about this last step is that anyone can get their redeem code by going to the site, even if they haven't completed the full Zork game!
Once you've put in the keys, you will notice there are three pictures on the same URL with a note. These pictures are presumably the perks that are going to be included in the new Black Ops Cold War. The perks are assumed to be Dead Silence, Blind-Eye, and Ghost, but it is just an assumption.
List of All Achievments
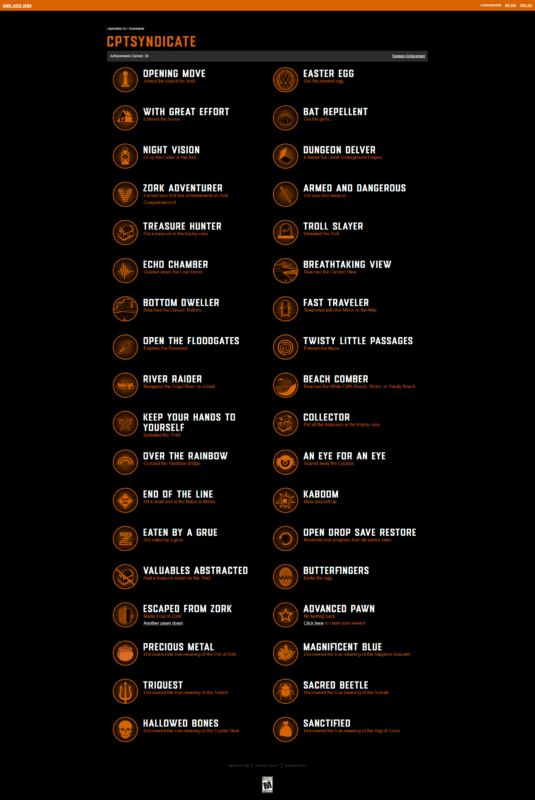
After the successful completion of this easter egg, you should have 36 achievements. There are a total of 37 achievements, but that is only if you have received a postcard mailed to you by Treyarch. Below is a list of all 36 achievements that you should have:
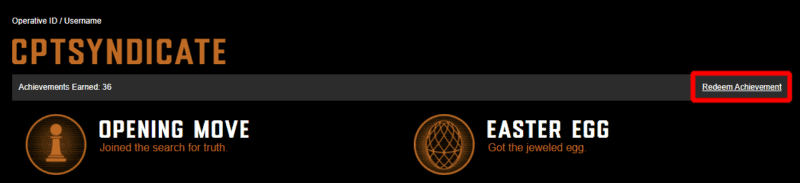
If you have received a postcard through the mail and a redeem code, then you can go to the top right corner of the achievements list and redeem it. This code is unique for every person they mail the postcards to.

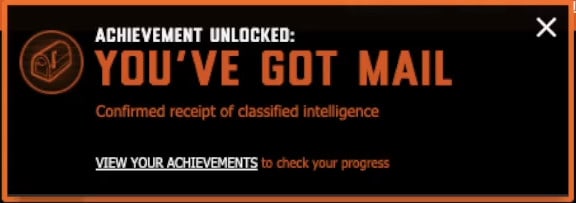
After redeeming the code, you will get the final and 37th achievement called "You've Got Mail."
nextpage
Phase 4
Introduction
Once again, Treyarch has outdone themselves by continuing the Pawn Takes Pawn easter egg approach, while incorporating Warzone for the reveal of the brand new Zombies mode that is going to return in Call of Duty: Black Ops Cold War.
Similar to the previous easter egg hunt, Treyarch sent different packages to a select few Youtube content creators that included NoahJ456, MrDalekJD, ShawnJ Gaming, Drift0r, JackFrags, and MarleyThirteen. These creators were sent some boxes that had different terminals that were introduced back in the 90s.
This is similar to the Call of Duty: Black Ops Cold War reveal easter egg above, where several Youtuber's were sent projectors from back in the day along with some slides. These Youtuber's received their packages on 22nd September 2020. Before proceeding with the guide, a massive shoutout to GeekyPastime and his discord community for solving each of these easter eggs on a daily basis before anyone else.
Each of these Youtuber's received something that they could put commands in. The screens where they could put the commands in were similar to the computer terminal shown on pawn takes pawn original website where you can play the Zork game.
While some Youtuber's like NoahJ456, Drift0r, and ShawnJ Gaming received an old computer from the 90s era called Tandy 1000, the others received a USB flash drive containing a program that opened up a CMD terminal screen where they could put the commands in.
Jackfrags, MrDalekJD, and MarleyThirteen received Bolex 160 Macrozoom (Video Camera), Kodak Brownie Super 27 (Photo Camera), and a Tape Recorder respectively.
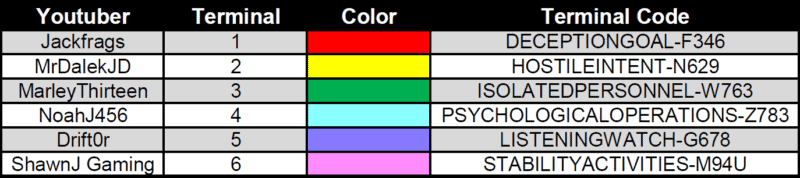
All of these Youtuber's were color-coded and had different terminal numbers. The following table shows the names with the terminal numbers and colors.

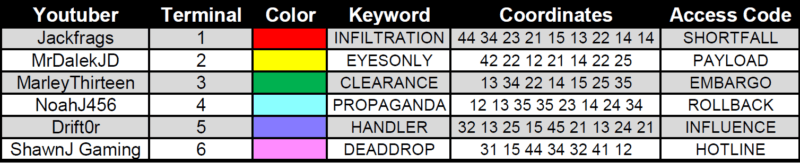
They all were given separate keywords along with some coordinates. These were Polybius ciphers. Solving these ciphers gives other words that they could use as Access Code for their respective terminals.
For instance, for NoahJ456, the set of instructions reads "PROPAGANDA (12 13 35 35 23 14 24 34)", here the keyword for the cipher is "PROPAGANDA" and the coordinates are "12 13 35 35 23 14 24 34." In order to solve this, we need to understand what the Polybius cipher is first.
In Polybius cipher, there is a 5x5 grid labeled 1-5 across both the y and x-axis. First, we need to take a look at the keyword "PROPAGANDA" and remove any repeated letters. After removing the repeated letters the word becomes "PROAGND". We will now write this word into the grid.
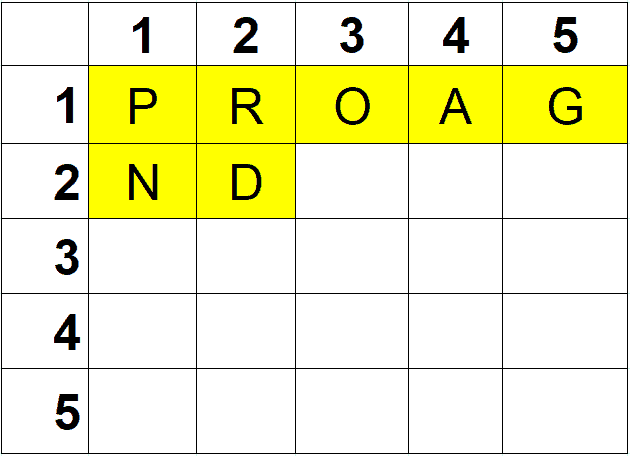
After that, you will continue with the alphabets but making sure you do not repeat any letters, this means that after "D", the letter "B" will come followed by "C" and then "E" etc. You will not write "D" again since it is already written. Completing the full grid gives us the following:
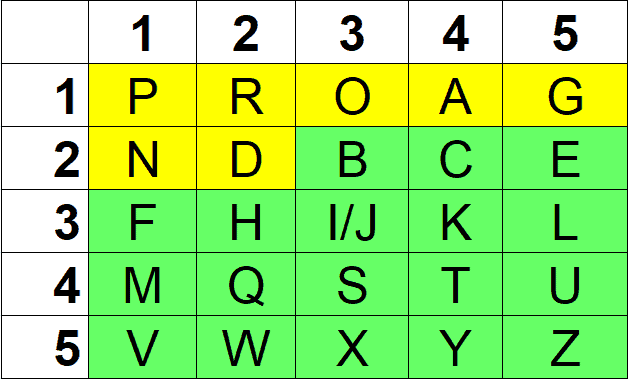
From here we can use the coordinates to decipher the word that is used to access the terminal. The coordinates 12 13 35 35 23 14 24 34 means that we go select 1 across y-axis and then 2 across x-axis which gives us our first letter "R" and the same way for 13, we go 1 across y-axis and 3 across x-axis giving us the second letter "O".
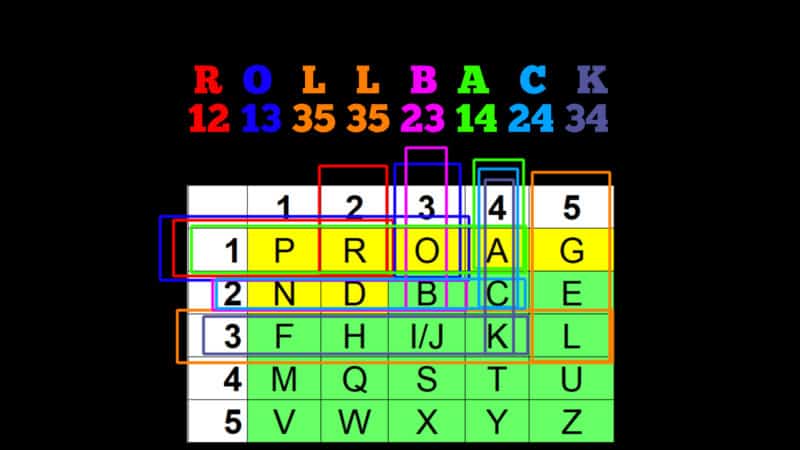
When you complete all of it, you get the word "ROLLBACK." This one was NoahJ456's access code for his terminal.
Similarly, the following are the ciphers and decoded codes for the other Youtubers:
All the creators were also given their first set of terminal commands that they could enter and in return get a link with a text that read "THE PIECES ARE IN PLAY." The link was ptp/wavesofattack. This was in fact, another pawn takes pawn URL, www.pawntakespawn.com/wavesofattack.
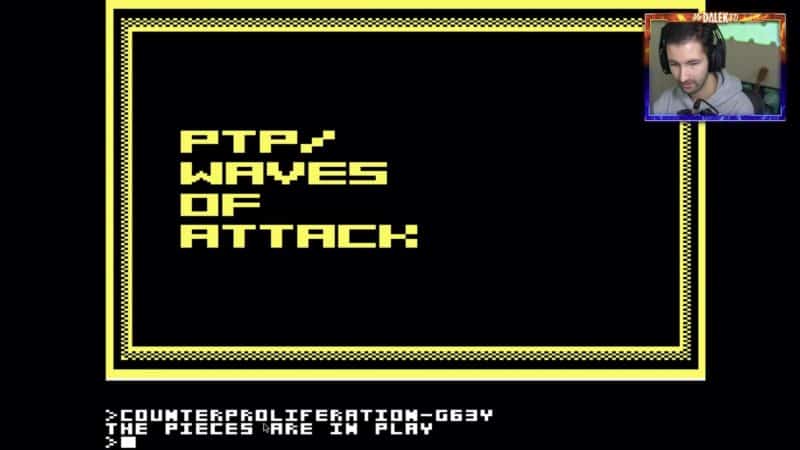
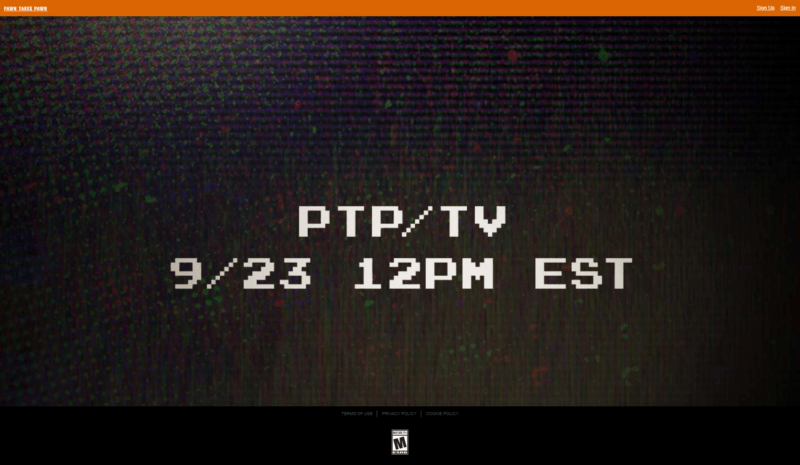
Going to this website showed the date and time for the next day which was 23rd September 2020 at 12 PM EST. The page also had another link that read ptp/tv. /TV is the same link as the original pawn takes pawn site where we could watch different tapes.
23rd September was the first day of the easter egg that would eventually lead to the reveal of zombies for Call of Duty: Black Ops Cold War.
Day 1 - 23 September 2020
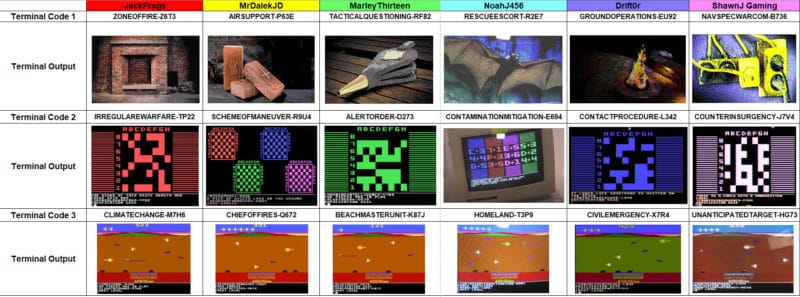
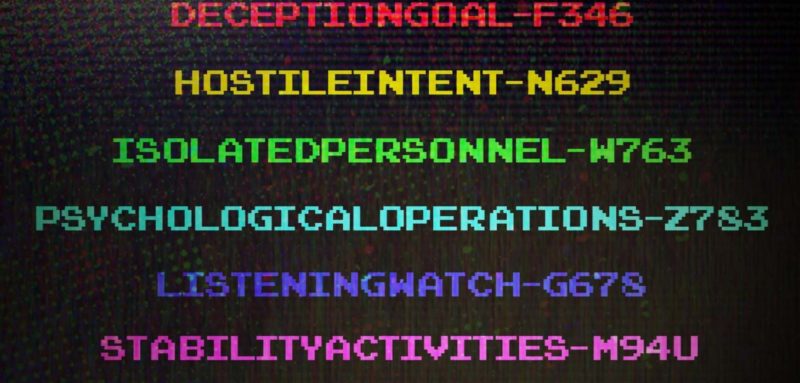
Fast-forwarding to Day 1 of the easter egg hunt, we get a brand new tape on ptp/tv called "Open-Drop-Save-Restore" that is not that long and ends quite fast. But, in the video, we could see different color-coded terminal codes once again. These codes were color-coded and meant for each content creator to put into their terminals.
The following are the codes that we see flashing in the new tape for each content creator (in order of appearance):
ShawnJ Gaming
JackFrags
Drift0r
NoahJ456
MarleyThirteen
MrDalekJD
We have a full chart showing what exactly the several outputs of all these terminal codes were:
There was a new set of instructions added to the dot-matrix as well that will help in solving all Day 1 easter egg. As you can see below:
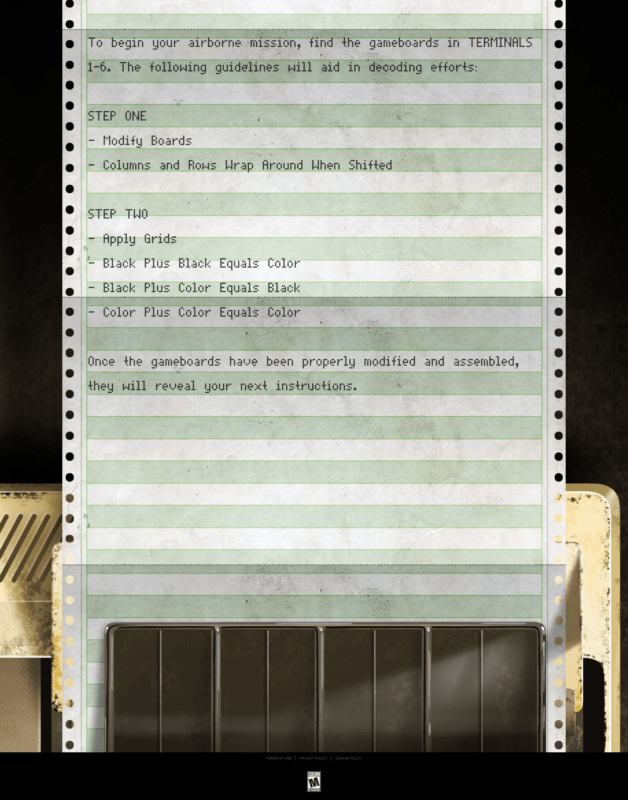
Boards
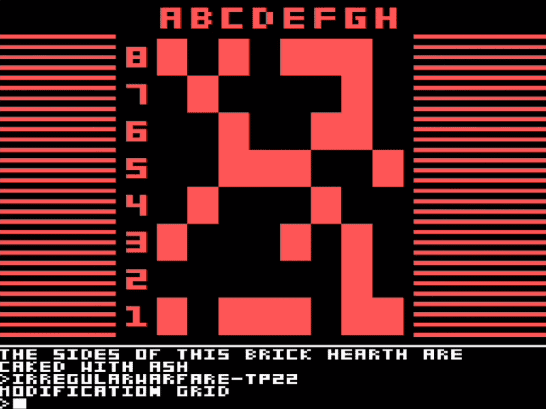
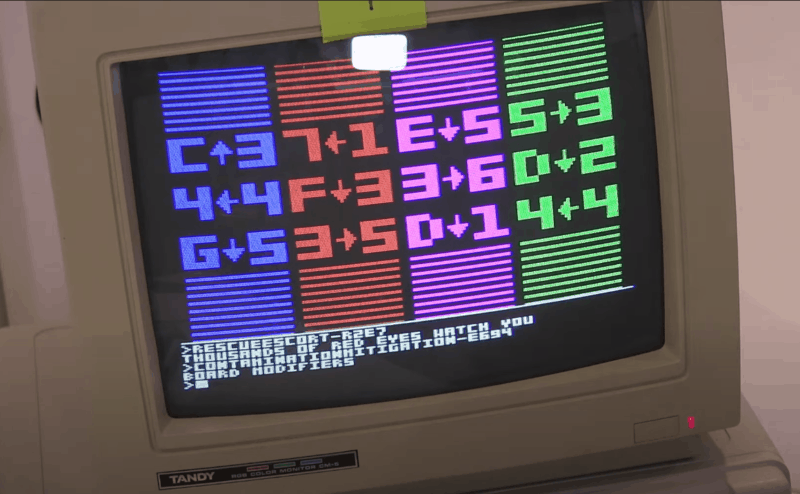
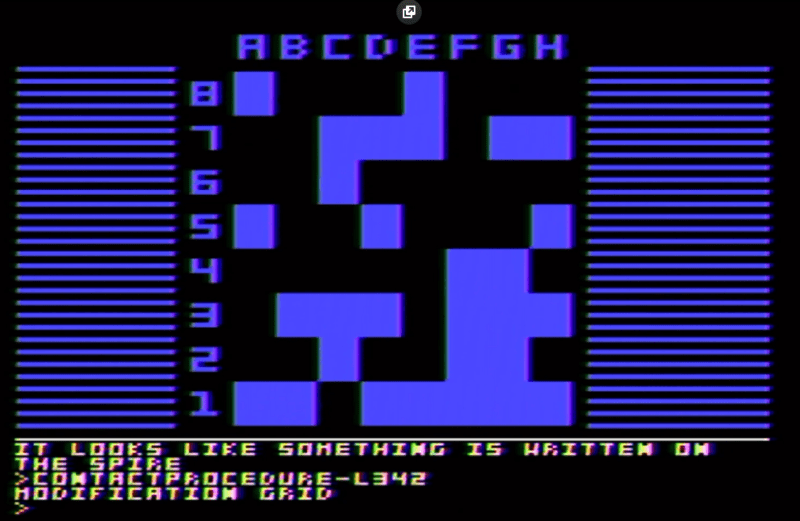
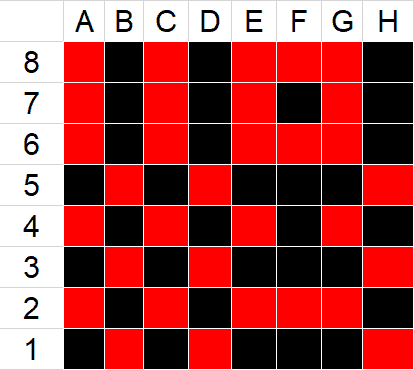
The first thing is to use the boards and modify them in a certain way to get to the next step. As you have already seen all of the content creators got some modifying boards, standard boards, and also board modifiers.
To solve the board puzzle, you will use NoahJ456's board modifier instructions. We will start by putting the standard board from MrDalekJD and then modify the board by moving each row/column depending on what the modifier states.
After that, we will overlay the modification grid on top of the shifted board. Now, here we need to compare the boards and see the colors. This is where the set of instructions come in. It states that
Black Plus Black Equals Color
Black Plus Color Equals Black
Color Plus Color Equals Color
This means, that after overlaying the modifying board on top of the shifted board if a square is Black on the shifted board and also Black on the modifying grid then that one square will turn into a solid color.
This solid color is the same color that we will be working on.
The following are all the grids: JackFrags
MrDalekJD

MarleyThirteen

NoahJ456
Drift0r
ShawnJ Gaming

Let's take a look at Jackfrags grid.
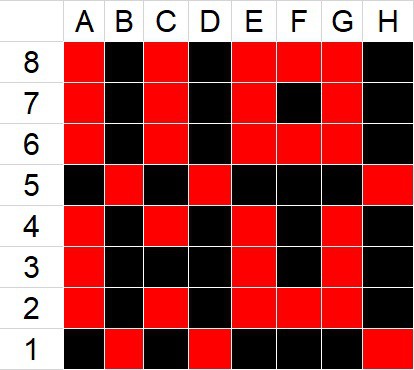
Here's the standard red grid from MrDalekJD's terminal output, represented on an Excel sheet for easier modifications.
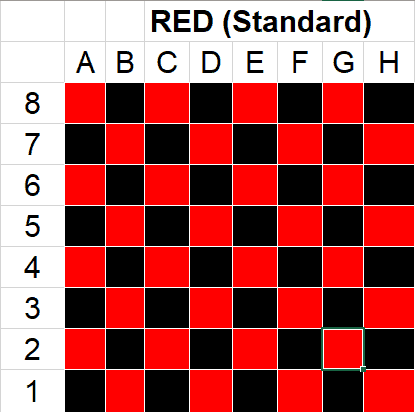
For shifting the grids, we need to refer to NoahJ456's board modifiers.

According to the modifier, we need to move row 7 to the left once, column F down thrice and row 3 to the right five times. Let's do it step by step.
Row 7 shifted to the left once gives:

Column F shifted down thrice:
Row 3 shifted to the right five times:
Once we have done all the shifting, we need to now overlay the modification grid of the same color (in this case red for Jackfrags) on top of the shifted grid. But, it will be difficult to see what we're working with so, for the purpose of explanation we have put them side by side and highlight the squares to show what the final colors will be.
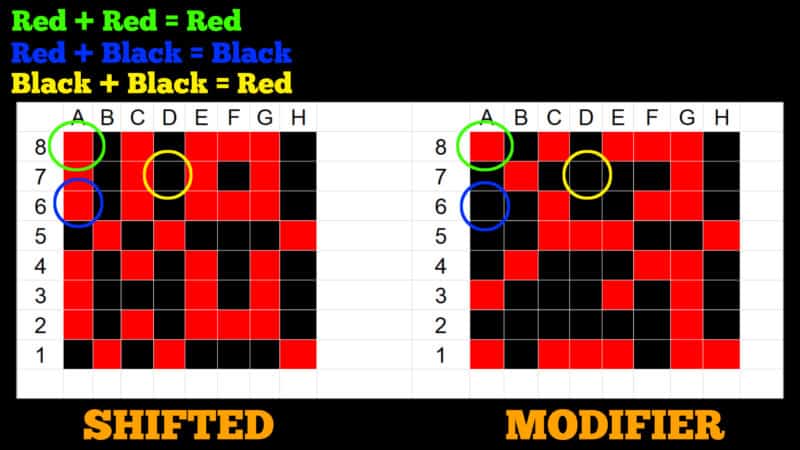
After overlaying the full grid, you should have a grid that looks like this:

As you can see, it makes up certain letters in the grid. You must complete the rest of the grids as well. After the completion of all the grids, you will notice letters on all the grids. You can re-arrange all the grids to make up a word "slashdustoff"
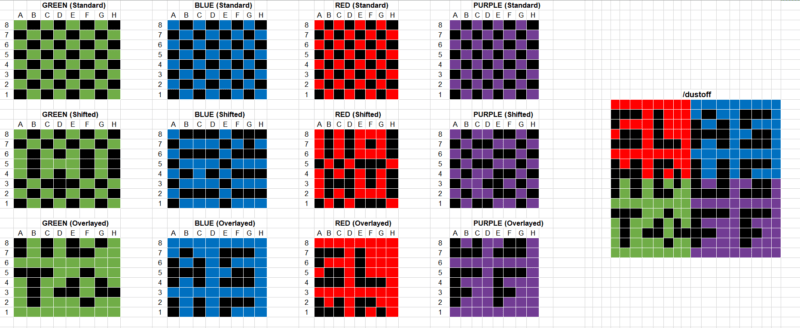
This is a new URL for pawn takes pawn and should be written as www.pawntakespawn.com/dustoff.
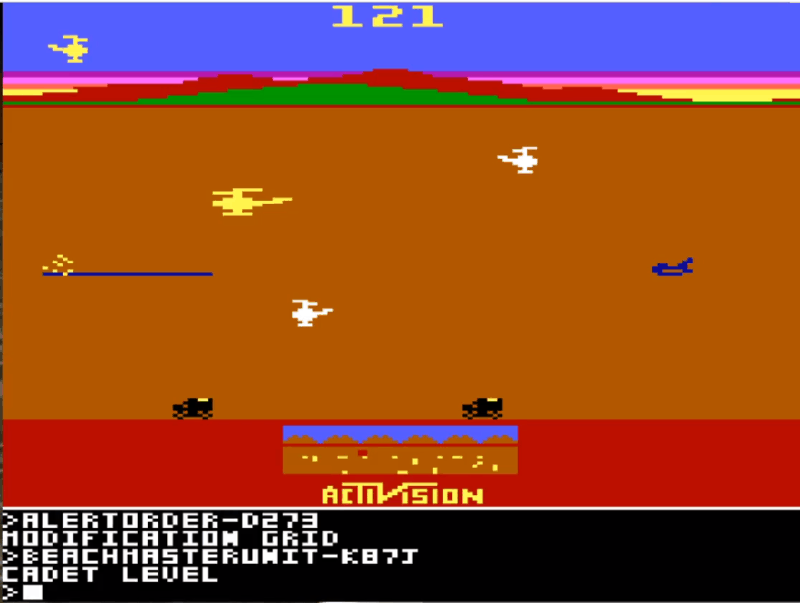
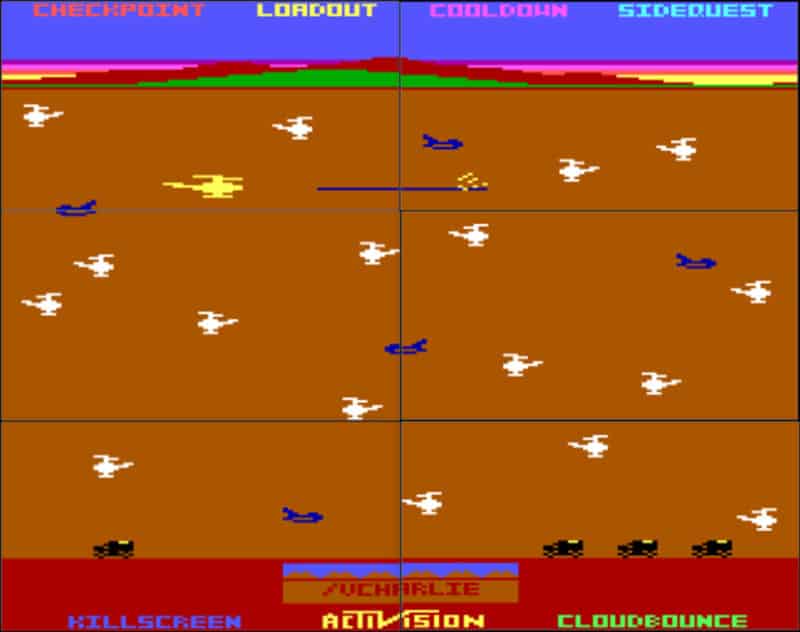
On this page, you will find a note with some instructions about the helicopter movement. This movement is referring to the chopper command game screen seen for each Youtuber after they all put in their terminal command.
Batdecoder
The next step of this puzzle is to look at the chopper command screen for each YouTuber and refer to the radar at the bottom of their screen. The following are the chopper command screens for all of them:
MarleyThirteen
JackFrags
Drift0r
ShawnJ Gaming
NoahJ456
MrDalekJD
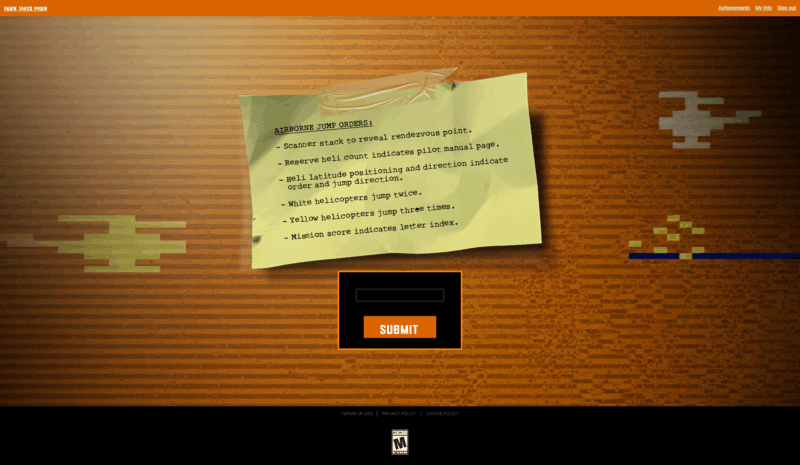
On the new URL /dustoff, according to the set of instructions, the scanner stack means the radar at the bottom of each screen needs to be overlayed to reveal the next part. After overlaying all the scanner's at the bottom we get:
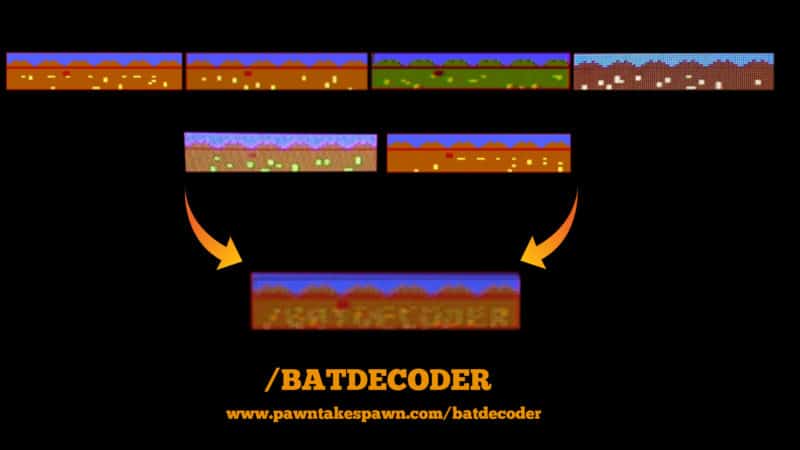
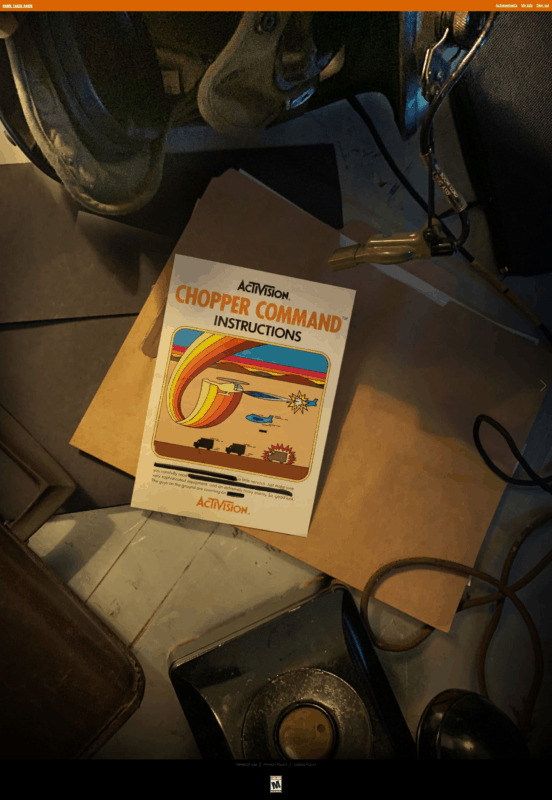
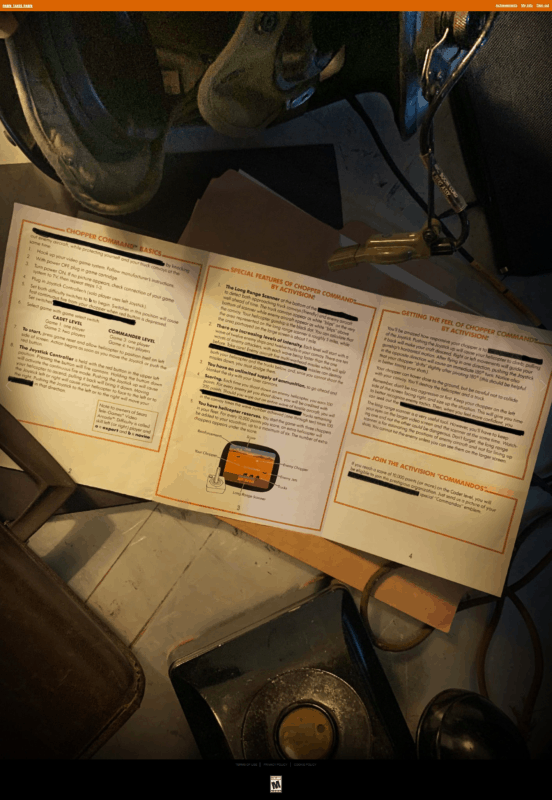
It is another URL www.pawntakespawn.com/batdecoder. When you go to this link, you will find a six-page instruction manual for the chopper command game. You will also notice that there are redacted words on every page of the manual.
There are precisely 18 words redacted. This number 18 is an important number because the number of choppers on all the chopper screens combined is also 18. On the /dustoff instruction note, it states that "Reserve heli count indicates pilot manual page." This is referring to the number of lives on each chopper screen at the top left corner.
The number of choppers seen at the top left corner of the screen refers to the page number in the manual. It also states that "Heli latitude positioning and direction indicate order and jump direction." This is needed when we decode in this part shortly after.
For now, just understand that the score on each screen refers to the letter positioning in a single word. We will come to these letters in a bit. Another thing to note is that the white helicopters jump twice and the yellow helicopters jump thrice.

Let's begin. You need to head back to the /batdecoder site and see the first page of the manual which is the cover page. You will find three redacted words.
Now, we've already established that the number of reserve helis refers to the page number in the instruction manual. That means we need to now look at the chopper command game screen with one heli reserve at the top left corner. And, MarleyThirteen has the screen with one reserve heli.
We will use these chopper screens to find three letters each on all six pages. This is why the number 18 was important as they all are related. So, page 1 of the manual and chopper screen with one reserve heli are put side by side.
First, look at the highest chopper on the screen and that is the white one facing right. This is referring to our first letter on the first page of our manual.
Remember the white helicopter jumps twice. In our case, the white helicopter is facing right, so it will jump twice to the right. But where will it jump? Heading back to the manual page 1, look at the first redacted word and jump two words to the right. You will land on "little."
The score at the to of the chopper screen is 121. Each number in '121' is referring to the position of the letter of a word we land on according to the chopper position. In the first word "little" it will be the first letter as the first number is 1. So our first letter is "L."
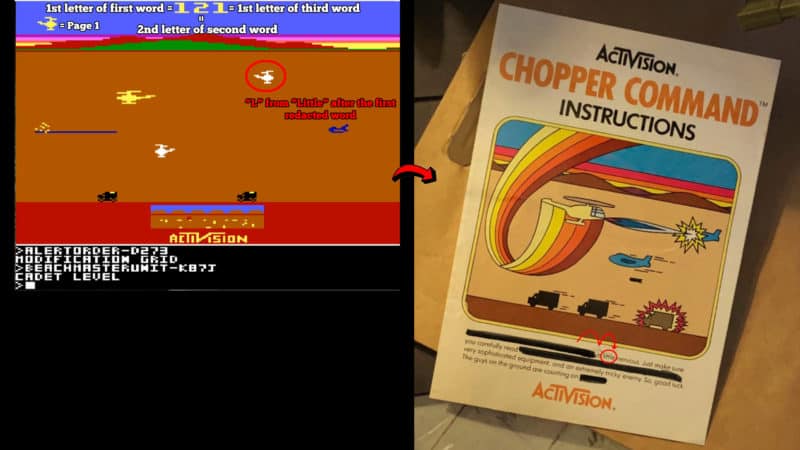
Moving forward, we look at the second-highest helicopter and that is the yellow one facing left. This means on the same page 1 of the manual, we jump thrice to the left from the second redacted word that gives us the word "you" and the second number in the score is 2, meaning our second letter is "O."
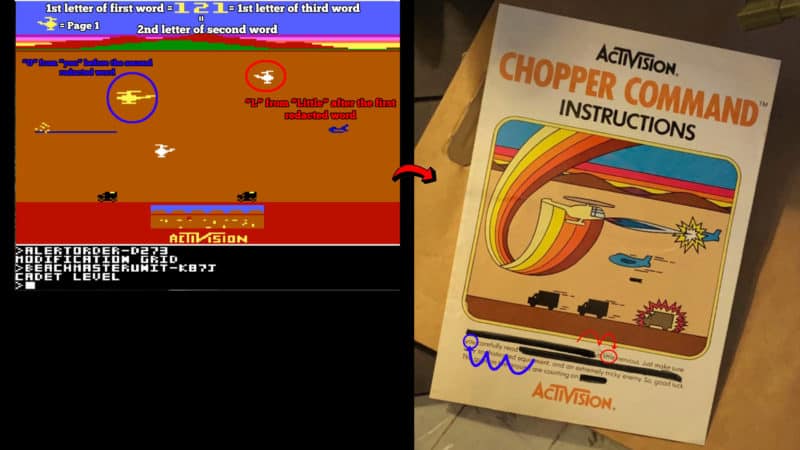
Similarly, the last one is a white chopper facing left, therefore, jumping twice left from the third redacted word, we land on the word "counting." The last number in the score is 1 which means the first letter of the word "counting" is "C."
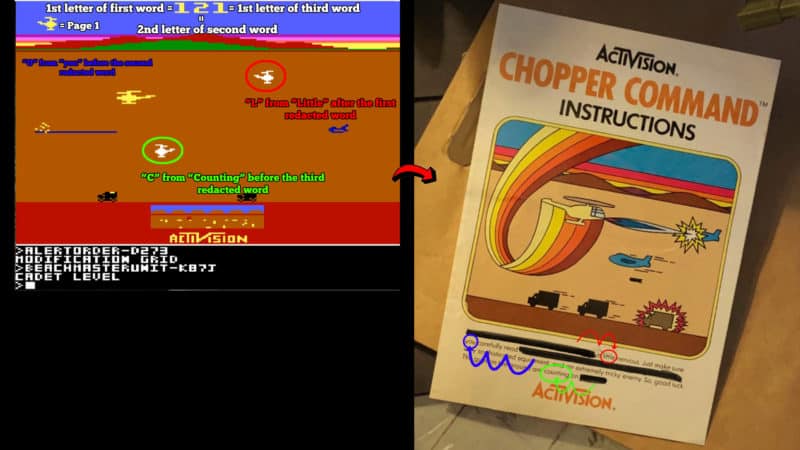
This gives us our first three letters from the first page that are LOC. You get three letters per page and there are a total of pages meaning a total of 18 words. 18 choppers are there and there are 18 redacted words that make perfect sense.

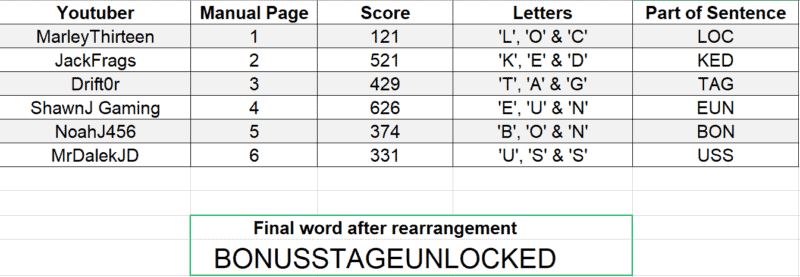
After completing all the pages and referring to the rest of the chopper screens, you will end up with LOC, KED, TAG, EUN, BON, and USS. And, if you re-arrange the words, you will get BONUSSTAGEUNLOCKED.
Zork - Fire & Air
You will need to head back to pawntakespawn.com/dustoff and you can now type in the password which is BONUSSTAGEUNLOCKED. You will then be redirected to another URL, www.pawntakespawn.com/fireandair. You will be asked to enter two keys. The keys were to be added on the second day (24th Septemeber 2020) of the easter egg but if you're reading this now, you should be able to enter and progress.
Video Guide
To get the two keys, you must head back into Zork and do a couple of tasks to earn some new achievements along with the two new words that are going to be used as the keys. We also have a written guide for this part below, assuming you are starting from the living room in Zork:
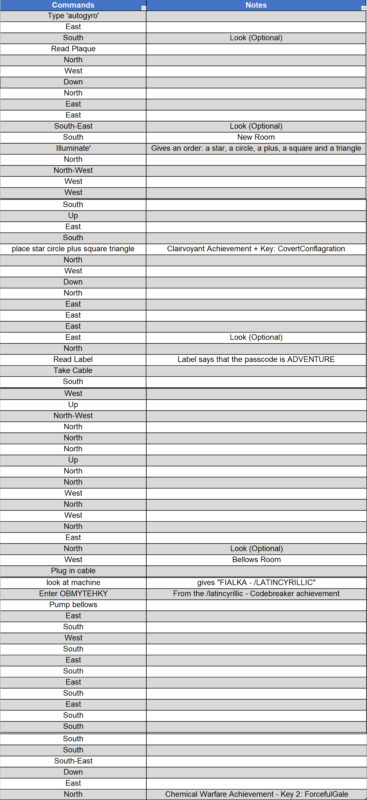
The two keys that you get from completing the above Zork step are CovertConflagration and ForcefulGale.
Day 2 - 24 September 2020
Once you enter the two keys at /fireandair you will be redirected to www.pawntakespawn.com/vanguard. Once again, you will be presented with more terminal codes, one for each of the Youtubers.
These terminal codes are again color-coded which helps us determine which one belongs to which Youtuber.
VCHARLIE
Upon putting in the new terminal codes in their respective terminals, the Youtubers got a part of a bigger image of the same chopper command game. Each image had both white and yellow choppers as well. They chopper command screens also had some words.
The following are the images corresponding to each Youtuber:
JackFrags
MrDalekJD
MarleyThirteen
NoahJ456
Drift0r
ShawnJ Gaming
When we re-arrange all these chopper command images we get the following image:
You will notice that at the bottom of the assembled screen there is another URL /vcharlie. You need to head over to www.pawntakespawn.com/vcharlie. Once you're on the page, you will see another long note with exactly 18 redacted words just like the previous chopper puzzle.
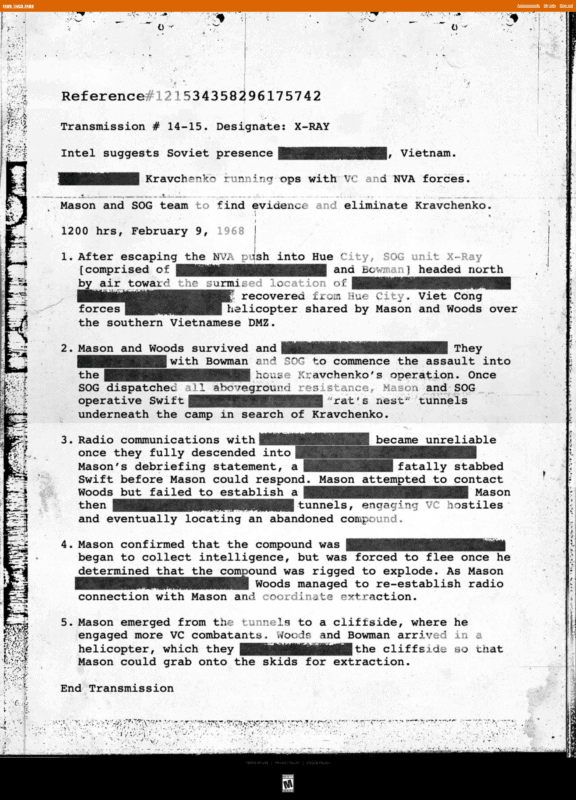
You will also observe that there are exactly 18 choppers on the assembled chopper screen. You need to start from the top-most chopper and move to the bottom-most chopper (including both white and yellow choppers) to find the words from the paper on /vcharlie.
You might be wondering, how do we know which letter to select as there is no score this time? Well, if you look at the top of the paper on /vcharlie, you will see a Reference#121534358296175742. These indicate the letter index of the word. Another confirmation is the fact that these are exactly 18 numbers in total that means one number corresponding to one letter each.
For instance, the first heli is the white one in the top left corner facing left. We will go to the paper on /vcharlie and see the first redacted word. Jump two words to the left of the redacted word and you get the word "Soviet." Refer to the reference number and The first number is 1, which means that the first letter of the word "Soviet" is our first letter. And, that would be "S."
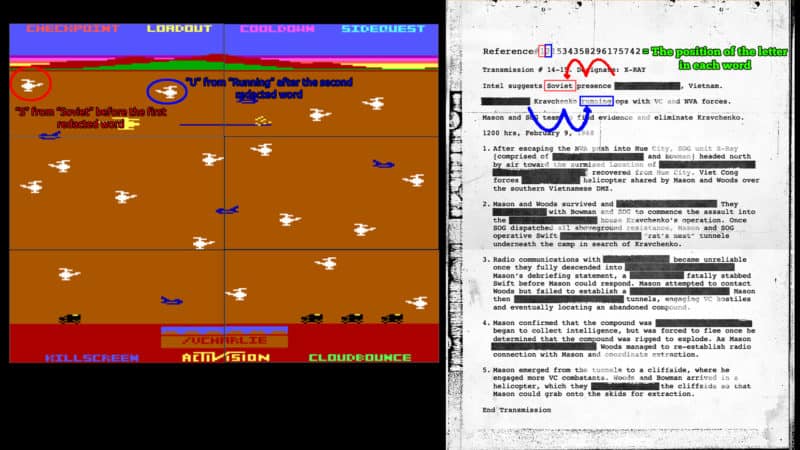
Similarly, do the same with the rest of the letters descending down and you should have:
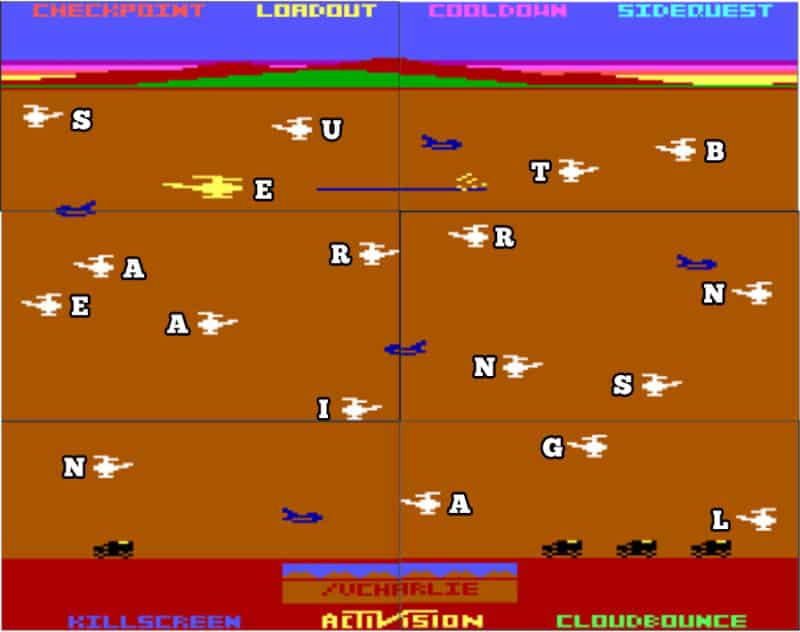
Reading from top to bottom, you will end up with a new word "SubterraneanSignal." This is, yet again, another URL for pawn takes pawn.
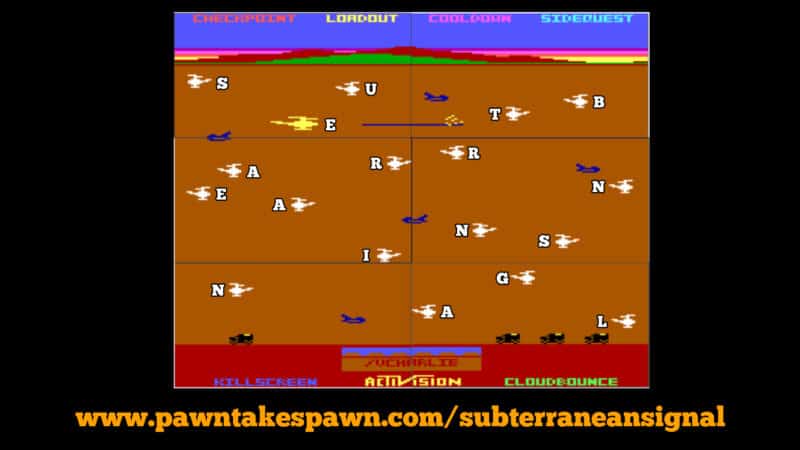
You can now go to www.pawntakespawn.com/subterraneansignal.

It will ask you for six passcodes. These are the same words that you see on the assembled chopper image.
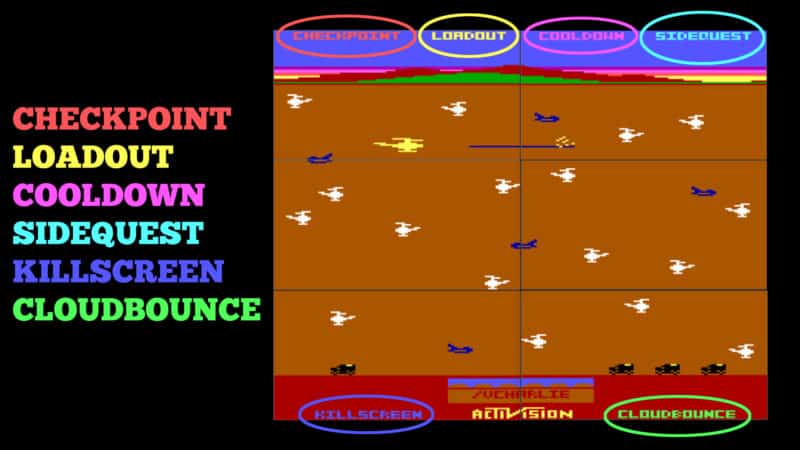
After putting them in you will land on another new URL, pawntakespawn.com/extractioncomplete. This is a very interesting page and shows the first set of hints and clues about zombies. Once you land on this page, you will first get an achievement called "Knight's Tour" along with a new reward that you can redeem in Warzone.
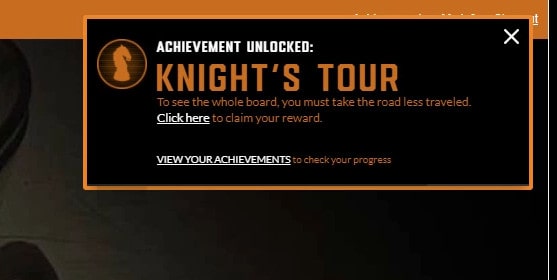
You can click on the link that will take you to a link that will give you a redeem code for a brand new Tac Rover skin.
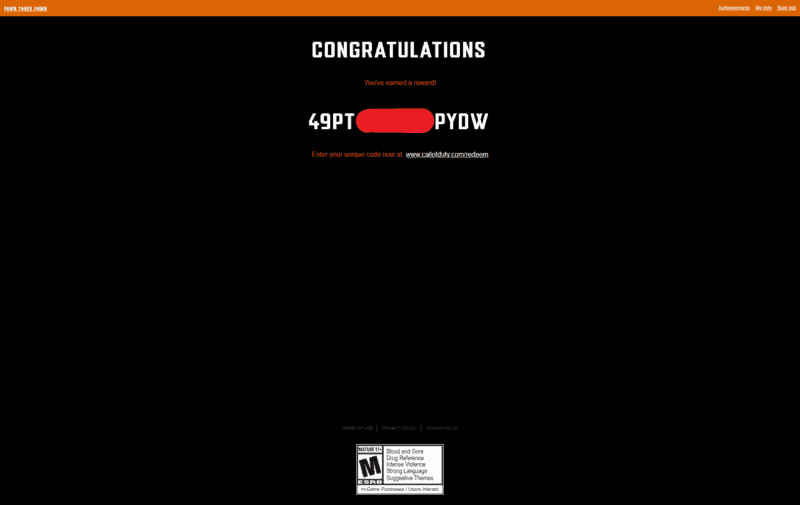
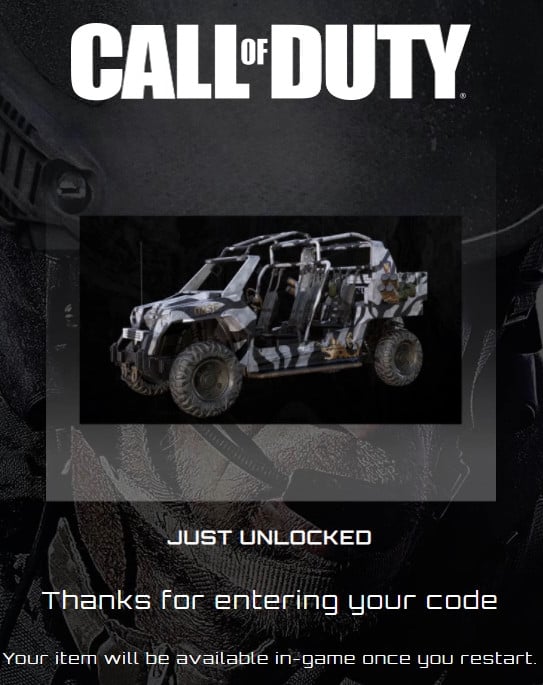
Coming back to the page, you will notice some interactive elements on the page. The first is a note by someone named Tatyana. This note is behind a green sticky note. She writes to someone named "M" regarding some developing situations that concern her. There are many theories as to who this "M" could be and a strong theory suggests that it could be "Mlad" a.k.a Perseus.
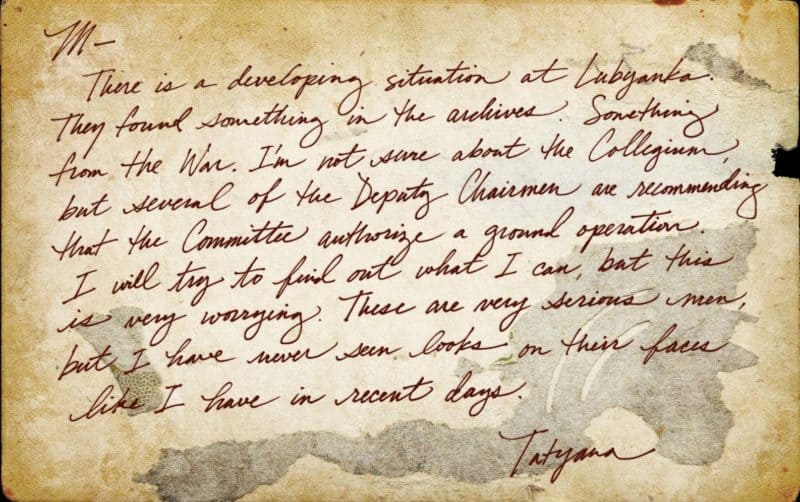
Another interesting element here is the map behind. You can also click on the map and it shows a full map where a certain region is circled.
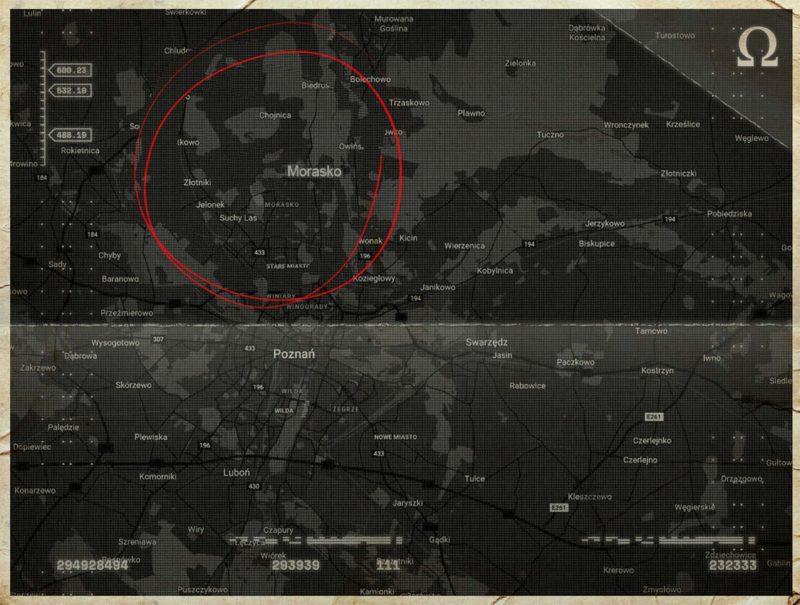
A quick Google search of the map shows that it is a location in Poland. To be specific, it is the Morasko Meteorite Nature Reserve which was established back in 1976. There are several meteor craters found at the site.
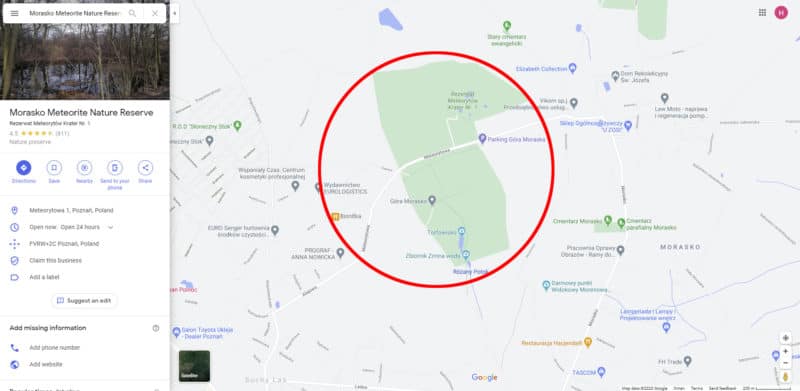
This could be a potential new Zombies storyline which makes this very compelling. Perhaps a meteor crashed in this area and caused some experiments to go wrong which lead to the rise of the zombies? It is also confirmed that this year Campaign and Zombies are interlinked so, it would be quite interesting to see how this all pans out.
One last interesting thing here is the Audio Tape Player a the very bottom of the page. You can play the audio by clicking on the player. We've provided the audio below for you to give it a listen:
[/audio]
That is all for Day 2 of the Zombies Reveal Easter egg hunt. There were no Zork steps and achievements to complete on Day 2.
Day 3 - 25 September 2020
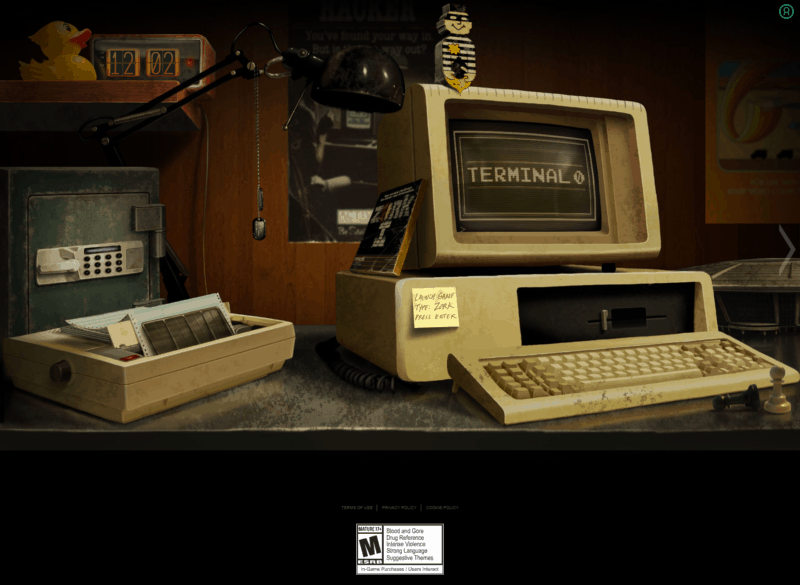
On Day 3, the creators and the community once again returned to pawntakespawn.com/codecave at 12 PM EST as per the schedule. This time, the computer screen seemed a bit odd as it had some notches on top of it.
Before coming to the notches, you will also notice that the safe on the left side is now accessible. You can click on it and put an access code. We will get to it shortly.
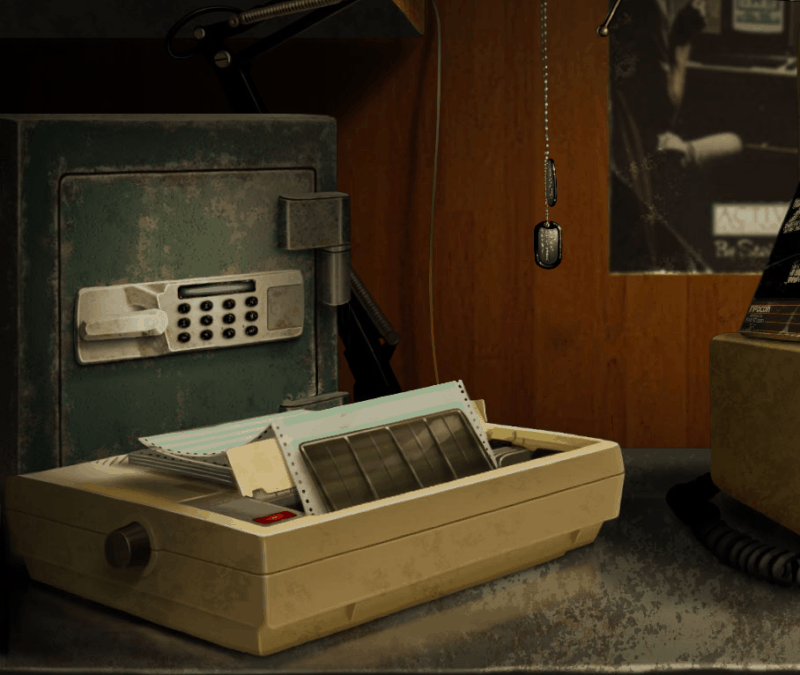
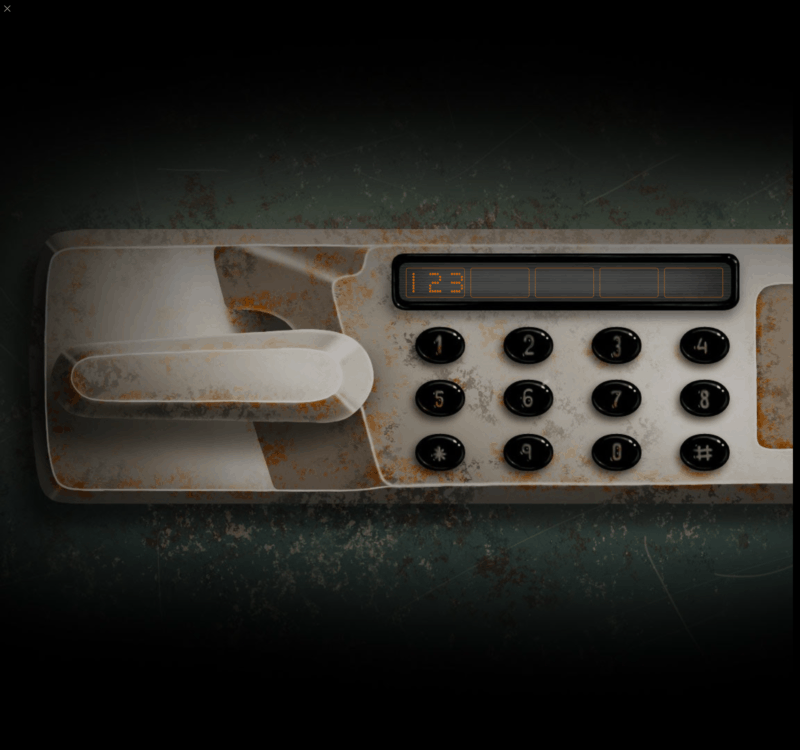
There was a new set of instructions added to the dot-matrix as well.

Moving Bombardier
These were exactly 26 notches and that indicated that these notches represented the alphabet since, there are a total of 26 letters in the English alphabet. We've also seen a bombardier statue on the monitor. This bombardier moves after every 5 minutes.
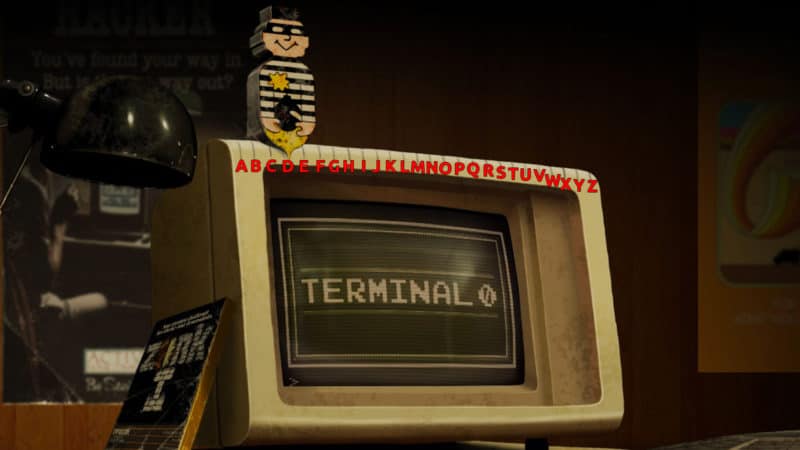
You need to keep track of the clock at the top left corner of the screen. As soon as the clock passes 5 minutes, the bombardier moves and goes to several specific notches. This bombardier movement was recorded and the alphabets were labeled to get the word.
[/video]
For instance, as you can see in the image below the time is 12:09 as soon as the time is 12:10, the bombardier moves and completes the full cycle. After that, the next cycle will be at 12:15 and so on.
After one full cycle, we get the word 'LOCKEDANDLOADED' and this is a new URL for Pawn Takes Pawn. Next up, you will go to pawntakespawn.com/lockedandloaded and you will land on a page with a bunch of new terminal codes that the content creators needed to put into their terminals.

All the content creators got three terminal codes each revealing several different images on their terminals that are going to be used to solve Day 3 easter egg puzzle.
Elementary Particles - Opening Safe
Among the images that the creators got after putting in their terminal codes were the pictures of the elementary particles. These particles are used to get the combination for the safe that we can open on pawn takes pawn site.
Each set represents three numbers that match up with the combination pattern on the safe. On each particle image, there is a blue marker on top of the screen as well. This marker represents the order of the numbers from 1 to 6 that goes into the safe.
The following are the particles (in order from 1 to 6) and the caption they come with:
NoahJ456
MarleyThirteen
Drift0r
MrDalekJD
JackFrags
ShawnJ Gaming
These symbols are basically quarks and leptons from the standard model of elementary particles. We can tell that due to ShawnJ's image as the numbers are arranged in exactly the same way the standard model is arranged.
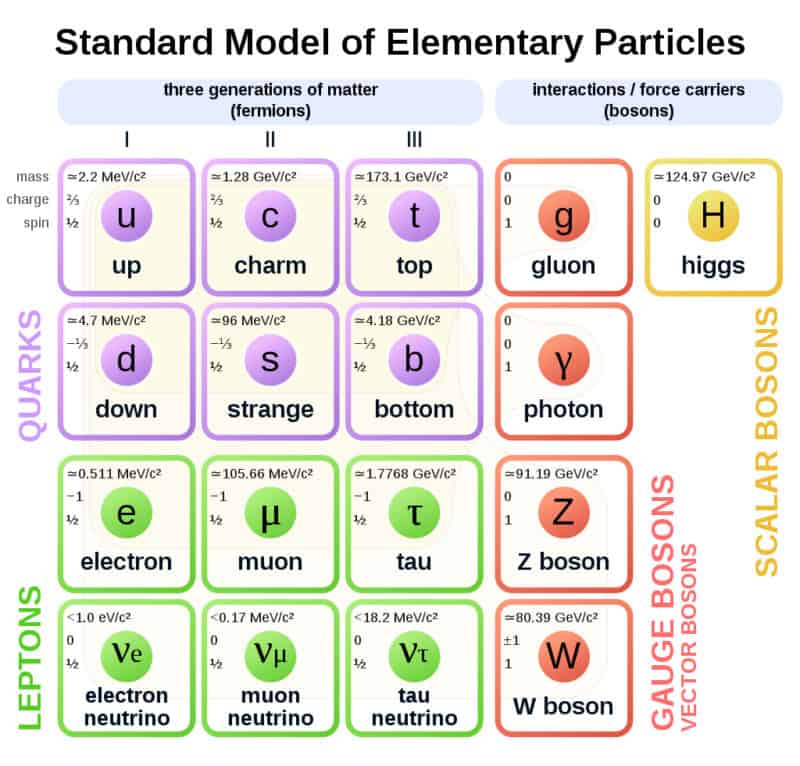
We can overlay ShawnJ's image on top of the standard model and identify what symbol represents what number.
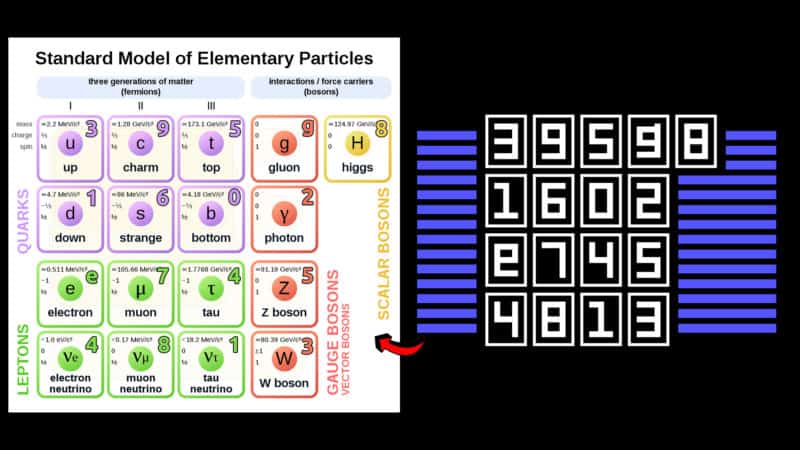
Based on the blue markers on top of each particle image, we can re-arrange the images in order from 1 to 5 (6th is ShawnJ's number model which is not needed for the safe combination sequence anymore) and get the combination. The safe combination is 431 371 688 520 954.
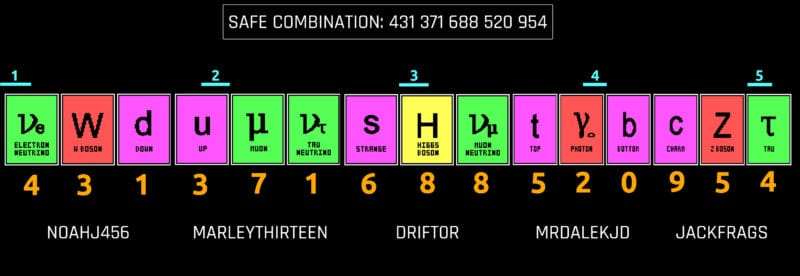
You can put in this code and the safe will open up. It has two more papers that are used to solve the Reticle Cipher. More on it below.
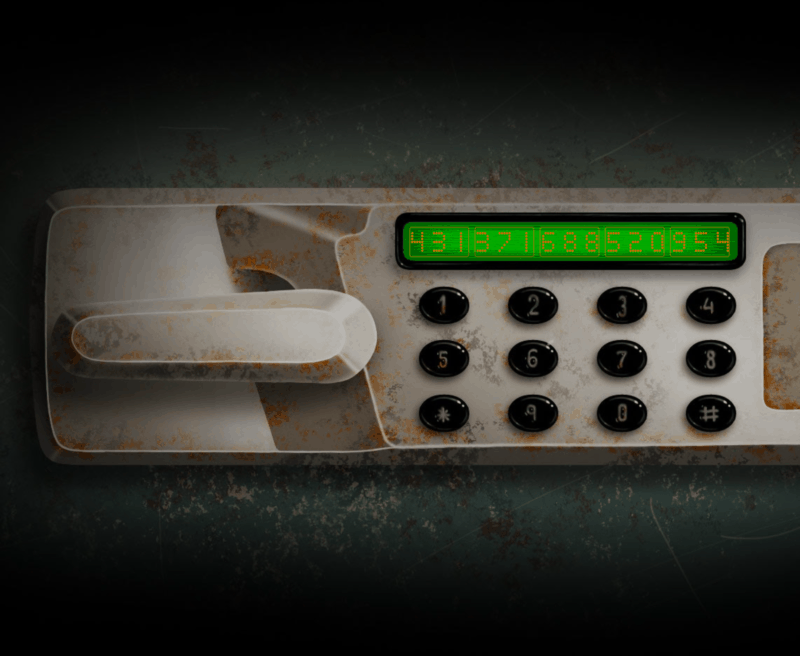
The following two are one of the most important parts of this easter egg as the whole solution revolves around these two papers.
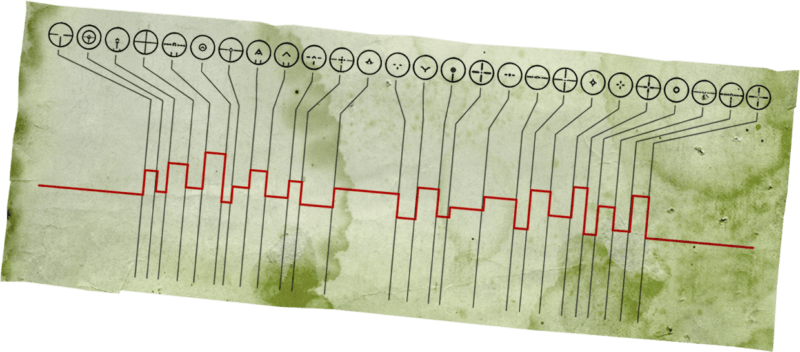
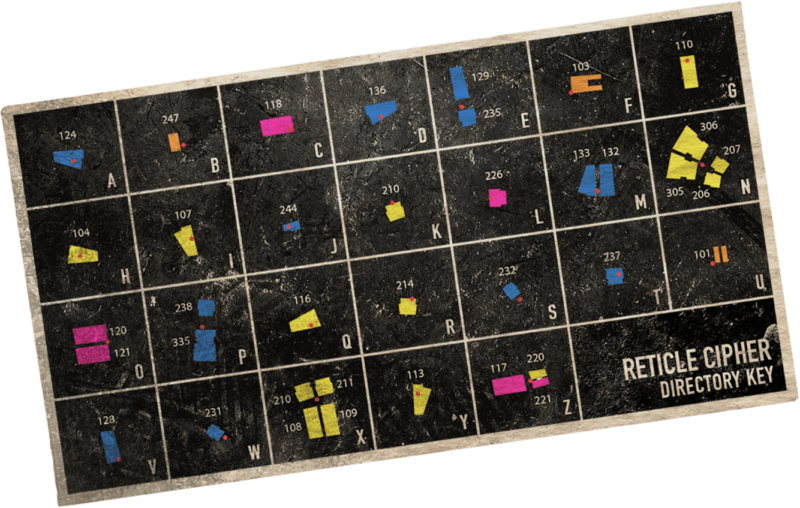
Reticle Cipher
At the start of Season 5, there were some reticle markings added all around the Stadium. Many people believed that these reticles were part of a bigger easter egg. And sure enough, they were. Today, these reticles come into play when Season 5 is just a few days away from a wrap-up.
As mentioned before, the content creators typed those new terminal commands and in return got many new images. Among these images were the new bomb screens. These were similar to the chopper screens but only in aesthetics. The following are the bomb screens that the creators got:
JackFrags
NoahJ456
Drift0r
MarleyThirteen
MrDalekJD
ShawnJ Gaming
These bomb screens included a bombardier on top off the screen and had a skyline view on all the screens that resemble the shape on the first page (from the safe) with the reticles laid out at the top.
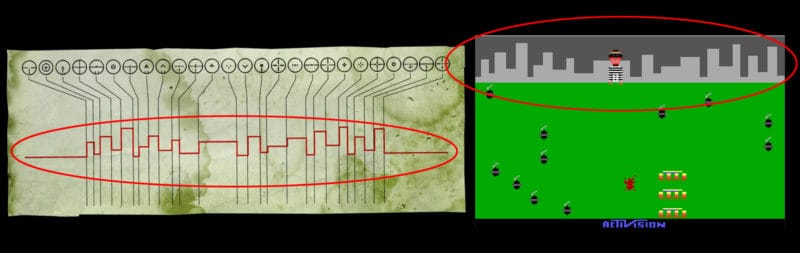
Based on the instructions from the dot matrix and the caption of each of these bomb images, we came to know that the reticles from the Stadium must be used here. The number of reticles is exactly 26 which means that each of these reticles represents a letter from an alphabet. There are a total of 26 letters in the alphabet.
We have also been given a Reticle Cipher key directory that helps us understand which reticle refers to which letter. Thanks to GeekyPastime and his Discord community, they already outlined all the reticles and their locations in the stadium some time ago as shown below:
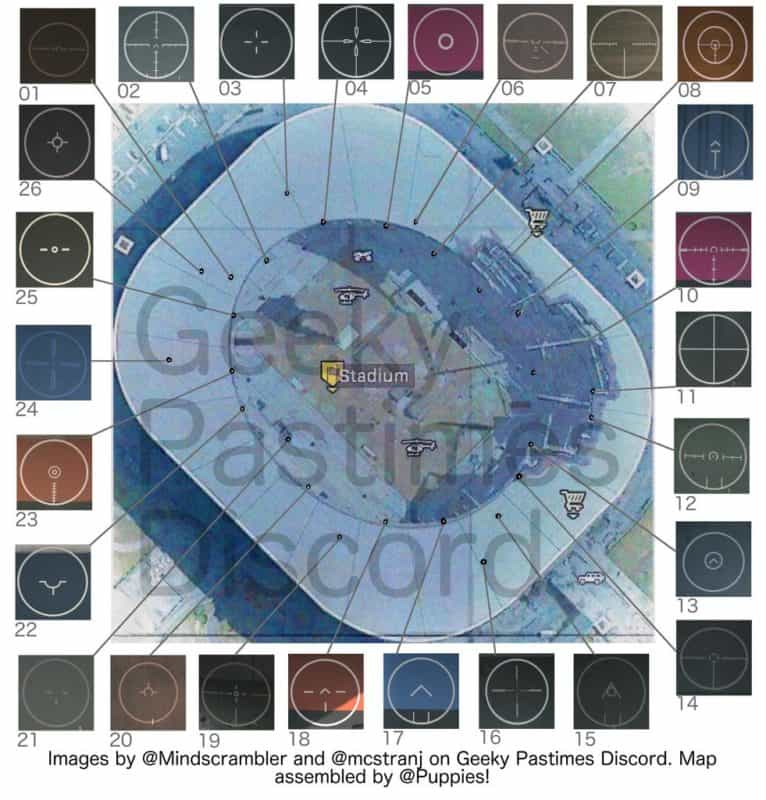
One of the Discord members named 'Mindscrambler' managed to find a bleacher overview of the Stadium in Warzone. We can overlay the bleacher picture on top of the stadium bird's eye view and know the exact location of the reticles. Then, we can match the location with the reticle cipher key directory to identify what letter is represented by each reticle.
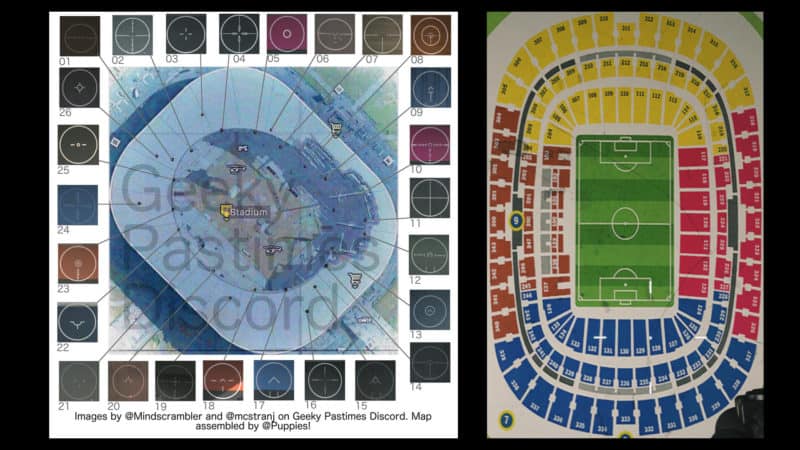
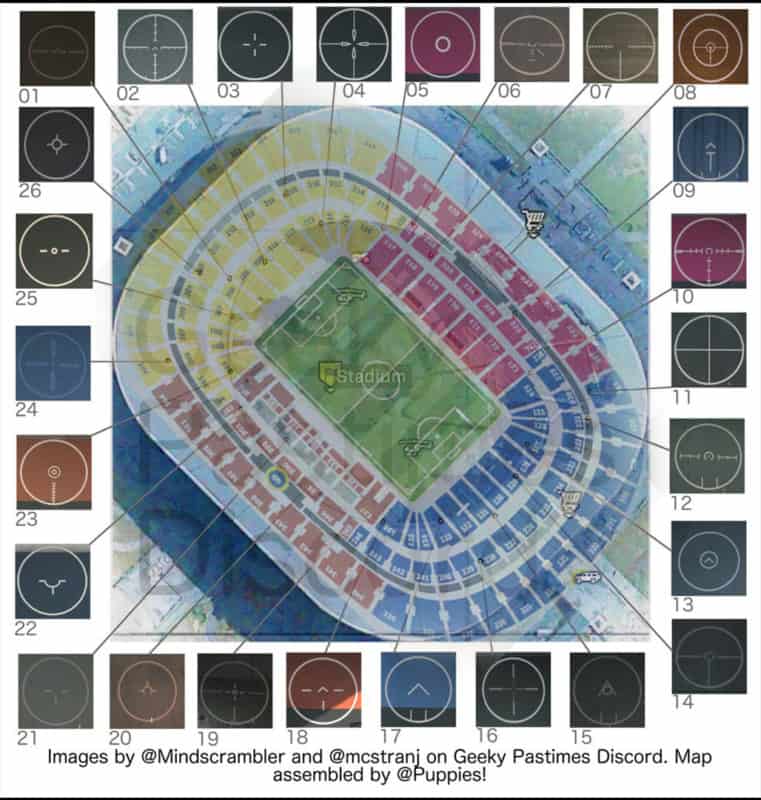
Now, as you can see the bleacher overlayed has the same sections and bleacher labels like the one seen in the reticle cipher key directory. All we need to do now is to put the directory and this overlayed image side by side and get the letters for each reticle. Some might not be exactly on the bleacher label but the line should be close.
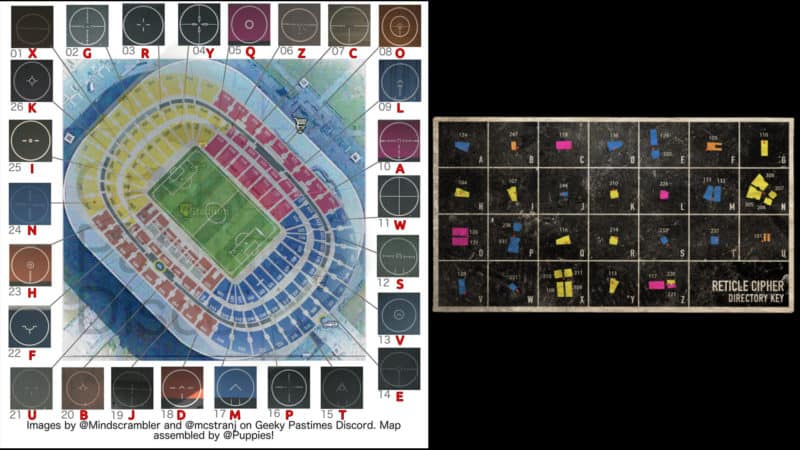
Once we know what reticle represents what letter. We can label the reticles on the page obtained from the safe which gives us the following:
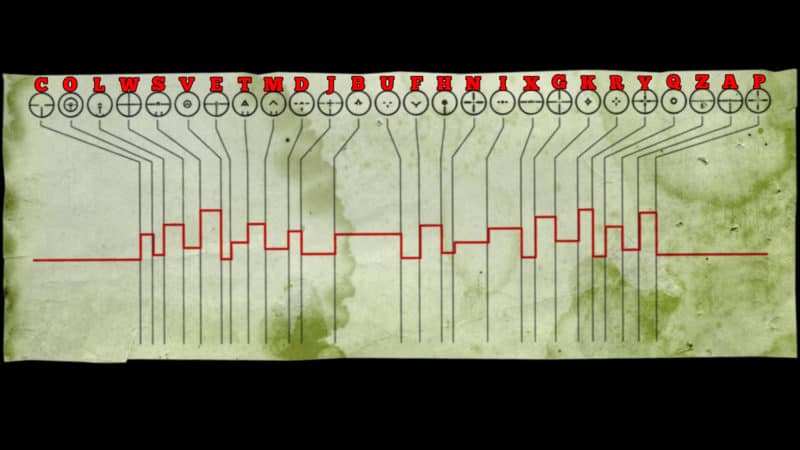
Now we can overlay this skyline labeled reticle page on the bomb screens of all the content creators and get the words. Each bomb screen gives us one long word and all of them are URLs for pawn takes pawn.
We need to overlay the page on the bomb screen matching the skylines and then extend the black lines coming down from the reticles.
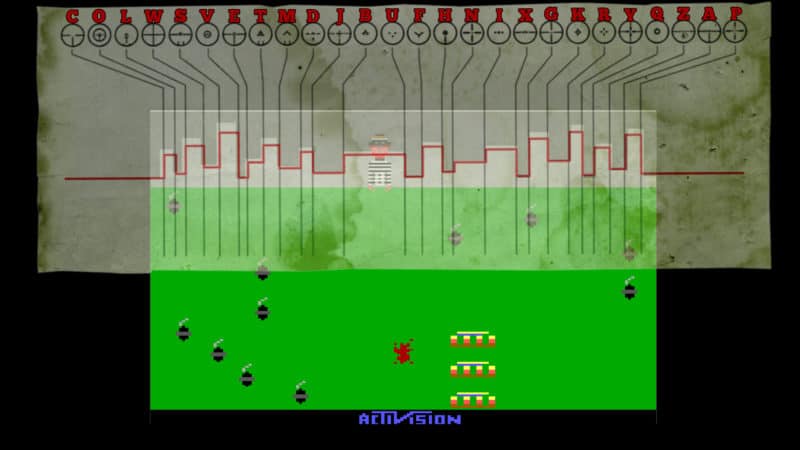
We will see the bombs on the screen and select them from bottom to top. While going from bottom to top, we will check the letters each bomb corresponds to in order to make up a full word. Let's solve MrDalekJD's for the purpose of demonstration.
First, the lines are extended for easy identification and then the bombs are numbered from the bottom-most bomb to the top-most bomb as we must select the letters corresponding to the lowest bomb and going all the way up to the letter corresponding to the top-most bomb.

Identifying all the letters corresponding to each one of the bombs, we get the word 'DELTATANGO.' You might get some extra letters in between but it is very easy to know the full word and those extras can be eliminated.

This is a new URL that is pawntakespawn.com/deltatango and it takes you to a site that has a picture of a bomb with time on it. The time on it shows the hour, minutes, and seconds clock hands. It also has a word in the middle that reads 'PTP' and this is an abbreviation for 'pawn takes pawn.' It also has a single dot underneath 'PTP.' This will help us get to the final URL but more on it later.
The following are all the URLs for each creator:
DrDalekJD
ShawnJ Gaming
Drift0r
MarleyThirteen
NoahJ456
JackFrags
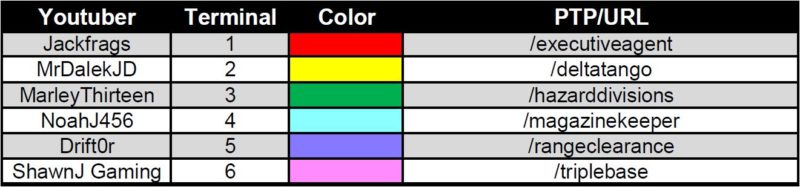
As stated earlier, each of these sites has a word and a dot underneath that word. The minimum number of dots is one and the maximum are six (one on each content creator's URL). The number of dots is an order in which we have to put these words and putting them together gives us another URL.
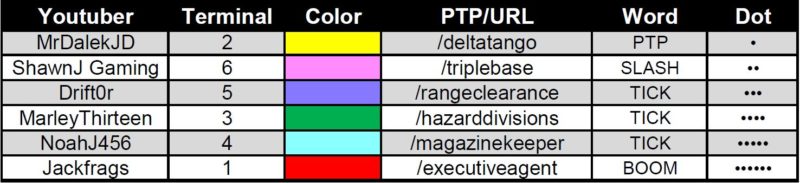
The new URL is pawntakespawn.com/tickticktickboom.
Strange Symbols Puzzle
When you open the aforementioned page, you will see some strange symbols. These are the exact same symbols that are found all around the Stadium in Warzone which GeekyPastime and his Discord community were already investigating.
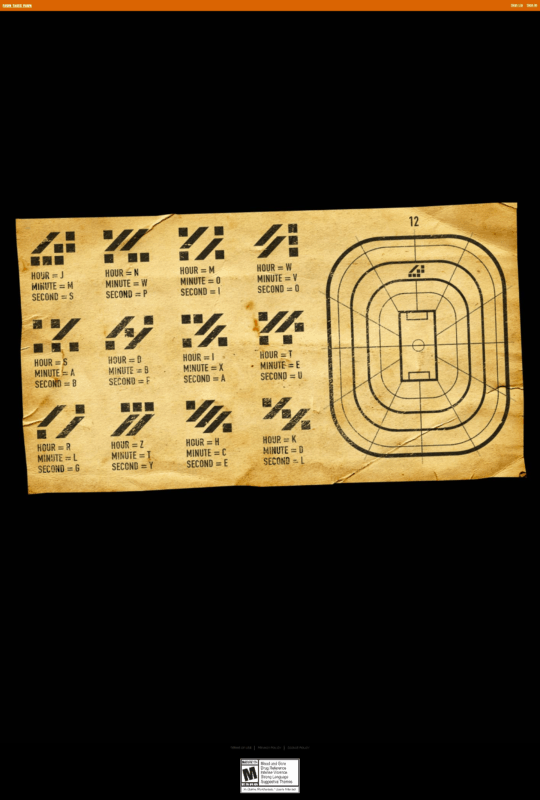
These symbols run across the whole stadium in a clockwise pattern. So if we go into the Stadium in-game and go across the Stadium we will come across these strange symbols and after completing the full circle and circling back, you will notice that we have exactly 12 symbols.
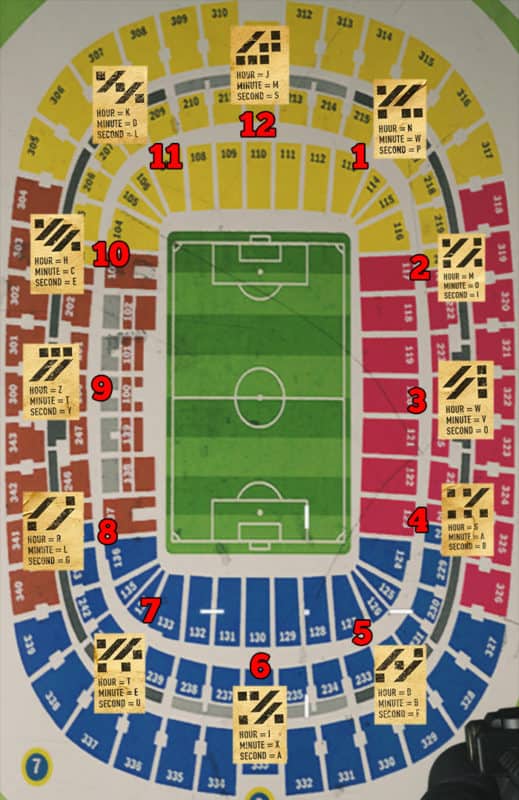
Now we go back to the URLs with the bombs and time are shown. Let's solve the time shown on the first link /deltatanngo with the word PTP. On the clock, the hour hand is on 7, the minute hand is on 1 and the second's hand is on 2.
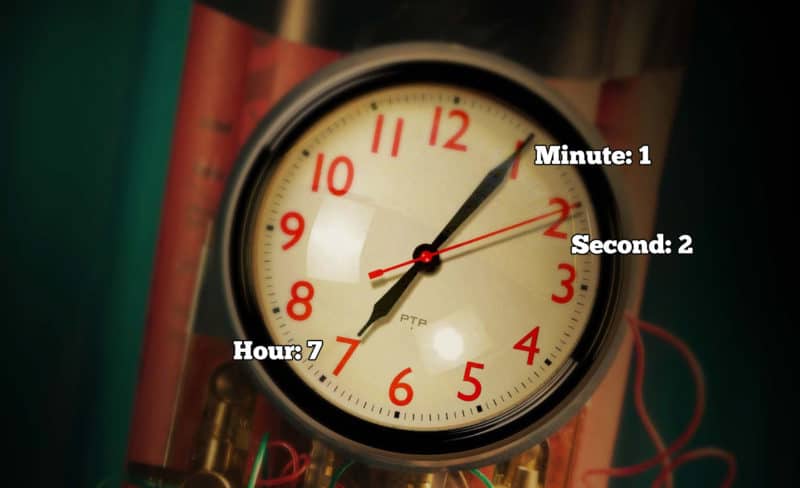
The order of the full word is again determined by the order of the dots on the URL. And, for the time order we get hours, minutes, and seconds. This means, whatever letter we get, we must write the hour letter first, then the minutes, and then the letter corresponding to the seconds.
Since our hour is 7, we go to the Stadium image and locate 7 and check the symbol. On this symbol, we have been given an hour, minutes, and seconds. We must choose the hour since 7 is represented by an hour hand. The hour letter for the symbol representing 7 is "T."
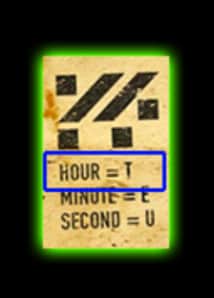
Similarly, we do the rest of the clock hands and get the letters "W" and "I" for the minute and second hand, respectively. This gives us our first set of letters "TWI"
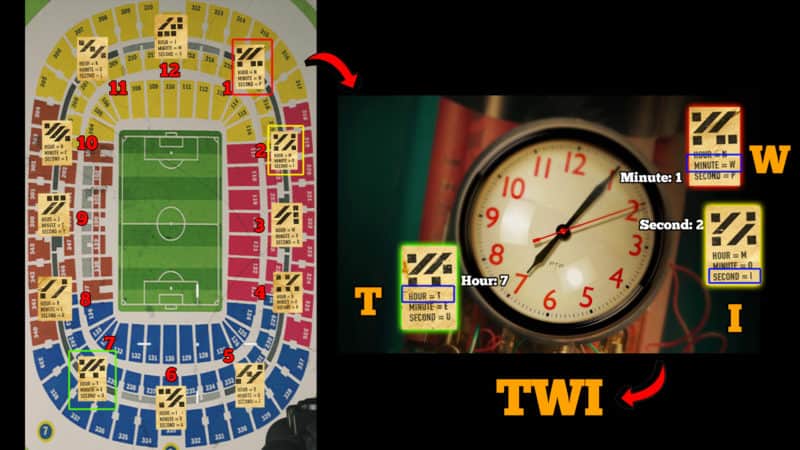
After doing all the bombs in order of the increasing dots we get a new URL, pawntakespawn.com/twistedanomalies. You will then be asked to put in two keys similar to the one you did on Day 1. These two keys are again found in Zork.
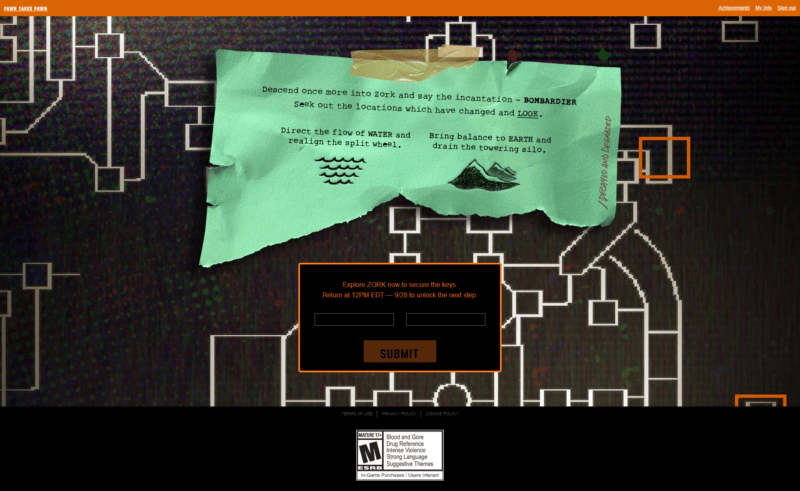
Zork - Water and Earth
Once you're done with the Zork game. You will need to head back to pawntakespawn.com/twistedanomalies and put in the two keys that are ChangingTides and StonySilence. You can put these keys as of reading this guide, but at the time of the easter egg, the keys were supposed to be put in on Monday (28th September 2020).
Our video guide below shows you how to get these two keys and earn some new achievements along with it.
Video Guide
We also have a full list of commands you need to type into Zork, assuming you are starting from the Living Room. Note that if you're already in the bat cave from the previous' page Zork guide (phase 2), then you do not need to go back to the living room. Just start the commands from the bat cave. The bat cave will be marked in the text guide below so you know exactly where to begin.
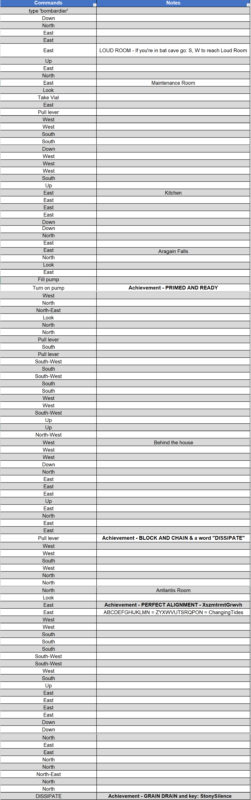
It is a high-resolution image, so you should be able to see all the commands by zooming in without any issues. Click on the image to open it in a new tab for sharper results.
After typing in the keys, you will be redirected to another URL, pawntakespawn/shapedcharge. You will see some more color-coded terminal codes for each of the content creators. This is where our Day 4 begins.
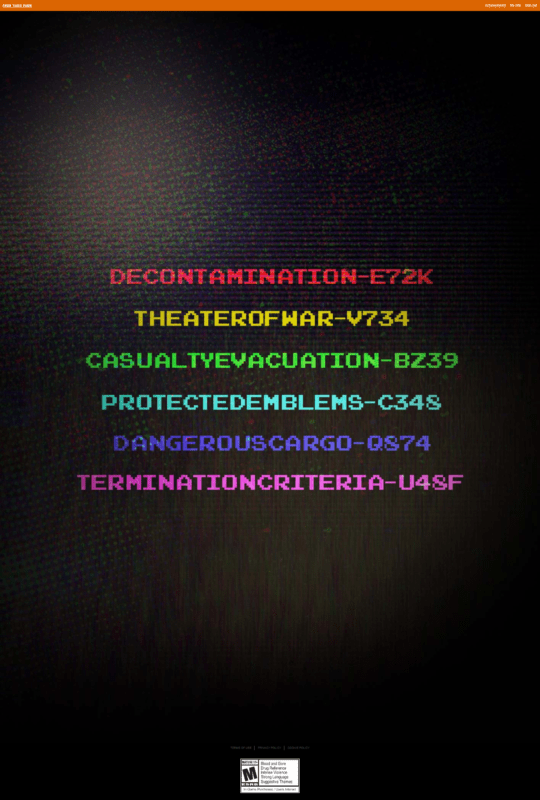
Day 4 - 28 September 2020
On the 4th day, after putting in the /shapedcharge terminal codes, the creators got the following images:
JackFrags
MrDalekJD
MarleyThirteen
NoahJ456
Drift0r
ShawnJ Gaming
If you notice in the pictures above, you will see that on the far left side of each image there are more bomb screen images. These can be stitched together to give us the following assembled image:
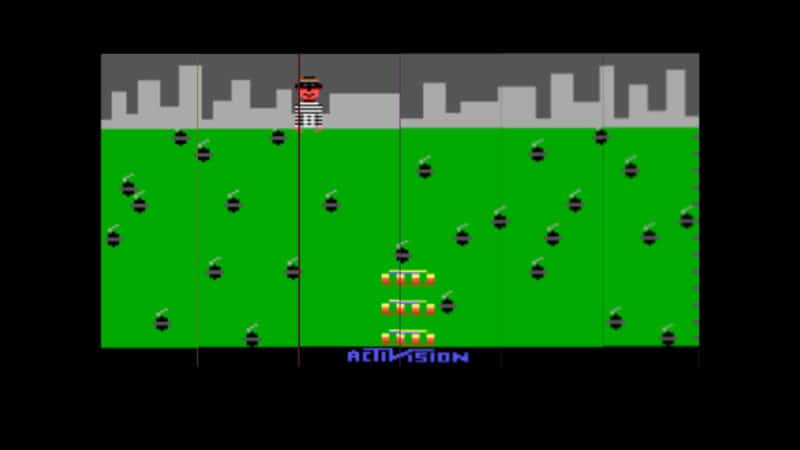
There are some other words on the images as well that reads ASSEMBLE, NUMBERS, VERTICLE, BOMB, HORIZONTAL, and LETTER. We know that this is the correct order due to their position and the notches shown top to bottom on each image.
First, we need to assemble the numbers on top of the image. The numbers that we use are given on MrDalekJD's image (yellow). The numbers are 24, 5, 20, 1, 12, 16, 26, 8, 4, 7, 9, 11, 21, 10, 19, 3 and 2. We assume all the numbers from 1 - 26 because there are 26 letters in the alphabet and there are alphabets involved in this as well. We will come to it shortly.
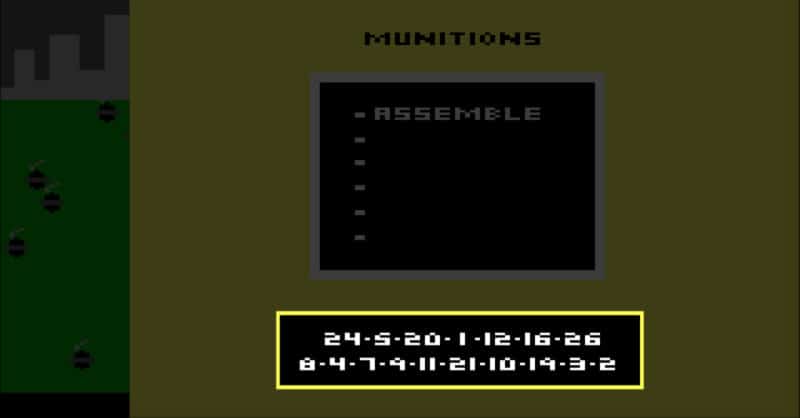
We put them on top of the assembled image at every building/skyline corner which gives us:
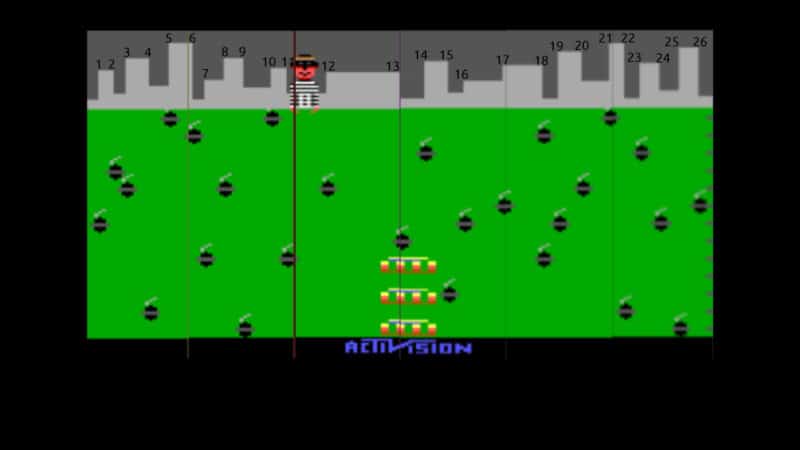
Then we can also see some notches on the far right side of this assembled image. Not only that, but we can also see letters at the bottom of each image left to right. This gives us the hint that we need to put the letters beside the notches in the same manner.

From JackFrags' image we can tell that the letters A, B, C, etc. will be on the left-hand side and the rest continuing from N will go on the right-hand side of the assembled image. After labeling all the letters, we get the following image:
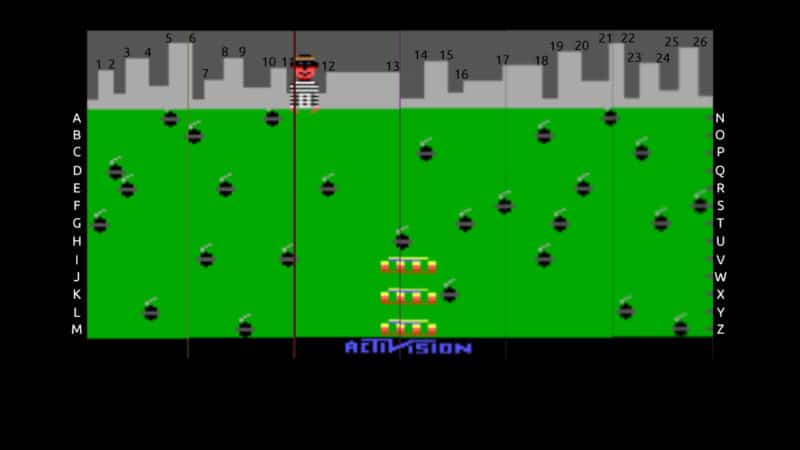
We can extend the notches across the image for easier letter identification when we get to solving it.
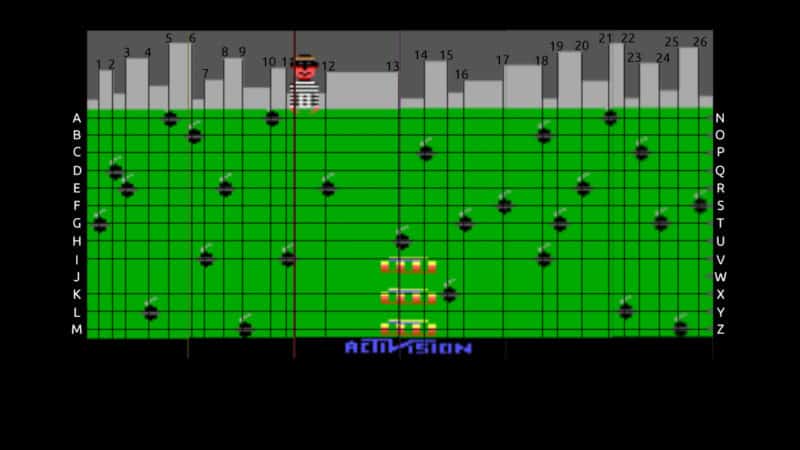
After we have assembled the full image above, we come back to MrDalekJD's numbers that are 24, 5, 20, 1, 12, 16, 26, 8, 4, 7, 9, 11, 21, 10, 19, 3, and 2. Now, our first number is 24. So we go to number 24 on the image and then check which letter it corresponds to. According to the image, it can be either G (left-side) or T (right-side).
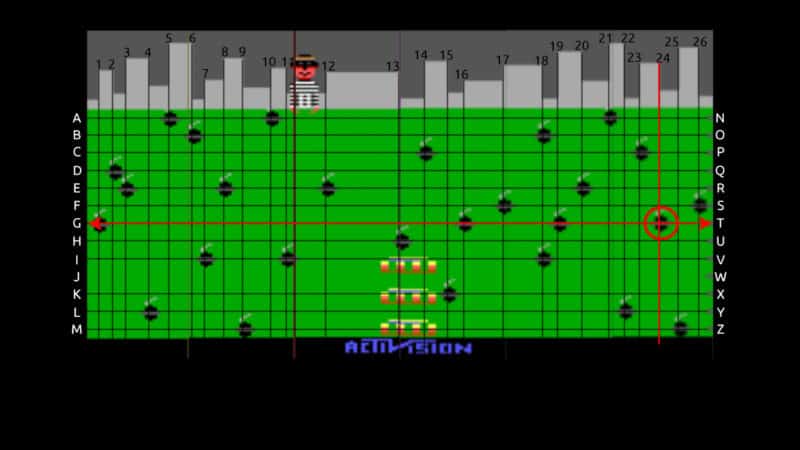
So, how do we decide which one is the correct letter? We look at the buildings and the number positioning. Each building has two corners. Left corner and right corner. If the number is on the left side, then we choose the letter on the left side of the screen and if the number is on the right side, then we go with the letter on the right-hand side.
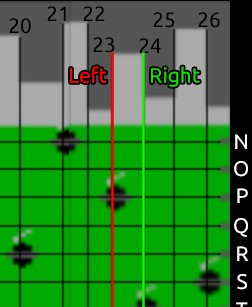
According to that rule, our first letter would be T on the right side of the image since 24 is on the right corner of the building. Just like 24, the next number is 5 and since it is on the left side, it will be A.
After completing all the letters we get:

This is yet another Pawn Takes Pawn URL and going to pawntakespawn.com/targetseliminated. It lands you on a page where you are asked to put in six words. These are six passcodes that are needed to proceed and they are dubbed "Mission Orders."
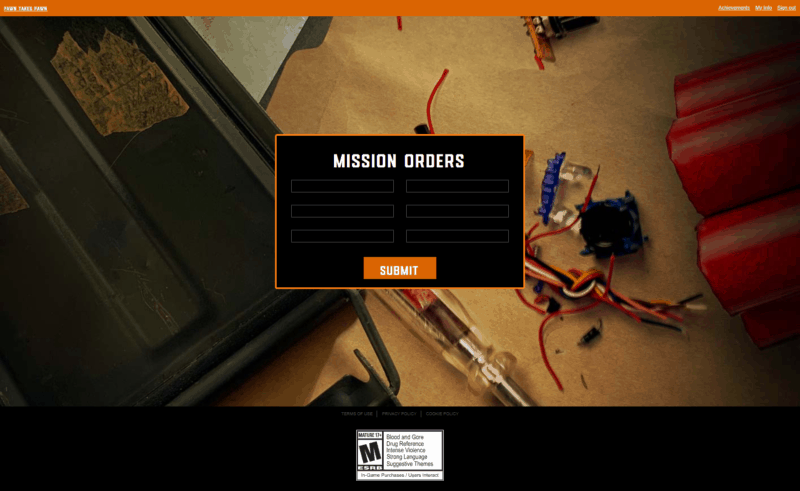
These words can be found in each image that the creators got earlier. Each of the creator images had a single word at the top of their image and those will be used here. The following are all the words for each creator.

After putting in all six mission orders, you will get to another URL at /kinghunt. Upon getting redirected to this site, you will also automatically get a new achievement called 'KING HUNT'
Moreover, you will see a notice in the middle of the screen along with a Bolex 160 Macrozoom video camera and a Kodak Brownie Super 27 photo camera. These are the exact same props that MrDalekJD and JackFrags received. There is also an Audio Tape recorder.
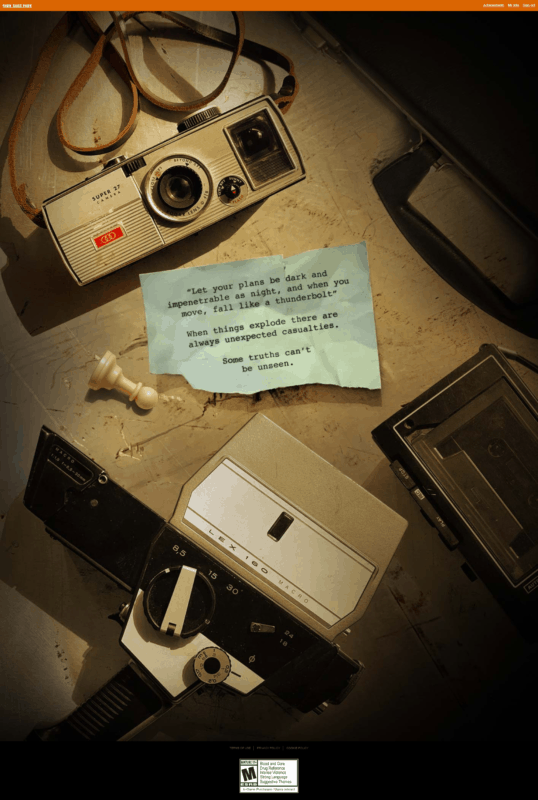
All these equipment are interactable. When you click on the Super 27 photo camera, you get the following images:
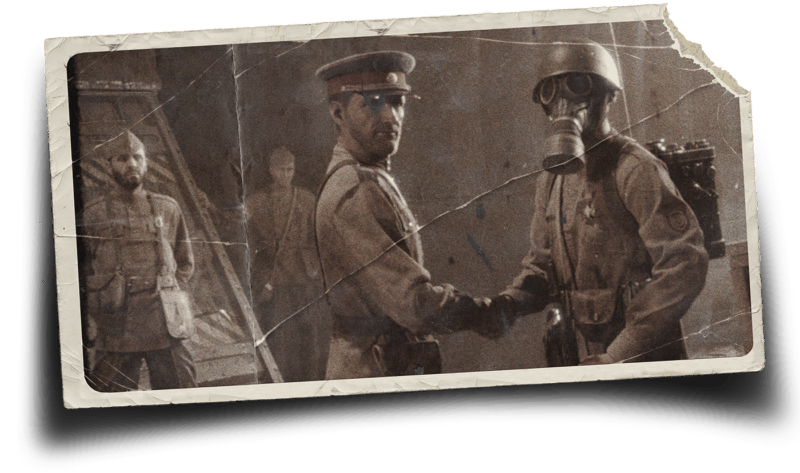
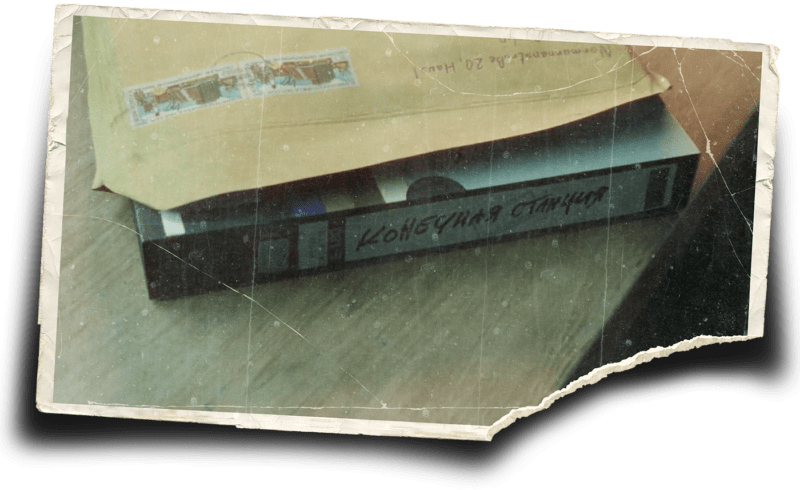
When you click on the Bolex 160 Macrozoom video camera, you get the following video:
[/video]
We can also listen to another audiotape by clicking on the audiotape recorder.
[/audio]
Towards the end of the above video, we can also see a new URL flash. The new URL is /truthbomb. This one is the last and most interesting URL of all. When you go to this URL, you get to see the first-ever teaser of the new Black Ops Cold War Zombies with a full trailer date at the bottom of the page.
According to the given date, we will get to see the full zombies trailer on 30th September 2020 at 10 AM PT. That will be 1 PM EST. It also shows the official Call of Duty's Youtube channel link indicating that the trailer will be directly released on the channel and not through an in-game event like last time.
Below is the teaser video that was found on the site:
[/video]
List of All Achievements (By the end of Day 4)
By the end of Day 4, you should expect at least 48 achievements earned through Zork and overall easter egg solving combined. But, you can also have 49 if you've received the postcard via mail as it contains a redeem code that can be used to get the 49th achievement as stated earlier.
The following is a full list of achievements:
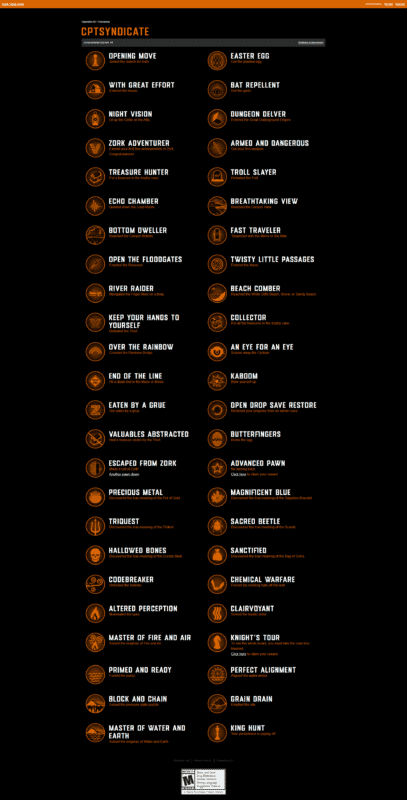
nextpage
Phase 5
What You're Made Of Tape
There was a new tape released on Pawn Takes Pawn, indicating the start of a new easter egg that we have covered below in detail.
Phone Call Puzzle
On October 18 2020 Pawn takes Pawn easter egg participants, and also website users, were sent a new email. This email contained a 5x5 grid with a bunch of numbers on it. Along with the grid, a set of instructions were also given that directed users to pawntakespawn.com/deepcover to find a sequence compiler.
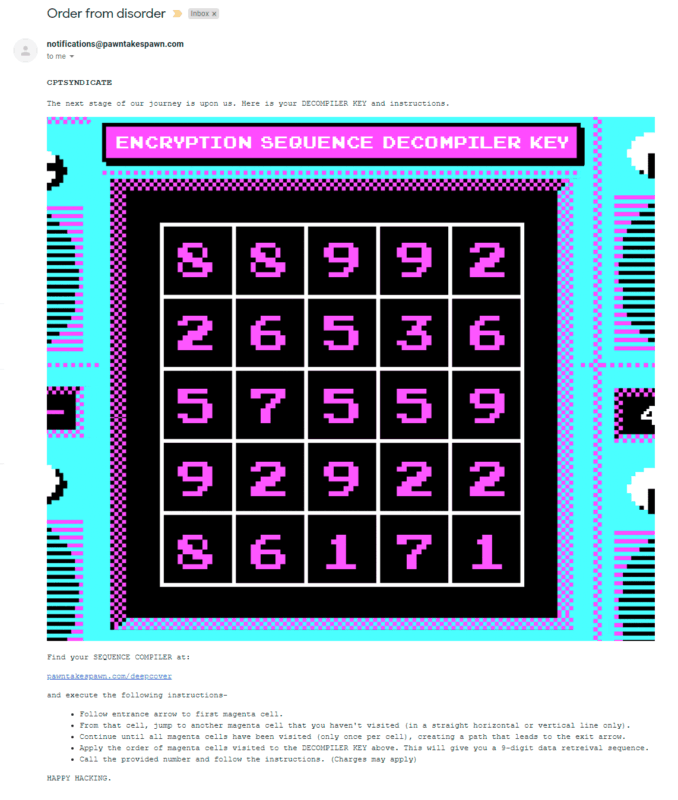
When on the /deepcover page, you will notice another grid with random magenta blocks, and an entrance arrow and an exit arrow. These two arrows indicate your starting point and a finishing point. This compiler will help you get a 9-digit code that we will use shortly.
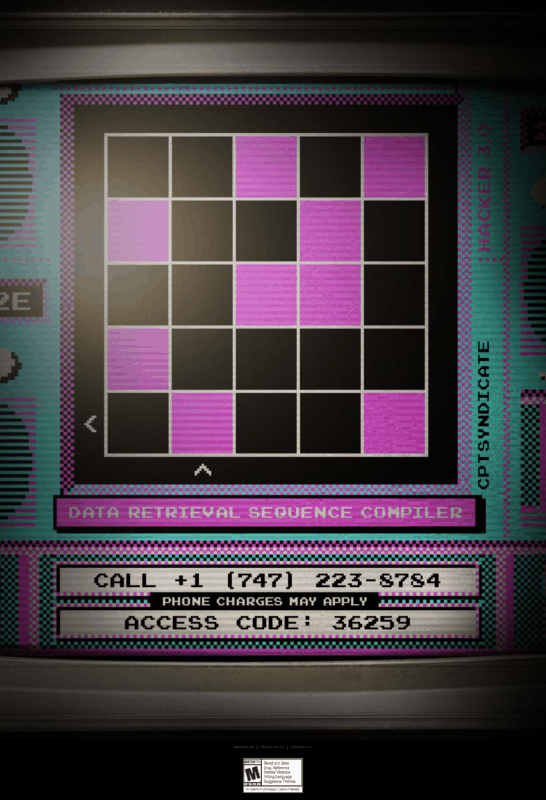
To get your 9-digit code, you must move from one magenta block to another in only either horizontal or vertical direction (depending on where the block is). Wherever you land in sequence, you must correlate it with the 5x5 grid you got in your email, in order to get your 9-digit code.
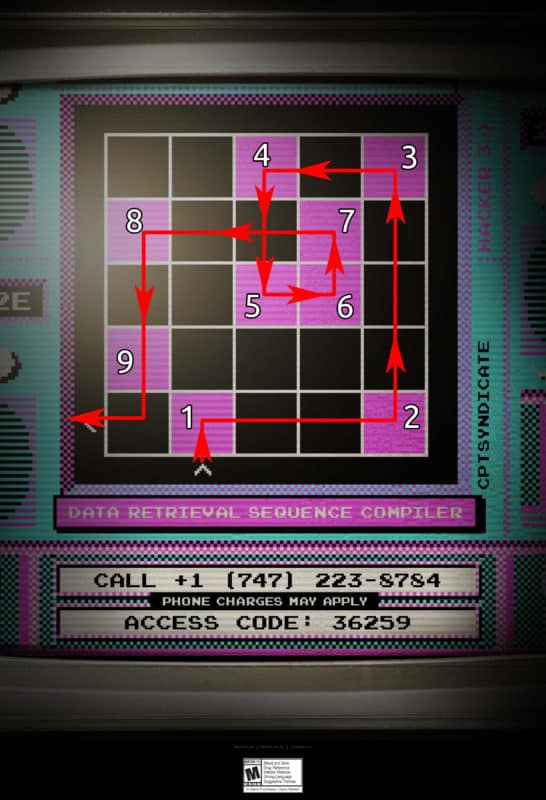

Every person got a completely different code and sequence but the same website at the end. After getting your 9-digit code, you must call the number given at the bottom of the compiler: +1 (747) 223-8784. You will be asked to put in your access code, followed by a pound. Pound in numerical format is "#."
The access code is also given on the same compiler page just below the phone number. The access code for us was 36259, that means that when they asked for the access code, we dialed 36259#
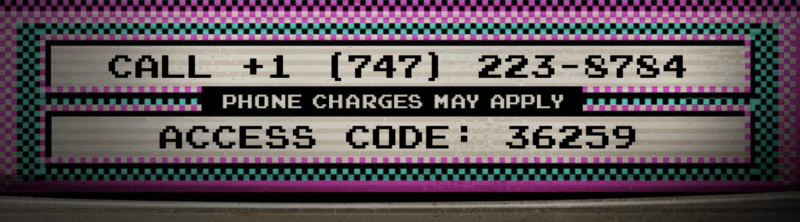
This will complete the first step of this easter egg, and the website that had the phone number with a sequence compiler grid will now be changed. It will have a bunch of random words scattered throughout the page. These words are not just random words. In fact, it contains a hidden URL.
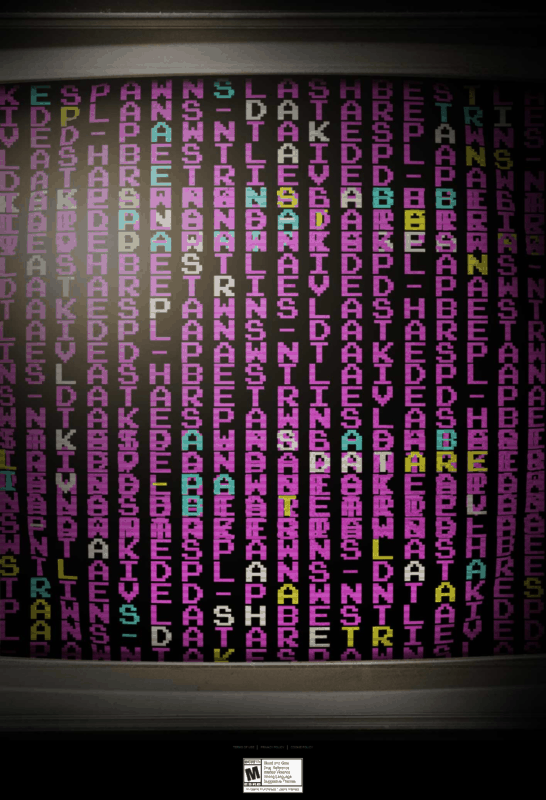
One of the new URLs that you get from the updated site is pawntakespawn.com/bestlaidplans.

You will find many new documents on this page that are used in solving some new puzzles that incorporate the use of the new Cold War Beta that is available to play (as of October 19, 2020).

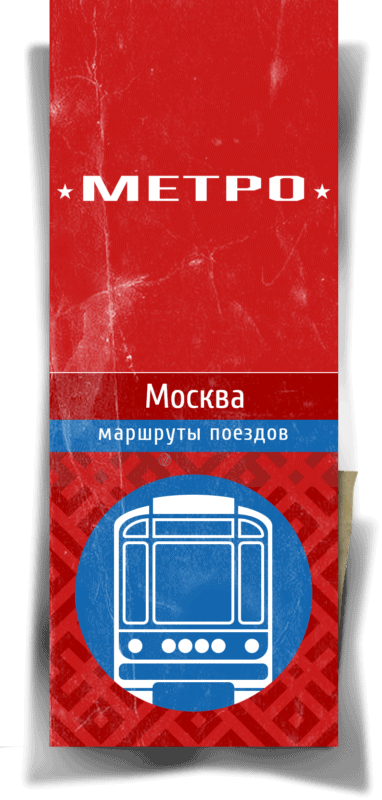

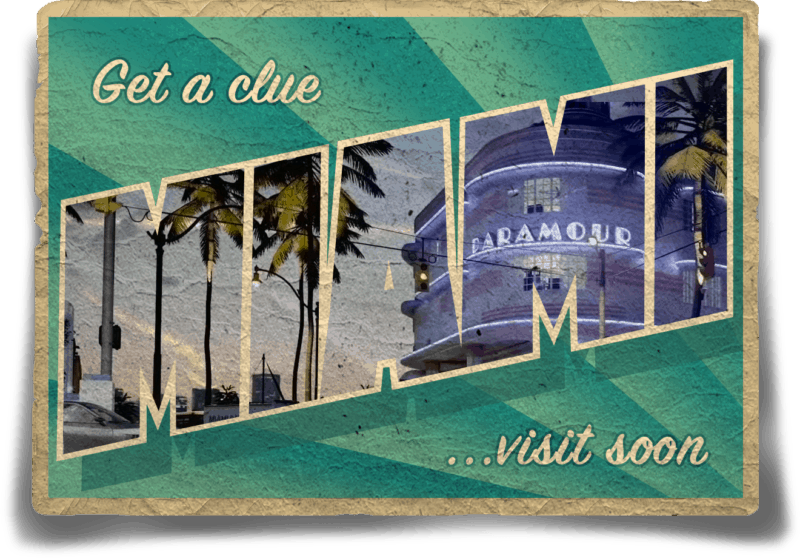
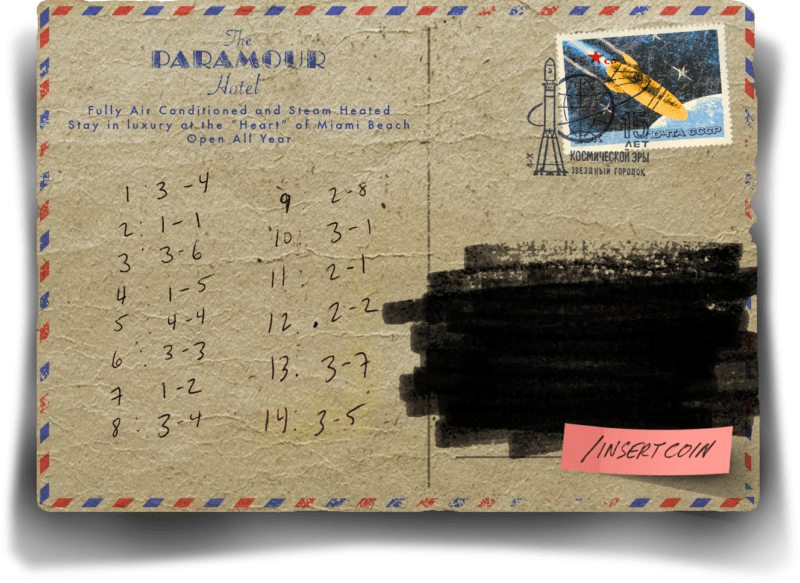
From the pictures above, it is clear that we need to use the maps Miami and Moscow in Cold War Beta to solve the puzzles. You will also get a new achievement called 'Access Granted'

Miami Puzzle
Looking at the postcard, you can see it shows a location found in Miami. That suggests that you need to head into the Miami map for this next part. You will also find a new URL at the back of the postcard that is pawntakespawn.com/insertcoin.
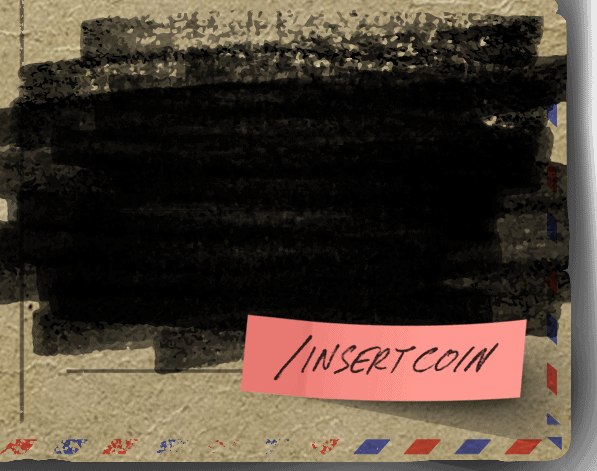
When you go to /insertcoin, you will be asked to type in the name of the game. There is also a hint suggesting you go to the Caiman bar in Miami and investigate the arcade machine.
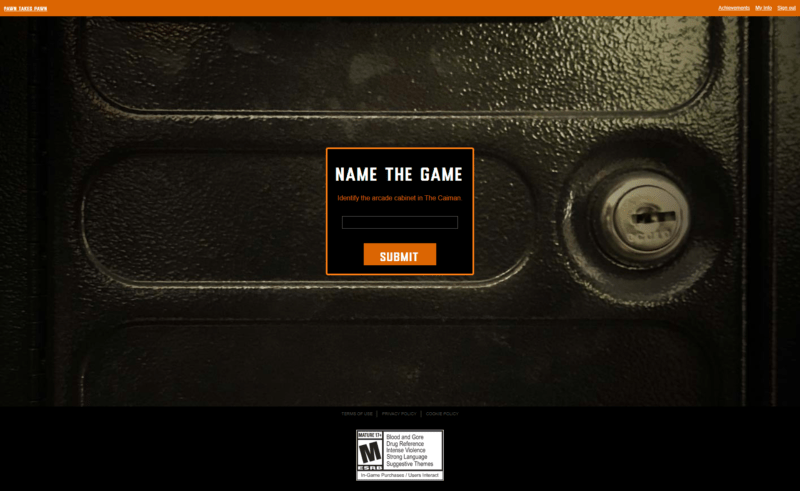
Going into Cold War Beta, you can head over to the Caiman bar at the very back of the map, enter the bar, and you will find a blue arcade machine to your left as soon as you enter the building. The name of the game is written on the machine that reads 'Fishing Derby.'

This 'Fishing Derby' is your passcode that you need to type into the blank space on /insertcoin website. After typing in 'Fishing Derby,' you will be redirected to a new URL, pawntakespawn.com/shardsofhistory.
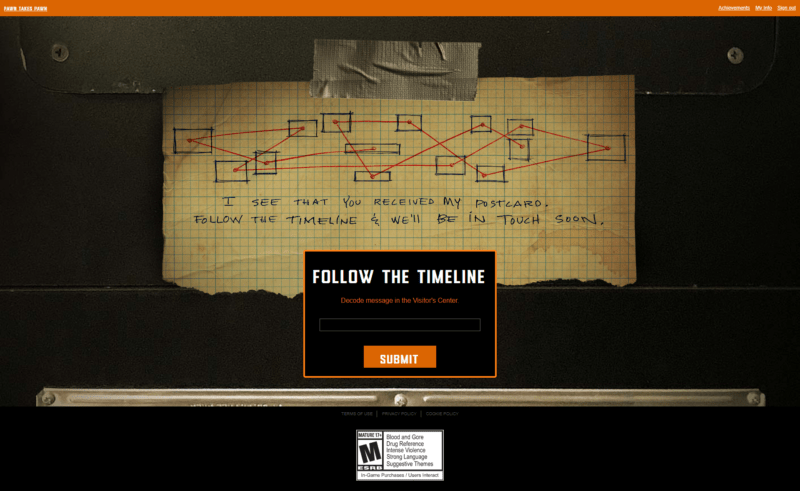
On this new site, you see a layout of a wall found on the same Miami map in Cold War Beta. You will find the wall inside the Visitor's Center, located just in the middle of the street next to the 'Evermore' building. This wall will be overlayed on the sketched layout found on /shardsofhistory.
Once overlayed, you will know the order of paintings, but how do we get the site's passcode? This is where we use the back of the postcard that had an image of Miami. You will see some random numbers. These numbers correspond to each painting in order from 1 to 14. Each painting has two numbers that correspond to each letter and word of the painting caption.
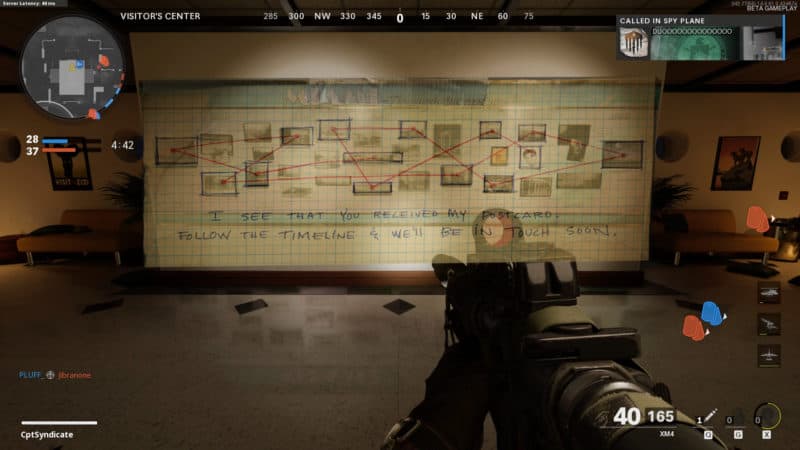
For example, if we take the first painting, the caption under it is "First ever Bathing suit parade." According to the postcard, the first painting numbers are 3-4. This means that we will select the fourth letter of the third word. That gives us "Bathing," and the fourth letter is "h." Our first letter will be "h."
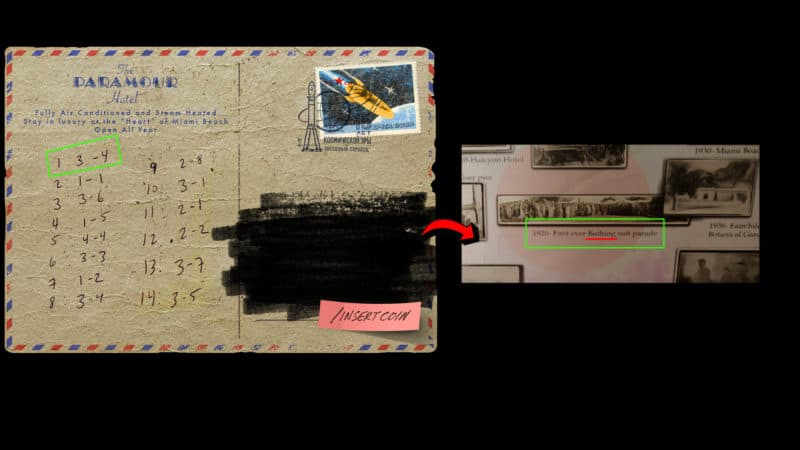
We will do the same with all of the paintings that will give us our final word: htlingualchaos.
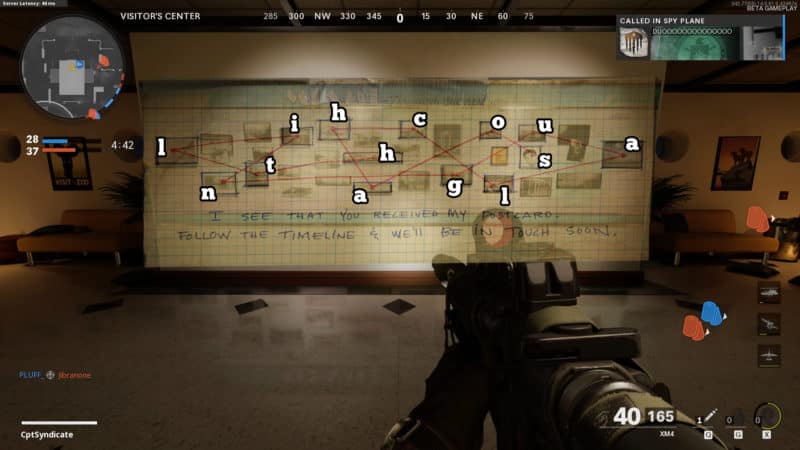
Upon putting in the passcode, you will be redirected to yet another URL, pawntakespawn.com/setinthewest. You will see some classified CIA documents on Robert Aldrich.
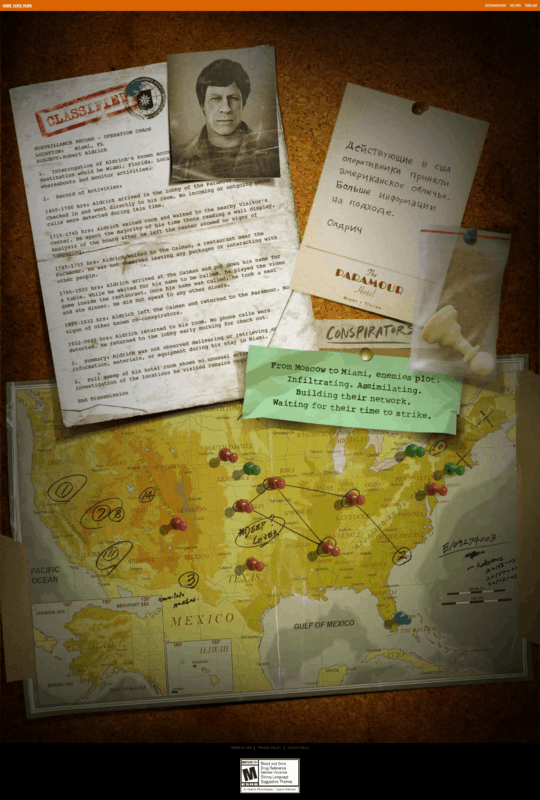
You will also get another achievement called 'Set In The West.'
Moscow Puzzle
The Moscow puzzle is more complicated than the Miami puzzle. We are already given some instructions on how to solve the metro system puzzle. It is also mentioned, at the bottom of the instructions, that we should start by acquiring the full map of the metro system from Moscow.
The full map of the metro system is available in Cold War Beta map, Moscow. You can go to the middle section of the map, which has a huge monument. Go up the small set of stairs (not the escalator), and you will find two metro maps to your immediate left.
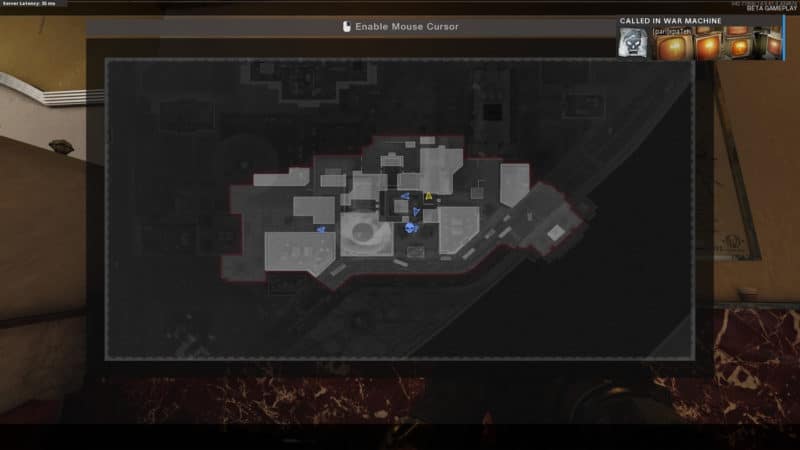
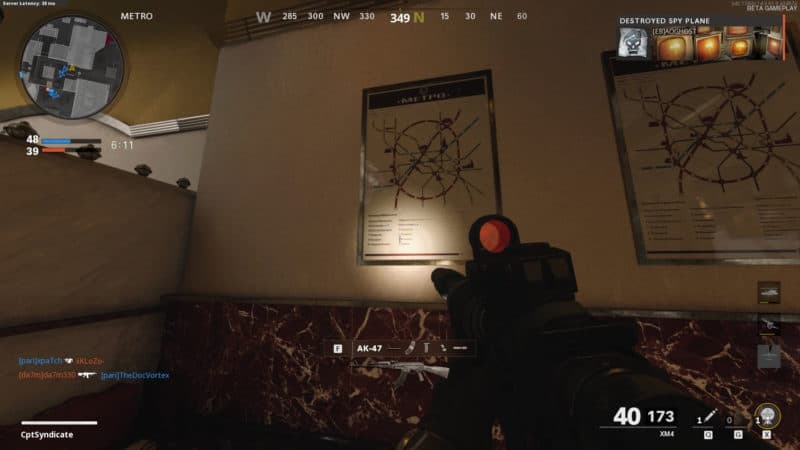
Here is a full high-resolution image of the in-game map (thanks to DanielxKnight over at GeekyPastimes discord)
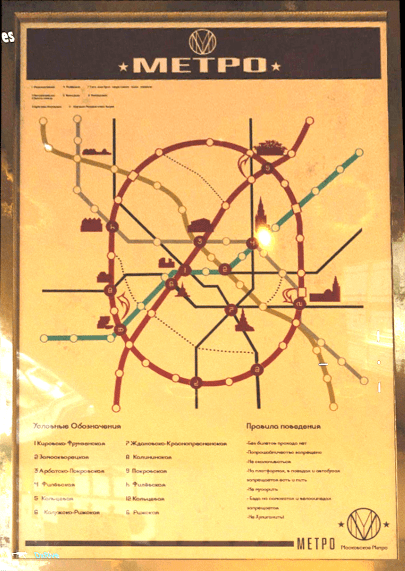
At this point, you can take a screenshot of the map and exit out of the game. You will now use the instructions from the manual in combination with the full map to get another URL. To solve this, you need to read the instructions from 1 to 19 and correlate it on the full map while using the letters shown on straight colored lines.
Let's start with the first one. It says that "Enter at the 2nd SILVER station, NW --> SE," which means that you must start from the second station on the silver line on the full map. After selecting the second station, you must move from northwest to southeast direction. The second station on the silver line shown on the instruction manual has the letter 'S' that means our first letter is 'S.'
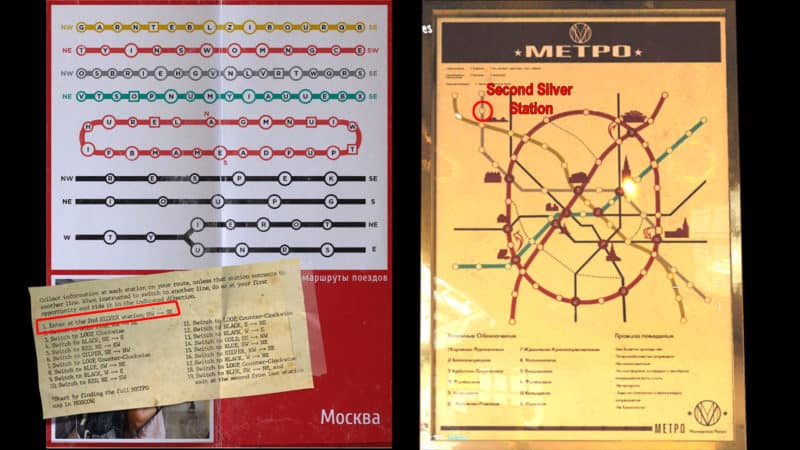
Moving forward, you must keep going until you reach the Gold line. We know that since the second number shows the instructions to be followed on a Gold line. Once you're on the Gold Line, we start moving in the direction northwest to southeast. You will come across at least two stations that can be ignored,pawntakespawn.com as these stations that are directly intersecting on two different lines must be ignored.
Moving in the same direction, you will eventually end up on a loop. According to the instructions, once on the loop, you must move in a clockwise direction choosing any stations in between until you reach the Black line (as it is the next one) and ignoring intersecting stations. The circles represent stations, remember that.
As per the letters shown in the loop, the stations you pass through are letters 'L' and 'A.' You must do the same for all the letters that will eventually give you your new word slashfunambulist or /funambulist. This is a new pawn takes pawn URL that you can go to.
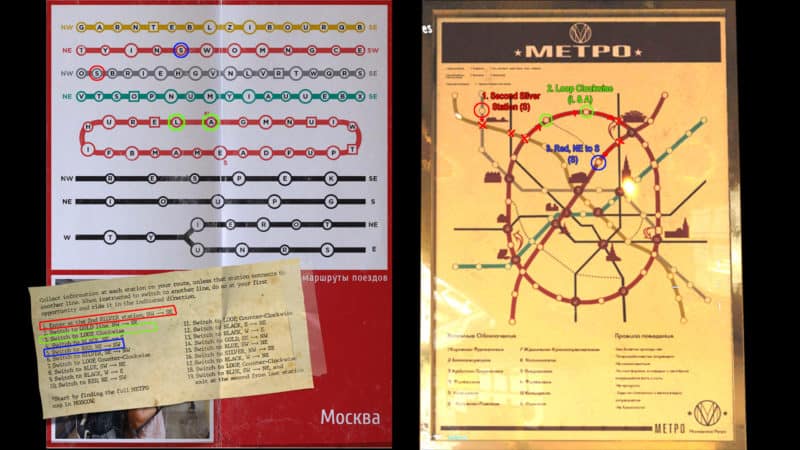

On pawntakespawn.com/funambulist, you will be asked to type in another passphrase, and it instructs you to go to Moscow and look for a chess game to determine what the passphrase is. There is a chessboard inside one of the houses on the Moscow map in Cold War Beta. There is also a chess grid with some letters on it on the site. There are some grids without letters.
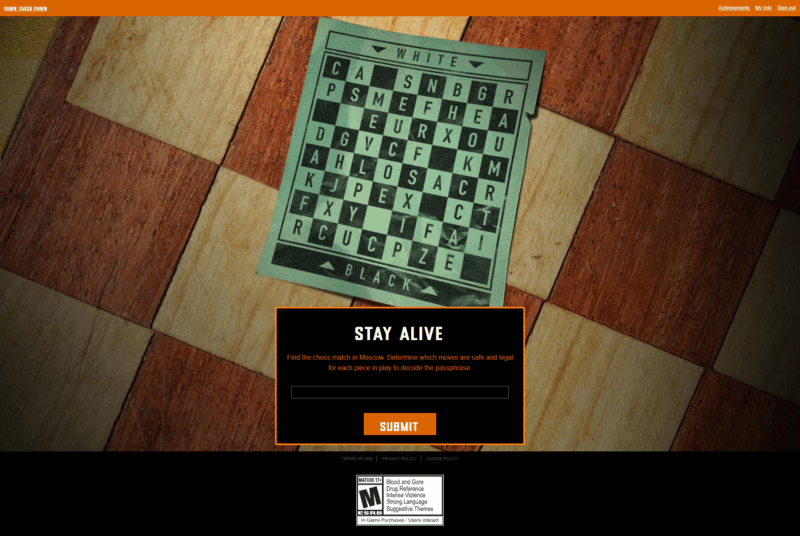
Some pieces are left on the board, and you must determine what moves these pieces can make. We must correlate these chess pieces' moves with the grid with letters on /funambulist to get our passphrase. As mentioned earlier, there is some grids without letters, and these are the grids that have a chess piece on it, and it is the same as the one seen in-game.
The in-game chessboard helps us determine what empty grid has what chess piece. Then we can see what letters those pieces can move to and finally get our passphrase.
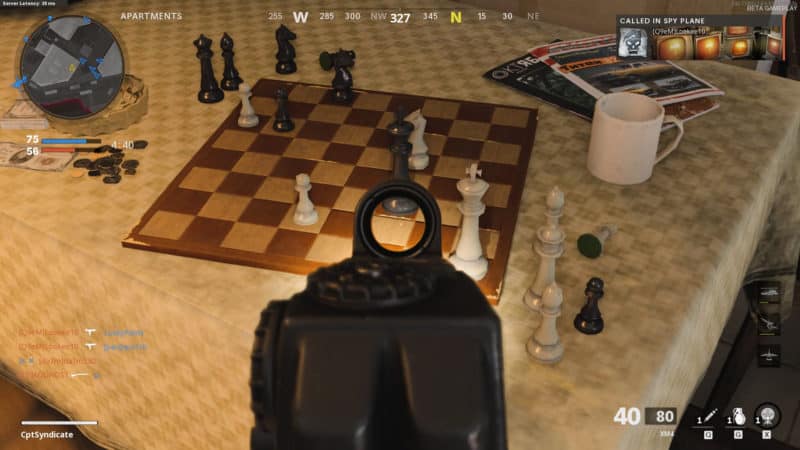
The chess pieces have specific movement rules, and they can only move to a certain grid from their position. Keeping that in mind, we move the pieces to different letters and make sense of the words. After moving all the pieces, we come out with the word 'PSEUDOSACRIFICE,' a term used in chess when a player sacrifices his/her queen to win the game. That was the scenario we see on the chessboard as well.
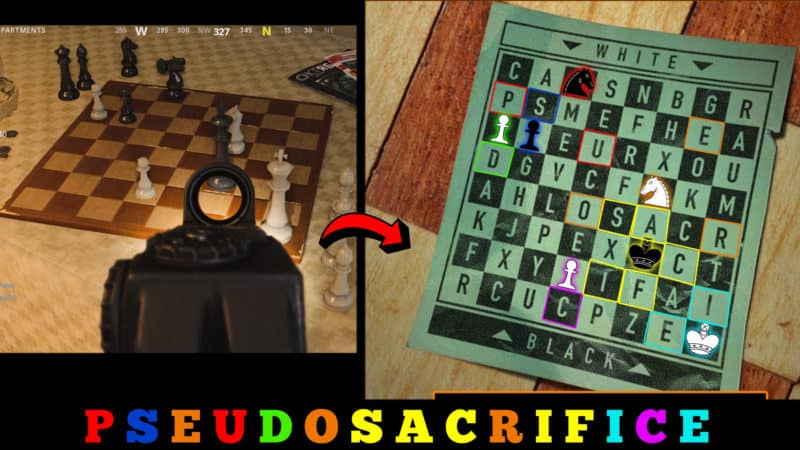
Once you type in the word 'pseudosacrifice,' you will be redirected to a new URL, pawntakespawn.com/riseintheeast, and get two new achievements - 'Rise In The East' and 'Two Tribes'. You will find some more information about different characters that are possibly going to appear in the Black Ops Cold War campaign on this page.
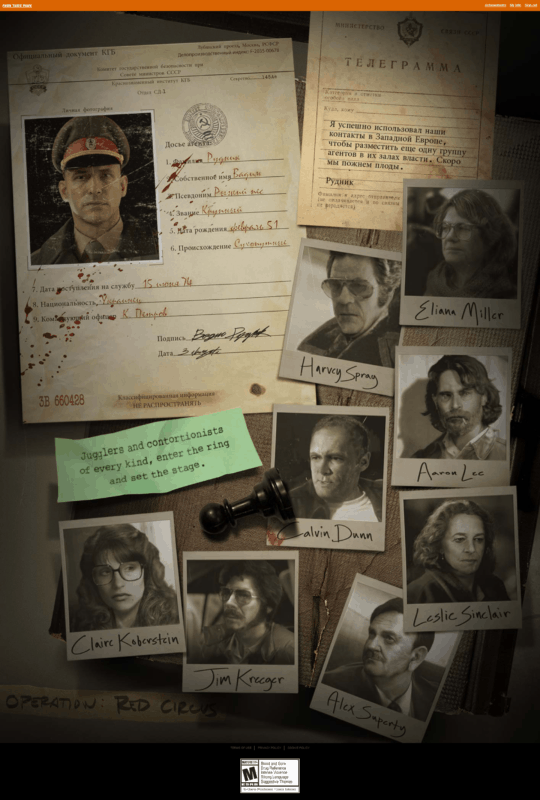

The Two Tribes achievement also gives you a link to which you can go and claim your reward. The reward is an extension of time to play the Beta, by one day. Originally the Beta was supposed to last until October 19 2020, but since this easter egg has been solved, the date has extended to October 20, 2020.

List of All Achievements
By the end of the Cold War beta easter egg, you should have a total of 53 achievements (52 if you haven't received the physical copy of the postcard via mail that can be used to redeem a code for an achievement). The following is a complete list of achievements up until the Cold War beta easter egg:
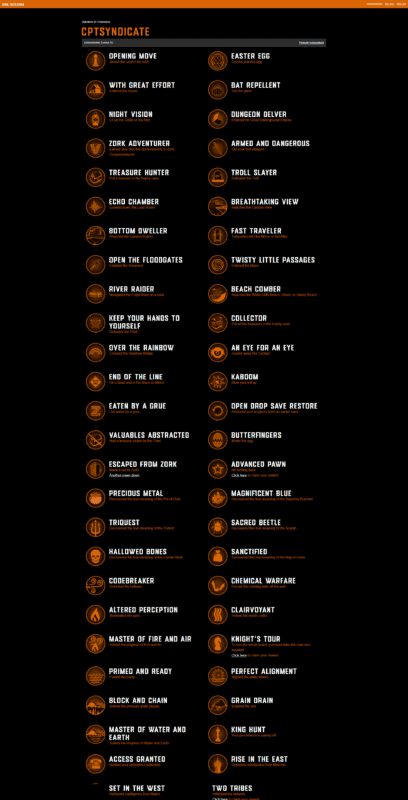
nextpage
The Pawn Takes Pawn easter egg keeps evolving and players are busy moving forward even after the reveal of the Black Ops Cold War and Zombies.
On October 22, 2020, Pawn Takes Pawn participants received a new email instructing them to go to a new Pawn Takes Pawn page, pawntakespawn.com/killingtime.
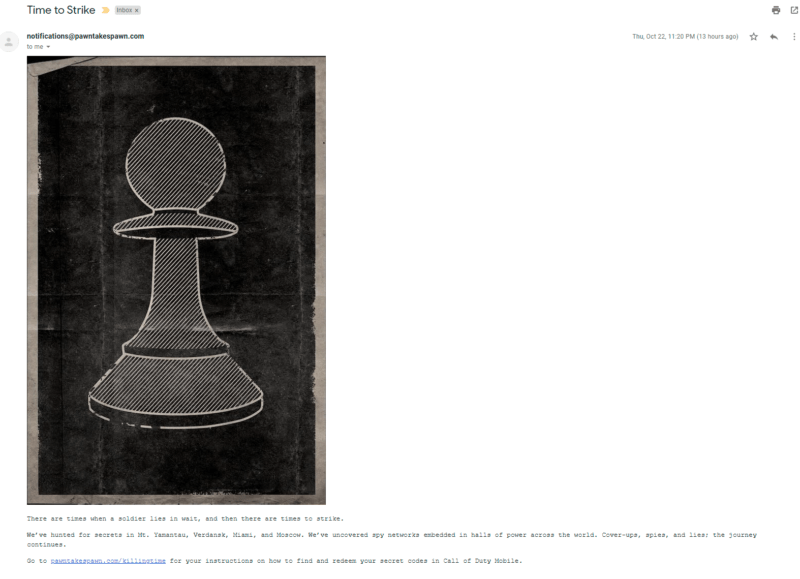
A new videotape titled 'With the lights off' on the Pawn Takes Pawn website that indicates that a new easter egg was also available.
When you go to the new page /killingtime, you will see a Chopper Command poster, a football, and a dartboard. You will also notice a note written to someone named Angie.
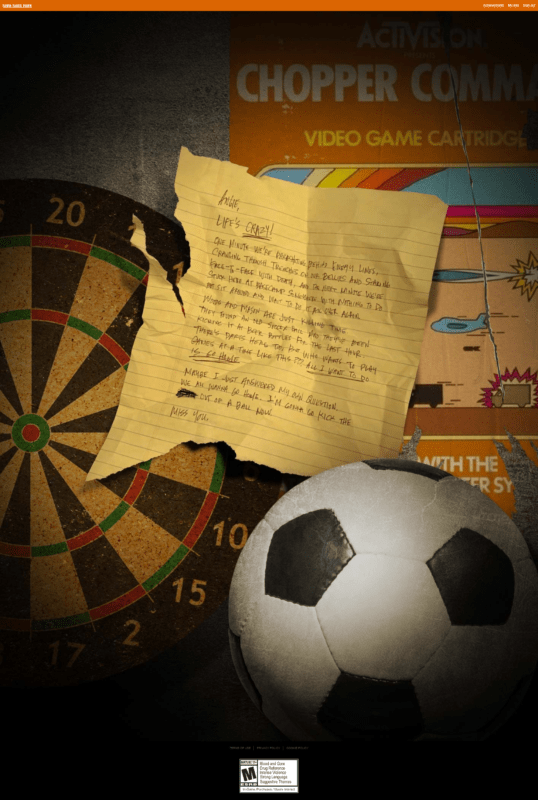
All these items on the page are clickable, except the note. When you click on each of the items, you are redirected to a new page that asks you to enter a code. It also gives you instructions on how to acquire these codes to access these pages fully.
These three items each have their own page that is accessed by clicking on them. This indicates that there are three easter eggs that you need to solve for each entry code. To acquire these codes, you must head into Call of Duty: Mobile.
You can either install it on your phone or download the official Gameloop emulator on your PC. Note that the codes are random for each person, and once it is redeemed, the other person cannot use it, of course.
Let's take a look at each of these easter egg puzzles separately. We also have a video guide showing the steps in COD: Mobile.
Phase 6
Video Guide
Chopper Command Puzzle
When you click on the Chopper Command poster on /killingtime, you will be redirected to /slashandburn. That page asks you to enter a code with instructions on how to acquire the code.
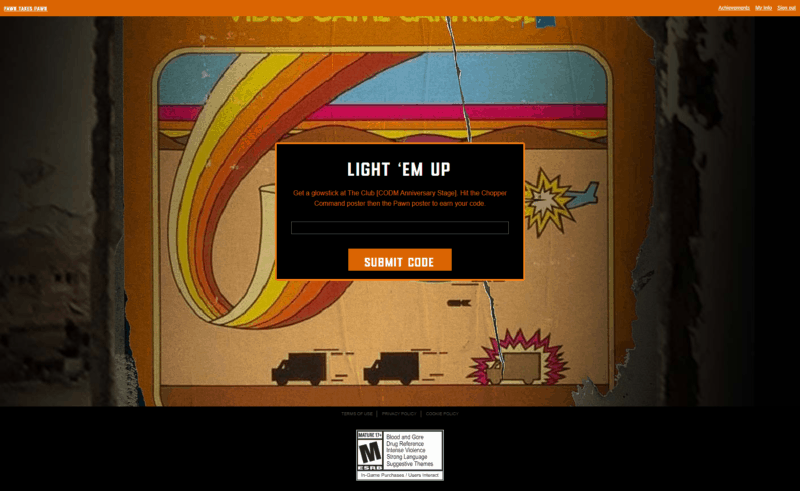
Easter Egg Steps
Go to the bunker lobby by clicking on the bunker entrance on the Call of Duty: Mobile main menu screen.
Pick u one of the glowsticks scattered around the lobby.
Go to the Chopper Command poster and melee it using the glowsticks.
Go to the Pawn poster just opposite of the Chopper Command poster and melee it. These posters will burn away upon hitting them.
You will get a 'Secret Code' on your screen with your entry code.
Now you can go back to the /slashandburn page and enter the code that you got in-game. Upon entering the code, you will get full access to the page showing you a transmission document that seems to be related to the Black Ops Cold War campaign.
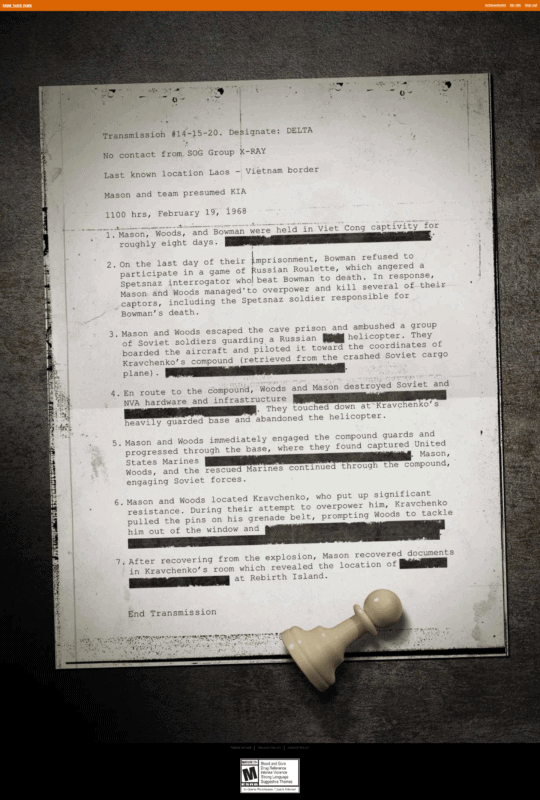
You will also get a new achievement called 'Beneath the Surface' with a link to get a redeem code for a reward that you can get in COD: Mobile.
When you click on the redeem link, you will be redirected to a link with a redeem code and another link at the bottom of the page where you can enter that redeem code.
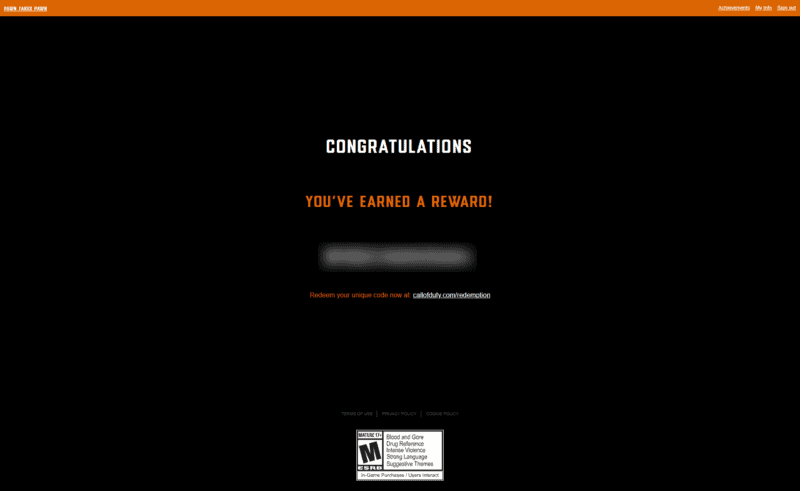
You will also be asked to enter your COD: Mobile UID. UID is a unique COD: Mobile ID that is different for each player.
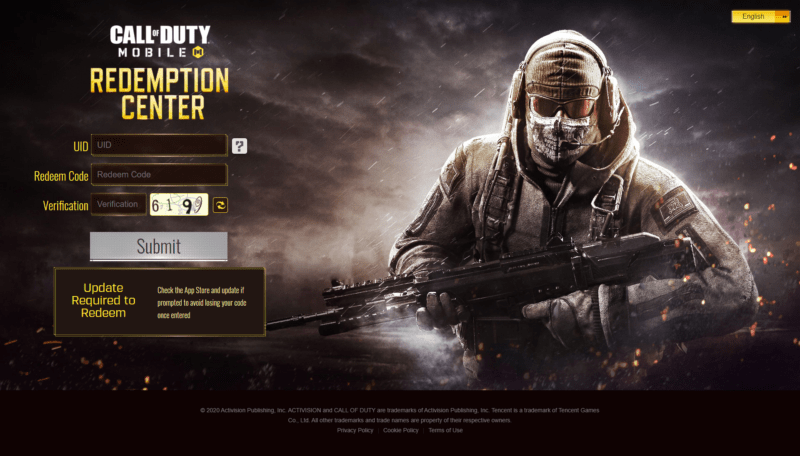
You can find the UID by going to your profile settings in COD: Mobile. It is the same steps to redeem for all the other codes as well. The only thing different is acquiring the page entry codes in-game.
Chopper Puzzle Rewards
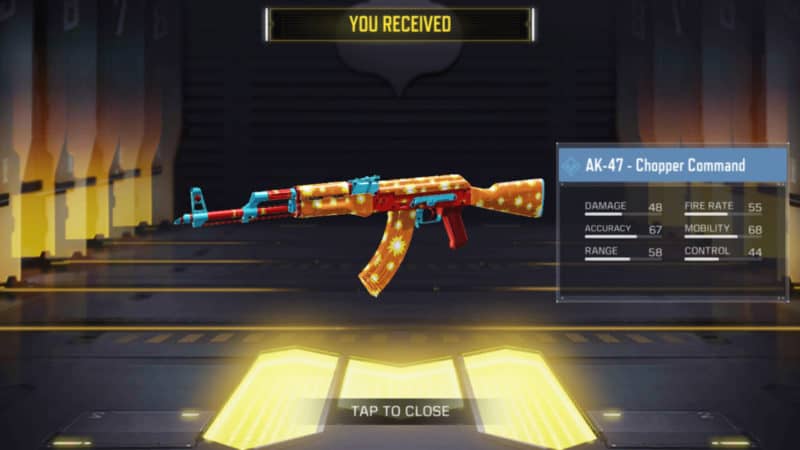
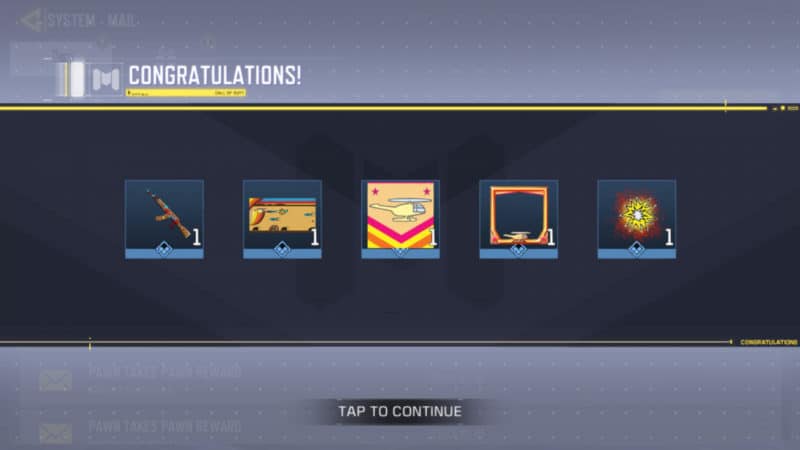
Dartboard Puzzle
Clicking on the Dartboard on /killingtime lands you on another pawn takes pawn page, /pointandshoot asking for the code with instructions on how to acquire the code.

Easter Egg Steps
Go to the bunker lobby by clicking on the bunker entrance on the Call of Duty: Mobile main menu screen.
Go to the dartboard game to the left side of the lobby and play it.
Select 'Practice Mode.'
Get all 3's on the dartboard in a row. That should be a total of five 3's.
After getting all 3's on the board, you will get a code. Go back to /pointandshoot and enter the code. You will get another transmission with a new achievement called 'Sure Shot.'
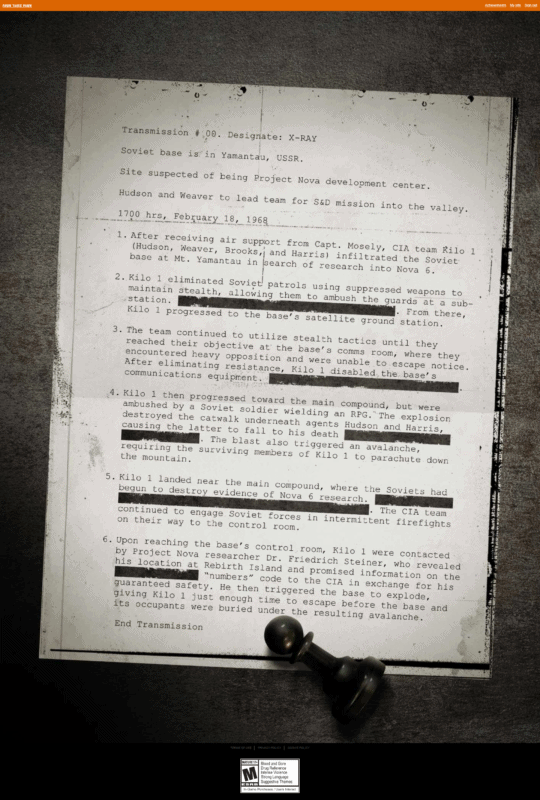
Dartboard Puzzle Rewards
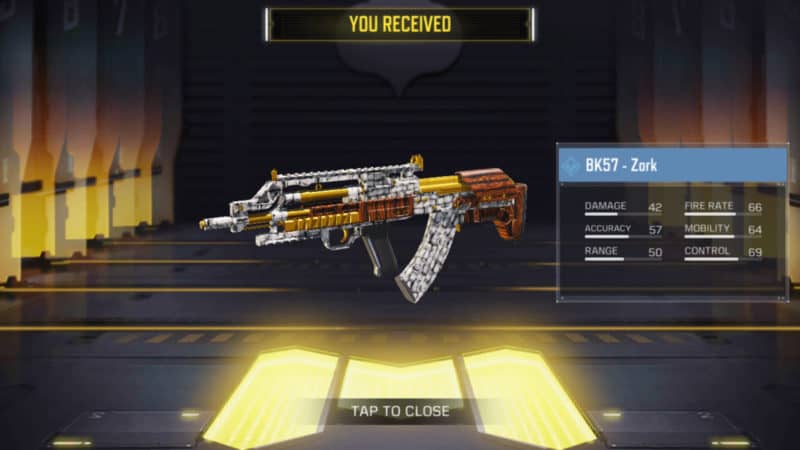

Football Puzzle
Upon clicking on the Football on /killingtime, you will be redirected to /shotongoal and once again prompted to enter a code. To get this entry code, you need to knock over four bottles placed in specific spots around the Bunker lobby in COD: Mobile. You need to knock them over using the footballs placed nearby.
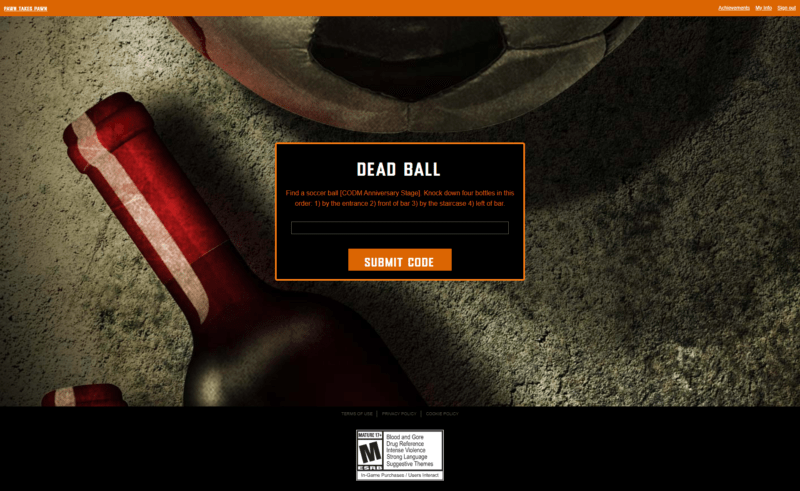
You must follow a certain order when knocking over these bottles, or else it won't work.
Easter Egg Steps
Go to the bunker lobby by clicking on the bunker entrance on the Call of Duty: Mobile main menu screen.
First knock the bottle near the Bunker entrance.
Knock the bottle by the bar.
Knock the bottle at the back of the lobby by a small set of stairs.
Knock the bottle at the back of the lobby next to some wooden crates.
If a bottle is not getting knocked over, you are going in the wrong order or have missed one of the bottles. You will get a code once you've successfully knocked all four bottles.
You can enter the code on /shotongoal and access the full page that shows you a note written by someone talking about the bigger threat - Perseus. Perseus is the main antagonist in the upcoming Call of Duty: Black Ops Cold War campaign.

You will also get two more achievements called 'Foot Soldier' and 'Overachiever.' Both these achievements provide a link to claim your reward as well.
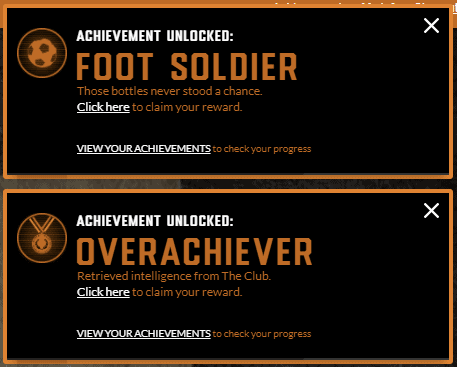
The 'Foot Soldier' achievement is associated with the football easter egg solution and 'Overachiever' is for completing all three easter eggs.
Football Puzzle Rewards
You will get the following rewards for 'Foot Soldier'


And the following rewards for 'Overachiever'
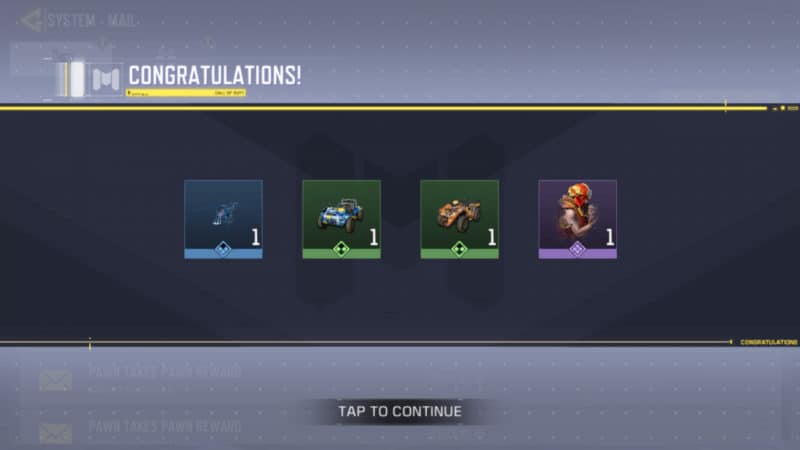
List of All Achievements
You will get a total of four achievements that give you redeemable codes from doing all the COD: Mobile easter egg steps.
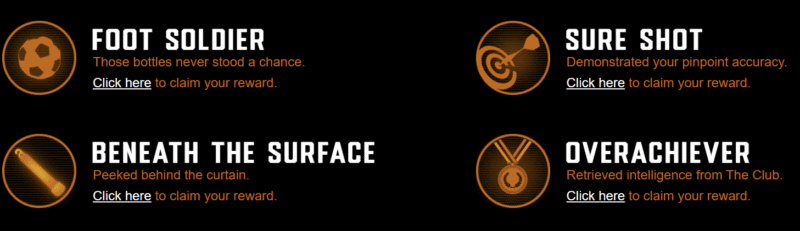
By now, you should have a total of 57 achievements (56 if you haven't received a physical mail with a redeem code for an extra achievement). You can see the full list of achievements below.
The list is a high-resolution picture, so feel free to zoom in after clicking on it if you cannot read properly.
nextpage
Phase 7
On October 26, 2020, many COD content creators, including ShawnJ Gaming, Drift0r, MrDalekJD, JackFrags, MarleyThirteen, NoahJ456, PrestigeIsKey, GeekyAcrylics, CharlieIntel, eColiEspressor, KRNG Oceane, C9EmZ, BennyCentral, ChaosxSilencer, and TheXclusiveAce, were sent new packages that contained Semaphores in the form of projector slides.
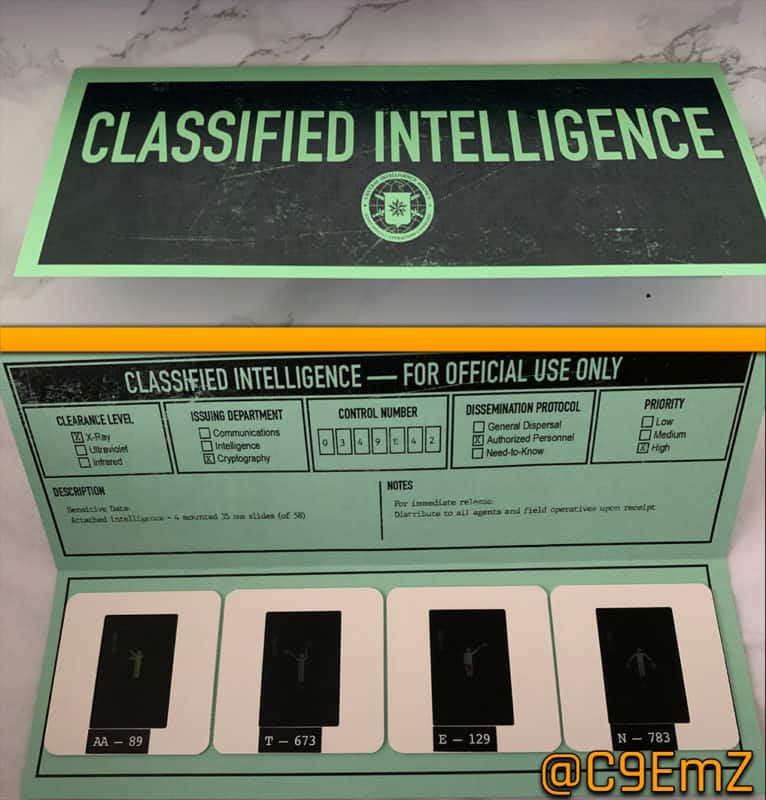
Whatever slides and content that you see in this guide are obtained from these creators as they were the ones who received these items from Treyarch. Some of the slides also contained color-coded keys in addition to the semaphores that we will use shortly to decipher some passwords.
Cassianx, a Geekypastimes' discord member, arranged all these slides in a clean infographic to better understand them. There are two types of semaphores - Red Flags and Black Flags.
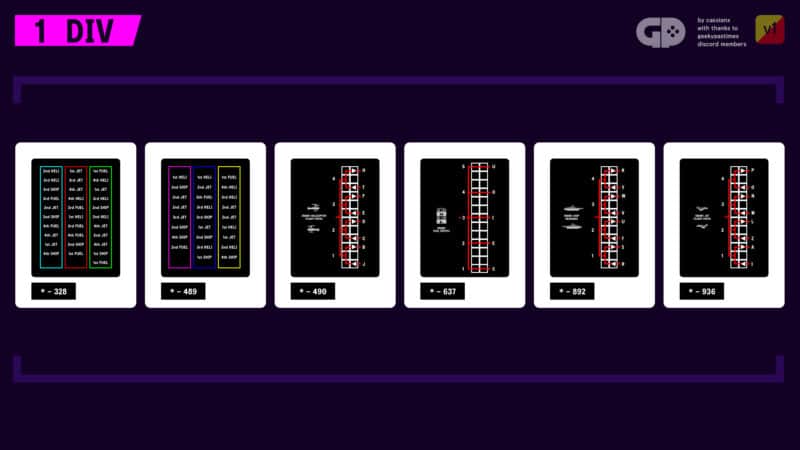
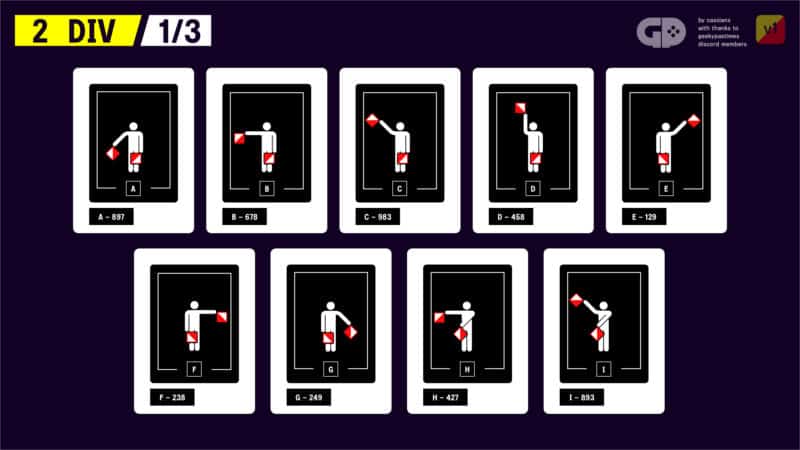
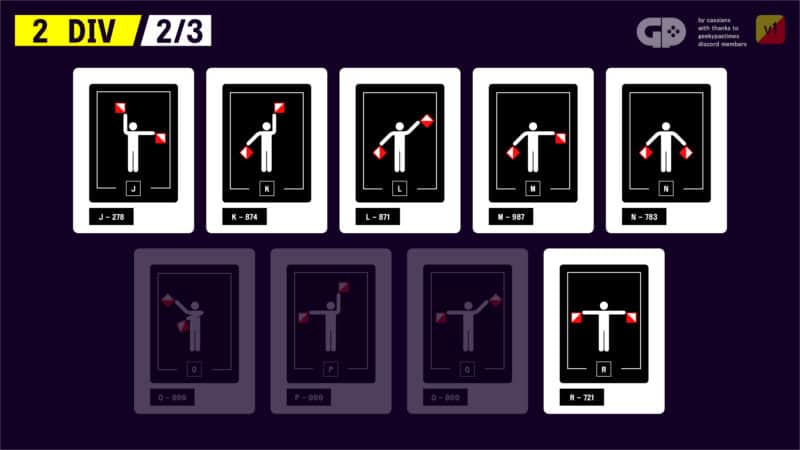
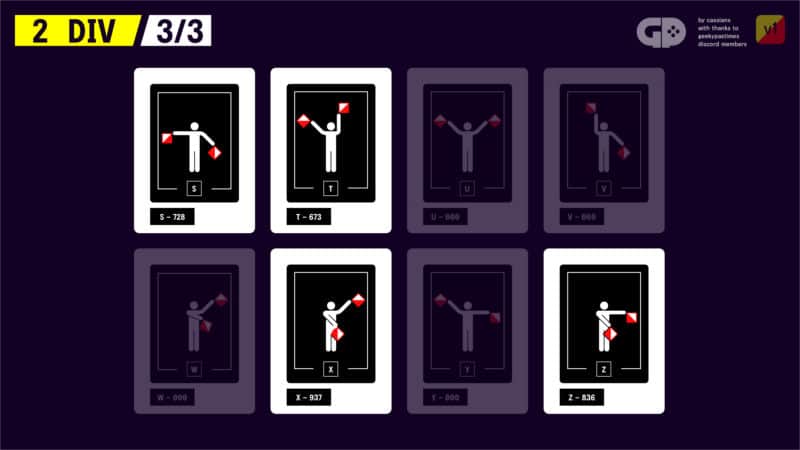
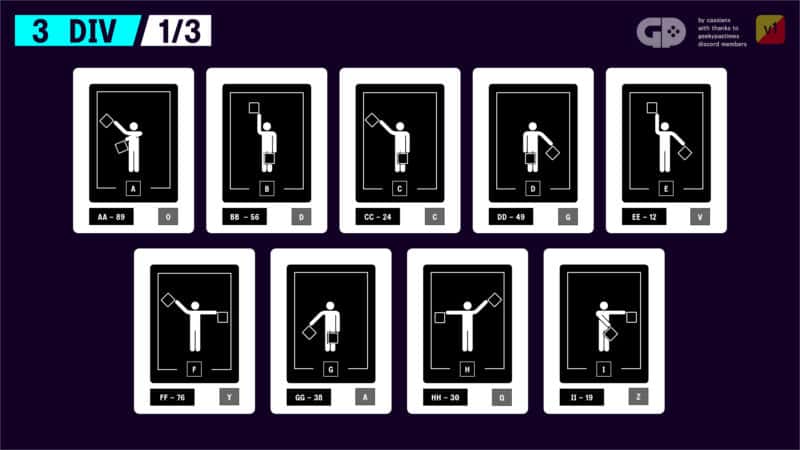
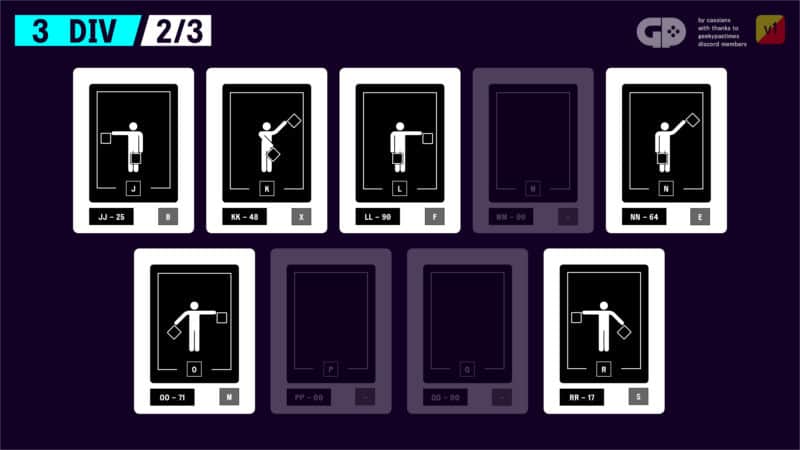
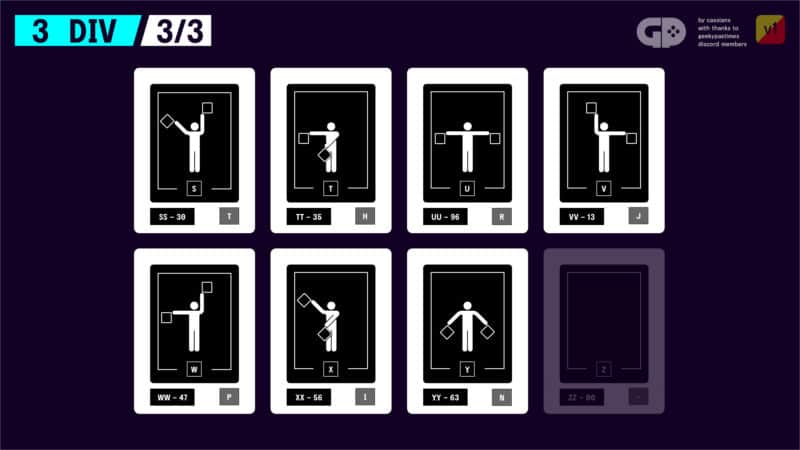
The content creators also received a sticky note with their slides, with a new hand-written PawnTakesPawn URL, /lightson. This URL contained the same video that was on a new 'Troublemaker' tape on PawnTakesPawn that reveals the hacker's identity to be William Bowman, Joseph Bowman's Son. All these slide packages also contained a code number: 0349E42
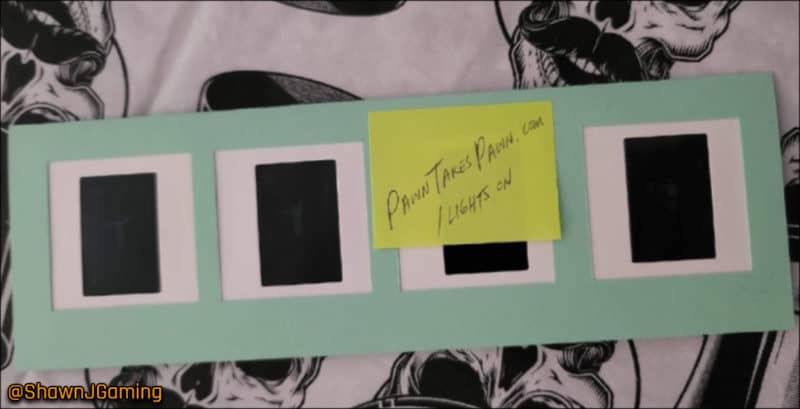
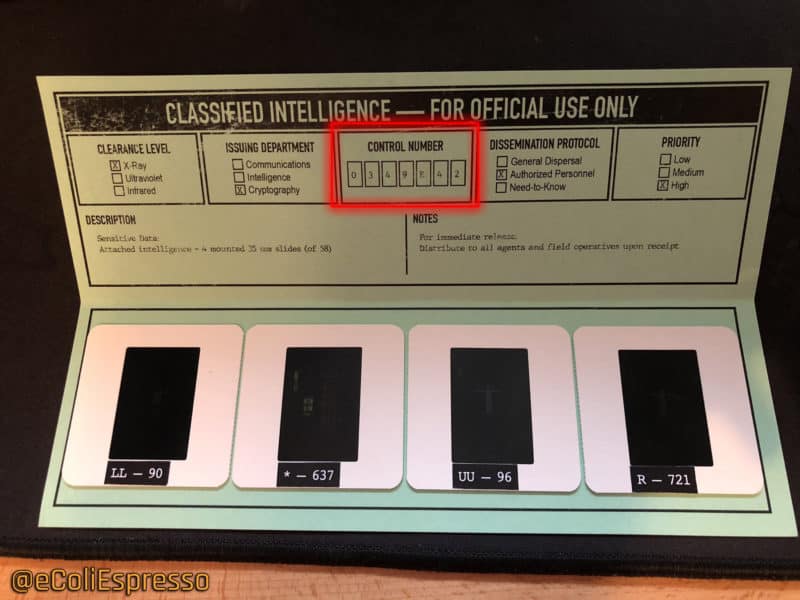
At the bottom of the page, it also said that return on October 28, 2020, at 1 PM PT to unlock the next part of the story.
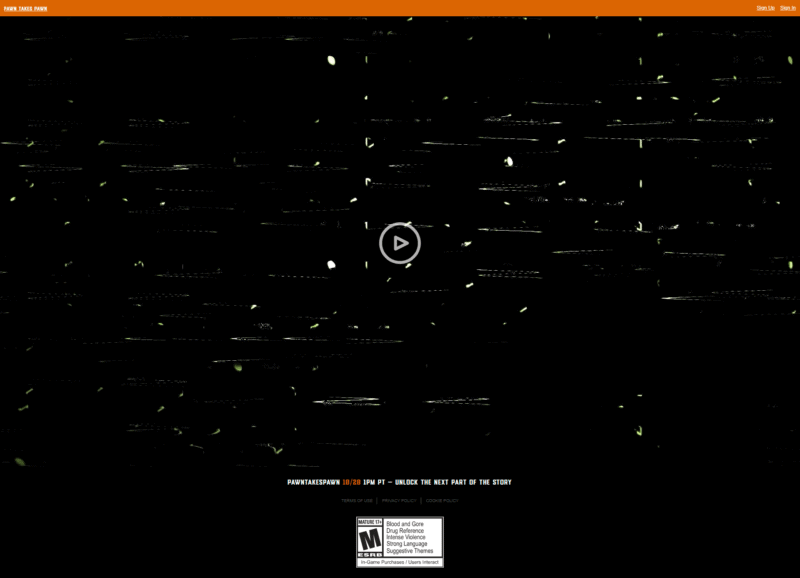
Sonar Coordinates
On October 27, 2020, pawntakespawn.com/deepcover was updated and asked us to obtain deep dive sonar coordinates. We couldn't enter or submit anything until October 28, 2020. The coordinates were found through Call of Duty's Facebook video titled 'The key to the future is knowledge of the past – Know your history.' It had the coordinates in the title and the video that was 59°2'43.4"N 18°20'6.5"E.
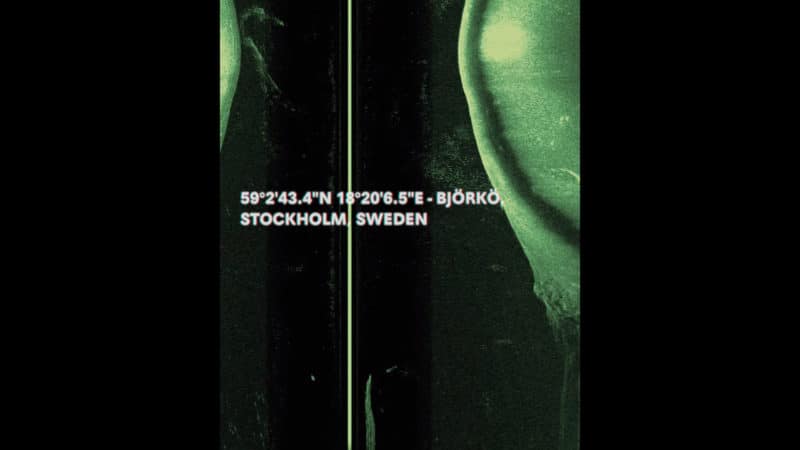
These coordinates matched perfectly with the blanks on /deepcover. On October 28, 2020, we could type in the coordinates and submit that redirected us to a new page pawntakespawn.com/boilerroom. You will see a sketch of a maze on this page.

If you go through the maze starting from the top and exiting at the bottom, you spell out - A - R - D - E - M - T - Y. For now, that is all we need to know regarding the Sonar Coordinates. This map will be useful later when we dive into The Great Underground Empire in Zork.
River Raid Puzzle
At the same time, on October 28, 2020, pawntakespawn.com/codecave was also updated with a new set of instructions on the dot-matrix.
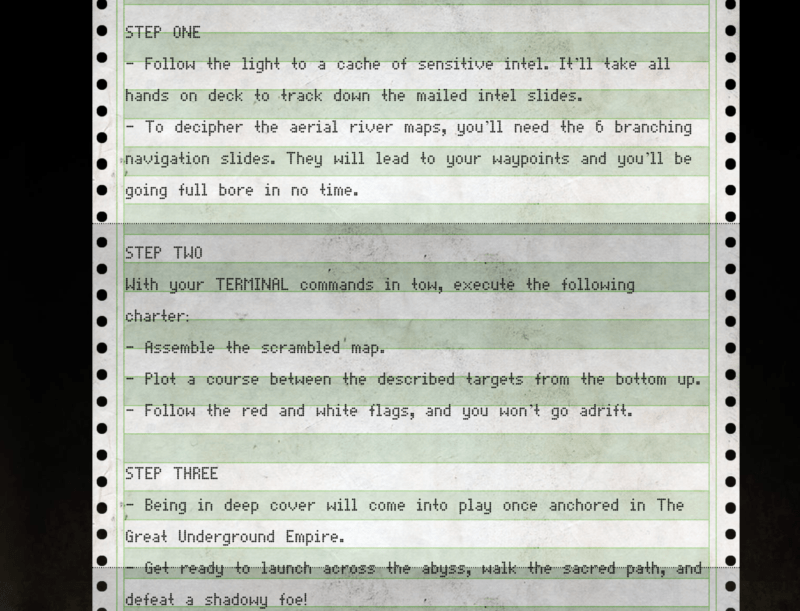
It is also worth noting that on October 28, 2020, there was a new URL engraved on the side of the printer that reads /trailoftruth.
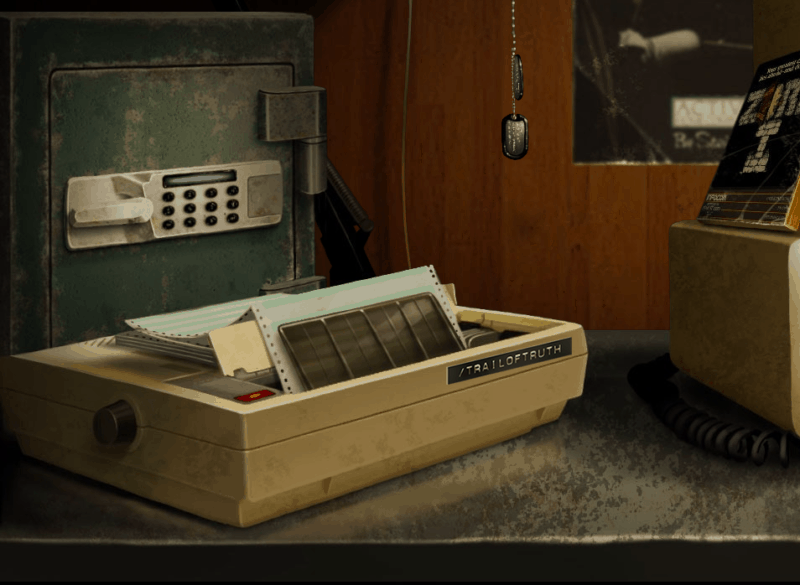
This redirected to a new page that played a video showing a full recap of the PawnTakesPawn story so far.
According to step one on the dot-matrix, you need to go to the main page of PawnTakesPawn and turn on the lamp by clicking it. Upon turning on the lamp, you will see a new URL on the side of the computer /anchorsaweigh.

When you visit the page, you are presented with a page full of new Intel and an audiotape at the bottom titled 'Words are a powerful thing.'
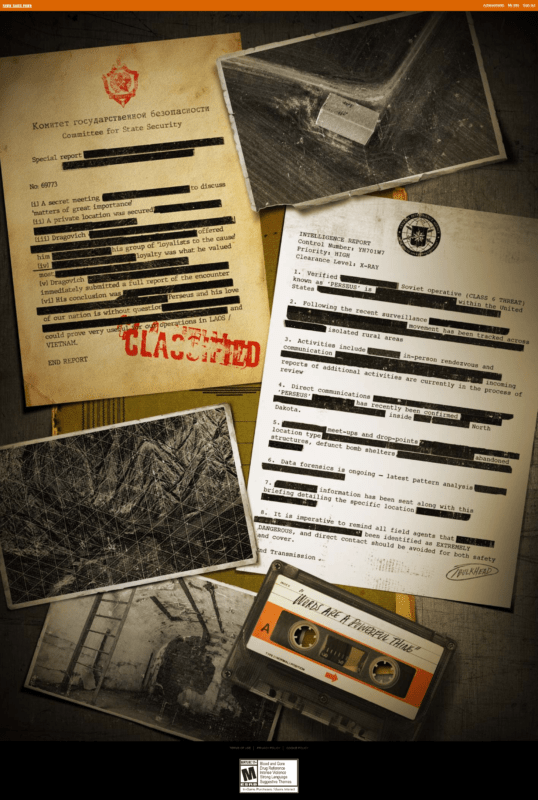
The audiotape played the following:
[/audio]
At the bottom right corner of the white intelligence document, you can see a new URL /bulkhead. When you visit this URL, you land on a page that asks for six keys. It also gives you a clue to 'Navigate the rivers to discover the keys.'
Additionally, there is a River Raid poster in the background that you can click on to browse through six different maps, each color-coded to match the colors assigned to the content creators who received the terminals in the zombie and cold war reveal phase.
Drift0r
JackFrags
MarleyThirteen
MrDalekJD
NoahJ456
ShawnJ Gaming
The six keys can be obtained using specific projector slides that some of the creators got. We can use 1 DIV slides in combination with these six maps to find the keys. We will use the 1 DIV slides created by Cassianx (from Geekypastimes' discord) for a better visual understanding as he has mock images of all the slides.
Slides *-328 and *-489 give us color-coded information with the names of the vehicles found on the six maps. The rest of the slides (*490, *-637, *-892 and, *-936) gives us the key to get the letters from those vehicle icons on the map based on their direction and position.
For instance, if we look at the first column (Cyan Column) in slide *-328, the first letter would be the '2nd Heli.'
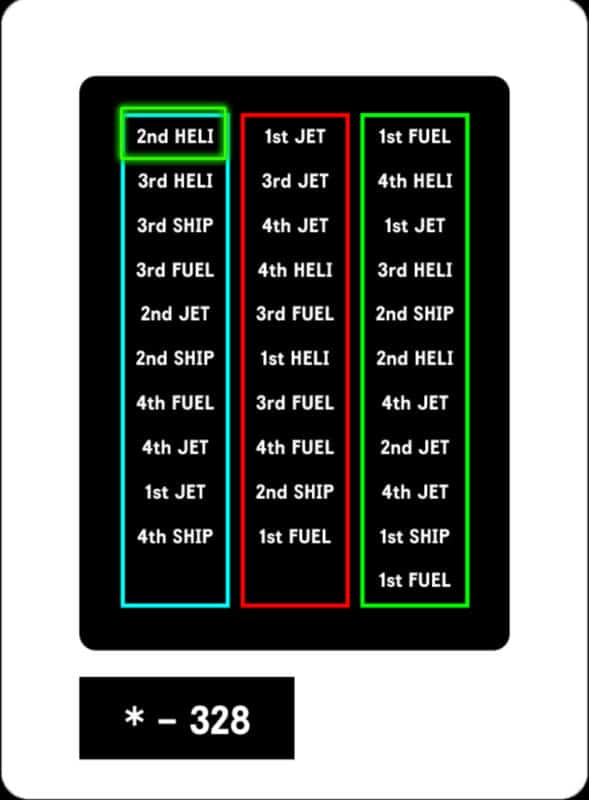
When we go to the Cyan colored map, the second heli (starting from the bottom and going up) is facing right.

We can now go to slide *-490 as it shows the letters represented by the helicopter position and direction. Since our heli is the second one, we will choose number 2 on the slide.
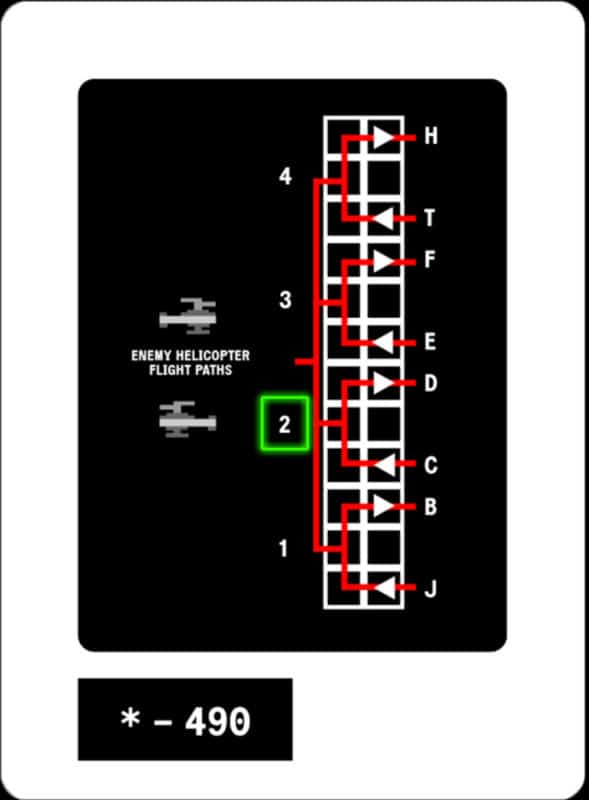
The number 2 represents two letters - D (if the heli is facing right) or C (if the heli is facing left). In our case, the heli is facing in the right direction, so our first letter would be 'D.'
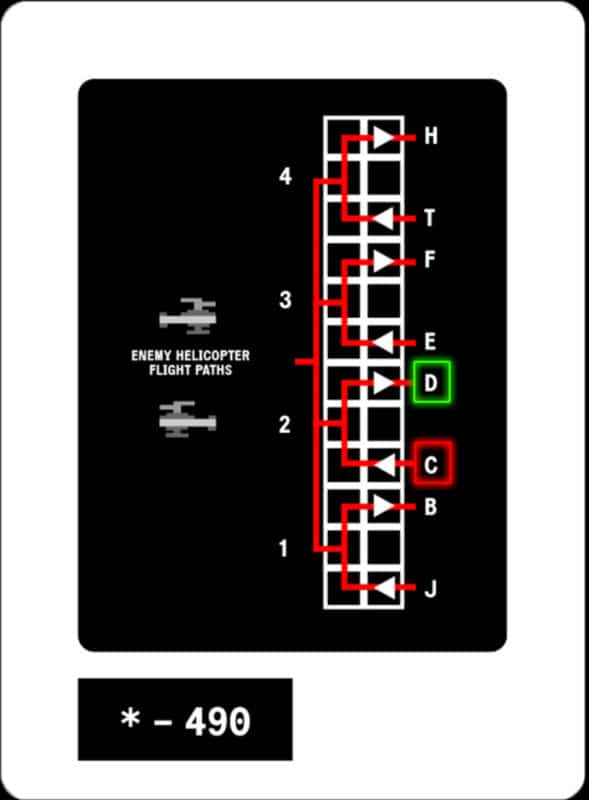
You need to do the same with the next one in the Cyan column, the '3rd Heli.' The 3rd Heli is facing in the left direction, and on the slide, the number 3 represents 'E' facing left. That means our second letter is 'E.' Completing all the letters for Cyan, you should get 'DEVILTOPAY.'
Similarly, doing the same with other maps, you will end up with six keywords.
AMPHIBIOUS
SHELLBACK
SHIFTCOLORS
DEVILTOPAY
BLUEWATER
BULLNUKE
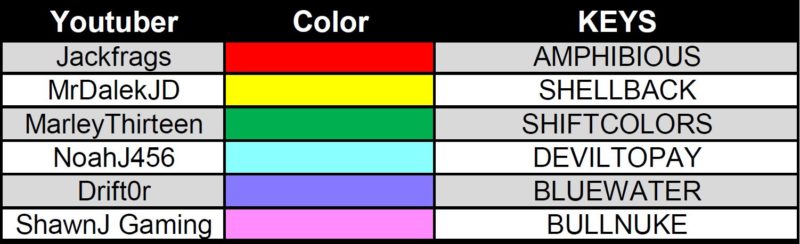
You can now go back to /bulkhead and enter these six keywords to access a new page /fullclip that shows more terminal commands for the content creators.

Red Flag Semaphore Puzzle
The creators used the terminal commands from /fullclip and entered them in their respective terminals to receive three images. Each creator had to put three terminal commands to acquire three images per command. The following is the result.
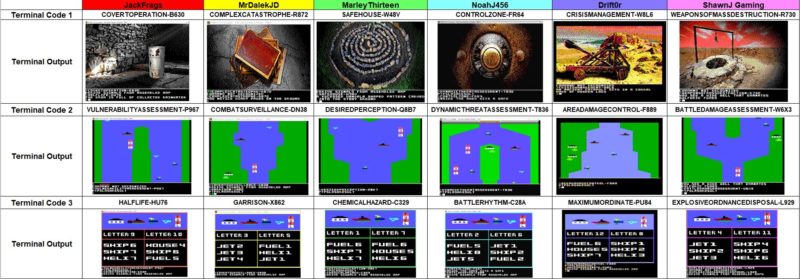
The first set of images refer to Zork, which means eventually we will have to head back into the Zork game to find more clues. The second set is another set of unassembled River Raid map that must be assembled to find the next clue. And the third set once again gives us the names of the vehicles found on the River Raid map. It also states that these are individual letters.
We will use the new River Raid map (after assembly, of course), the new letter keys, and the Semaphores to get a new word. Before we go through the map and the keys, you must know the alphabets in the form of Semaphore. A quick google search gives us the following image:
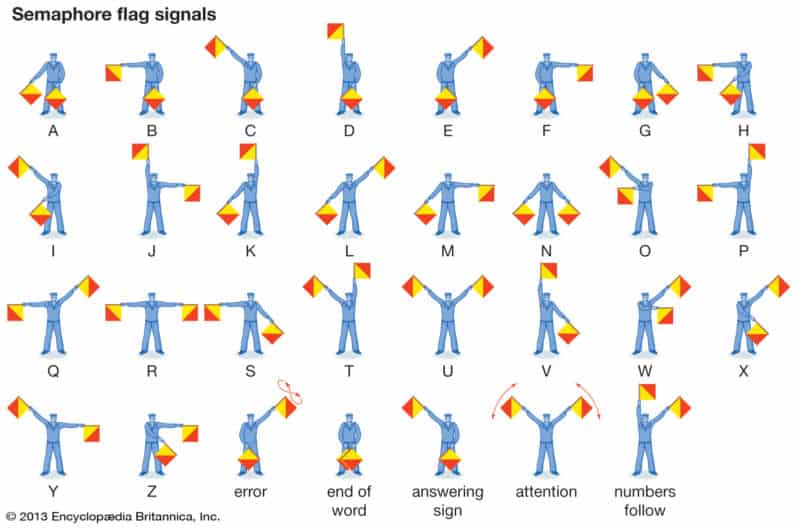
These are the same semaphores as the red flag semaphores sent out to all the content creators.
First, we will join the map pieces from all the content creators to get the following assembled River Raid map image:
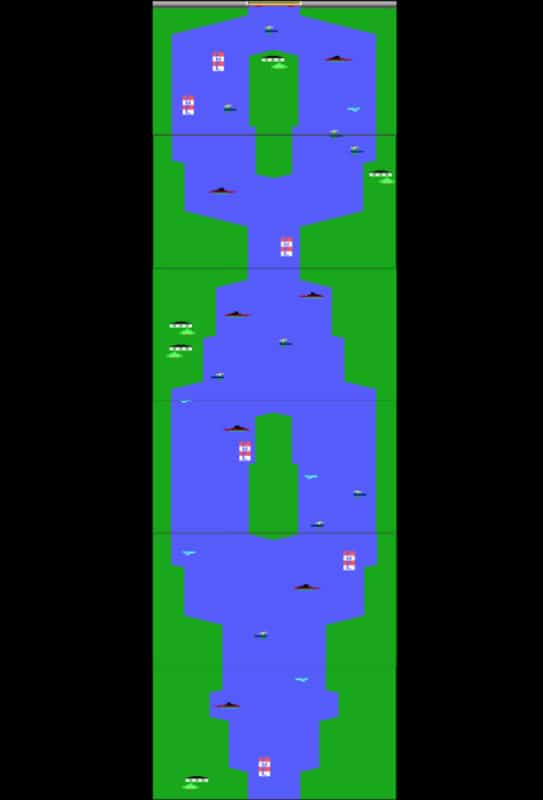
We will then use the keys to identify the pattern to correlate it with the Sephamore positioning to identify each letter.

For example, if we take a look 'Letter 1', it has three words: Fuel 6, Ship 7, and Heli 7. We will find these three on the assembled river raid map image and join them to give us the following pattern.
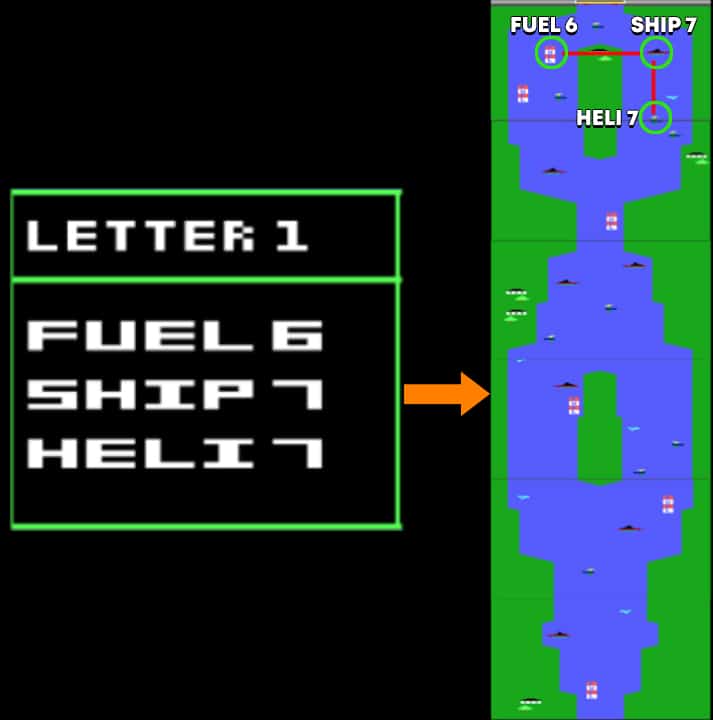
You then correlate the shape that you get with the semaphore to identify what letter it represents. According to our first shape, it is the letter 'B.'
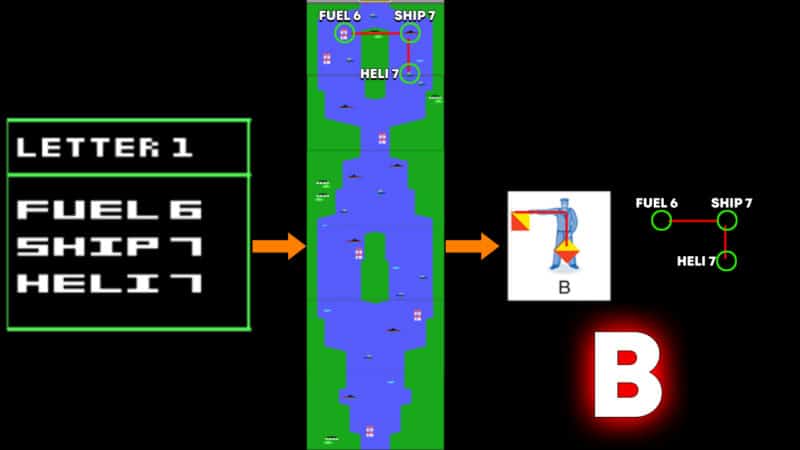
After doing it for all the letters, you will get a word: BRIDGESLAYER.
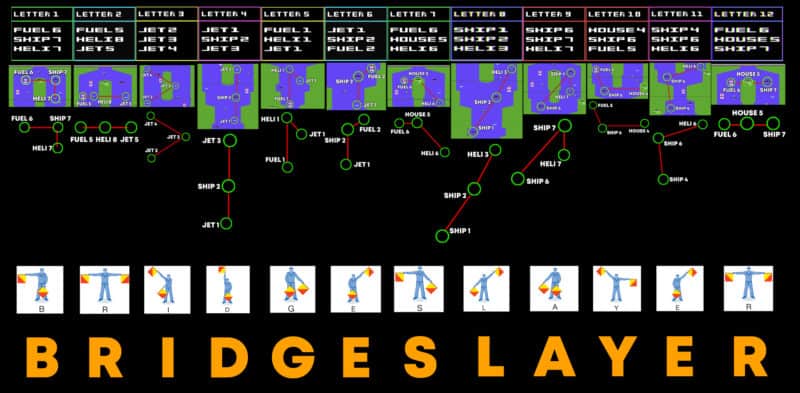
This is a new PawnTakesPawn URL, pawntakespawn.com/bridgeslayer. When you go to /bridgeslayer, you will be presented with yet another video. This is an interrogation video between William Bowman and someone he believes to be 'Perseus.'
At the end of the video, another PawnTakesPawn URL is shown to us that reads /hydrocamouflage.
When you visit pawntakespawn.com/hydrocamouflage, you will be asked to go to Zork to secure three keys to access the site further. At the time, you were asked to return on October 29, 2020, at 1 PM PDT to enter the keys. But, as of today, you can go to the site and enter the keys. As always, it gives you another incantation to be used in Zork: DREADNOUGHT.
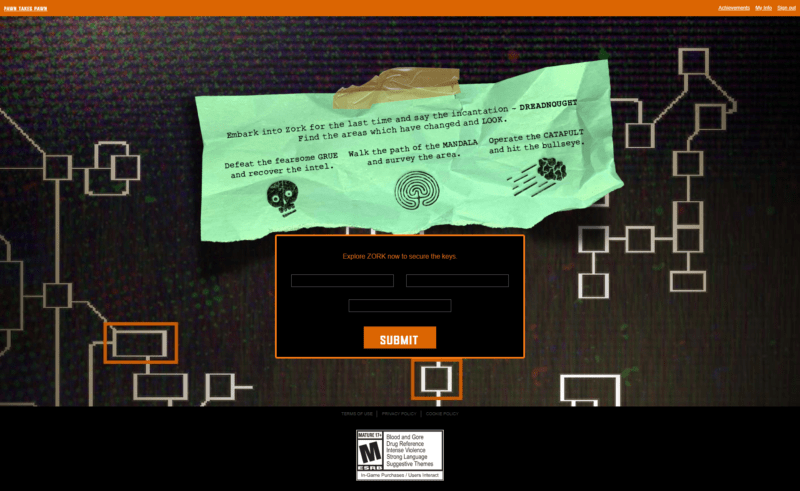
Return to Zork
Once again, you need to head back into Zork to navigate the Great Underground Empire to find the three keys. On October 29, 2020, PawnTakesPawn participants were also sent a new email with a map of the Great Underground Empire. The map highlighted the new areas that are now accessible in Zork after saying the incantation 'DREADNOUGHT.'
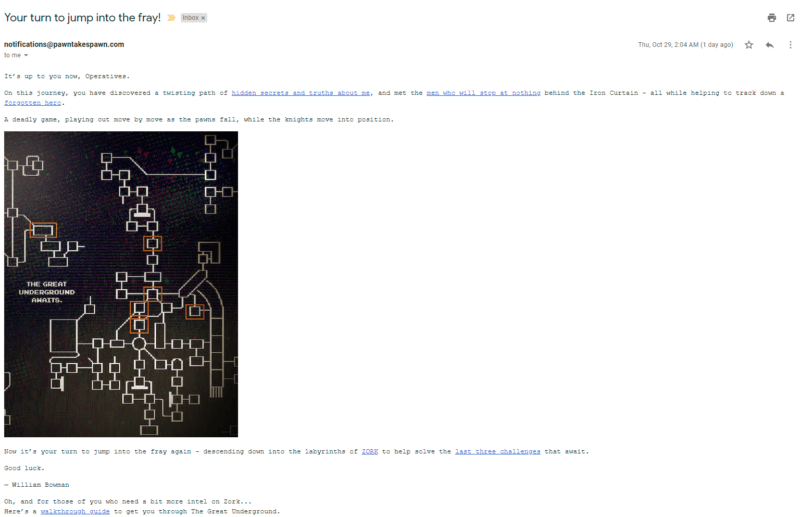
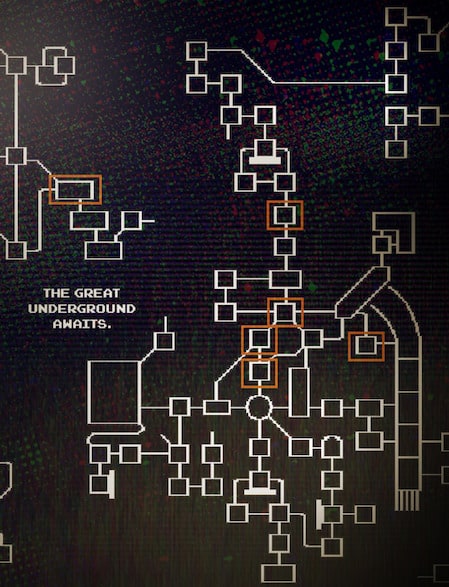
Our video guide below shows you exactly how to obtain the three keys and the six PawnTakesPawn achievements that come with it. We also have written steps to follow along, assuming you start from the Living Room in Zork.
The written steps shown below start from the Living Room. Make sure you are in the living room, and then begin with the commands below. The commands are in a high-resolution picture, so feel free to open them up by clicking for better visibility.
If you are currently at the Sand Silofrom doing the last Zork guide, then you can head back to the living room by going South, South, South West, South, South, West, West, South West, Up, Up, North West, West, West, and West.
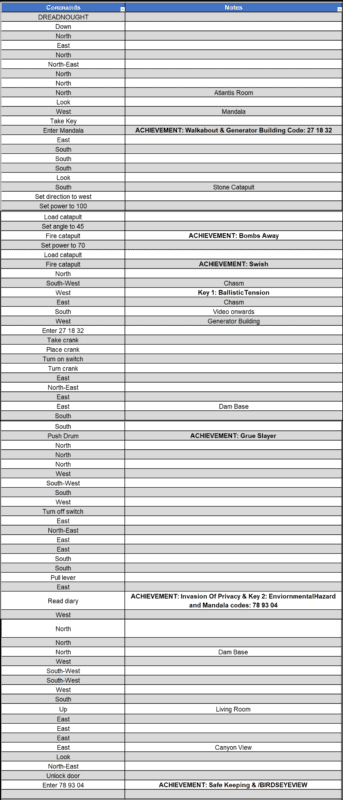
Once you're done with the Zork steps, you will come out with six achievements, two keys, and a URL. The two keys that you get are EnvironmentalHazard and BallisticTension. The new URL you get is /birdseyeview.
When you go to /birdseyeview, you will get another maze sketch similar to the one found on /boilerroom earlier. This maze sketch is the second part of it.
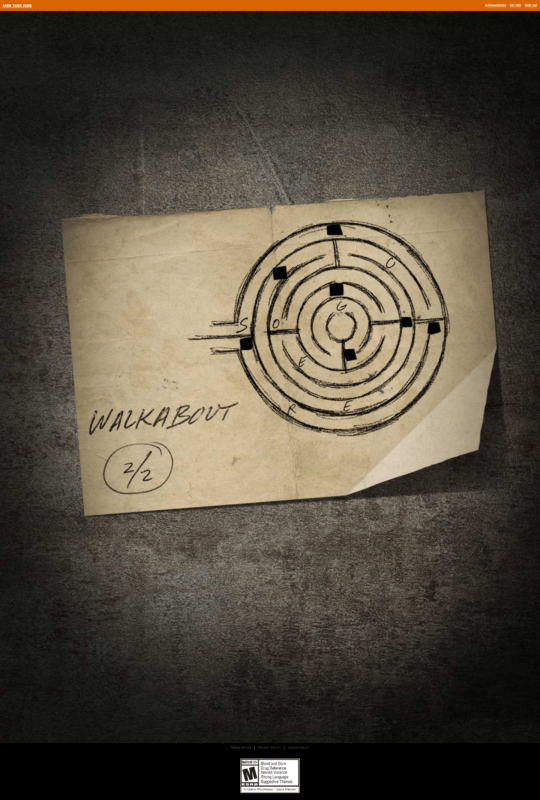
You can correlate the two maze sketches to identify the blank letters. You will end up with the word SacredGeometry. This is your third key.
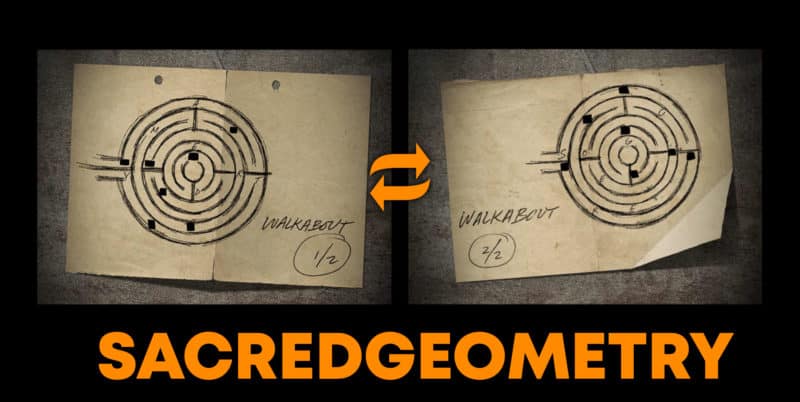
Your three keys are EnvironmentalHazard, BallisticTension, and SacredGeometry that you will use on /hydrocamouflage.
By the end of this Zork phase, you should have achieved six new achievements that include Walkabout, Safekeeping, Bombs Away, Swish, Grue Slayer, and Invasion Of Privacy.

Black Flag Semaphore Puzzle
Fast forward to October 29, 2020 and participants could put the codes in on /hydrocamouflage. Upon putting in the code, you will be redirected to pawntakespawn.com/opensecret, which shows a duffle bag previously mentioned during the interrogation of Bruce Harris, who William Bowman believed to be Perseus.
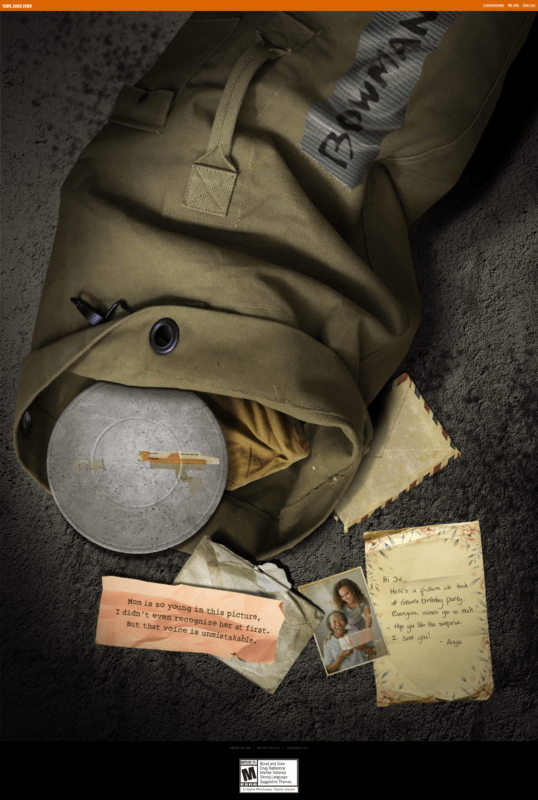
This duffle bag and its content belonged to Joseph Bowman. There is a picture of Angela Bowman with her grandma, along with a small note addressing it. Just at the opening of the bag is a metal piece that seems to be recorded audio. When you click on it, you will be redirected to /voicefromthepast, where you get to listen to a full message Angela Bowman sent to her husband, Joseph Bowman.
Here's the full audio message if you are interested in listening.
[/video]
You will find a floppy disk resting just beside the audio player. You can click on it and you should be redirected to a new page with the URL /harborofrefuge. This page contains terminal commands for the content creators.
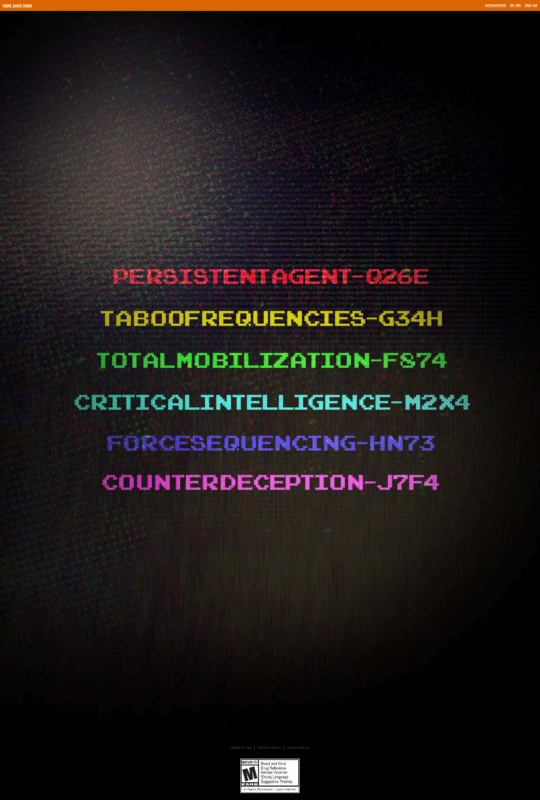
These terminal commands returned some new words that we can put in order of appearance. Each of these images also has a new same URL, /colorcompany. The following are the images that return with their respective terminal commands for each content creator.
NoahJ456
ShawnJ Gaming
JackFrags
MarleyThirteen
MrDalekJD
Drift0r
As mentioned above, the new URL is /colorcompany. When you go to this URL, you will come across an audiotape labeled 'STILL SWIMMING.'

Audiotape:
[/audio]
The tape also has a new URL underneath the label. The new URL is /semaphoreblackout. You will find a 'Nautical Cryptography Dispatch' document containing the color-coded item lists found on the River Raid maps.
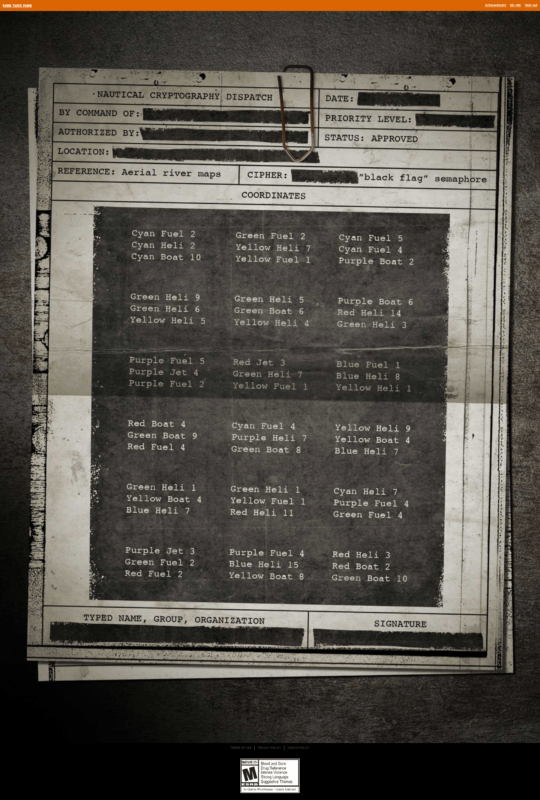
If you remember, we came across six color-coded maps on /bulkhead. We will arrange these maps according to the order of the colored words appearance, as seen with the new terminal commands. If we arrange those images in order, we get the following:

We will arrange the River Raid maps from /bulkhead in the order shown above as well. That will give us the following arrangement:
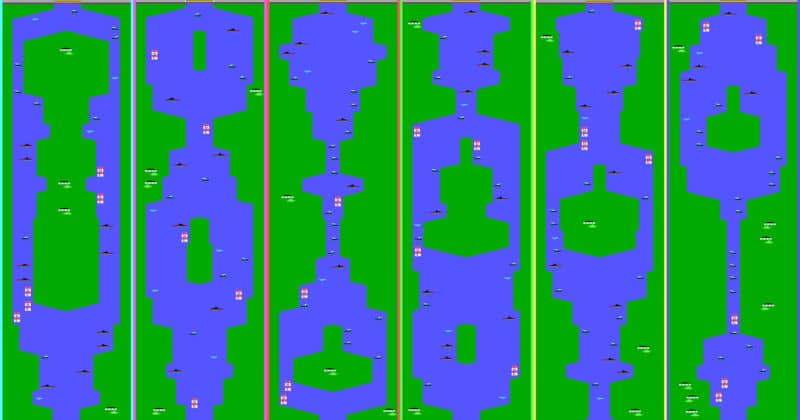
In combination with the cryptography dispatch document and the combined river raid maps, the black flag semaphores will be used to find the next clue. We will use the black flag semaphores arranged by Cassianx from Geekypastimes' discord for better visibility. To refresh your memory, the following are the black flag semaphores.
To find the letters from these semaphores and the combined river raid maps let's take the first letter as an example. Each coordinate on the cryptography document is a single letter. For instance, the first one is Cyan Fuel 2, Cyan Heli 2, and Cyan Boat 10.
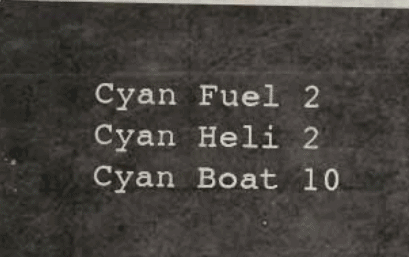
These will be labeled on the combined map, and whatever shape we get, we will match it with the black flag semaphore to get our first letter. According to the first coordinate, our first letter would be 'B.'
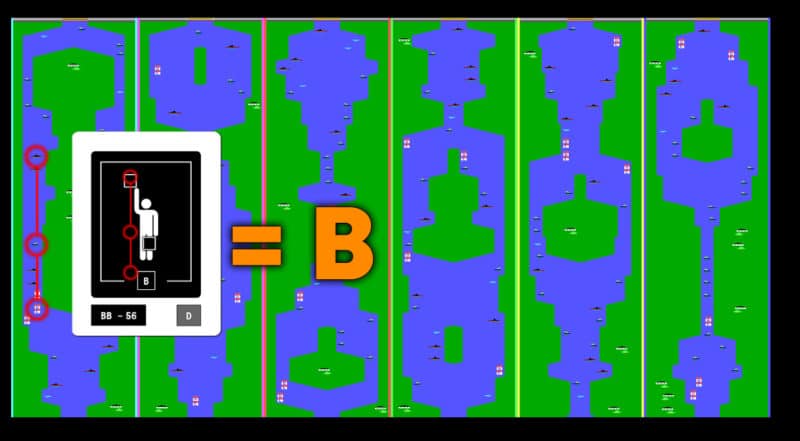
The next two letters from the first row are:

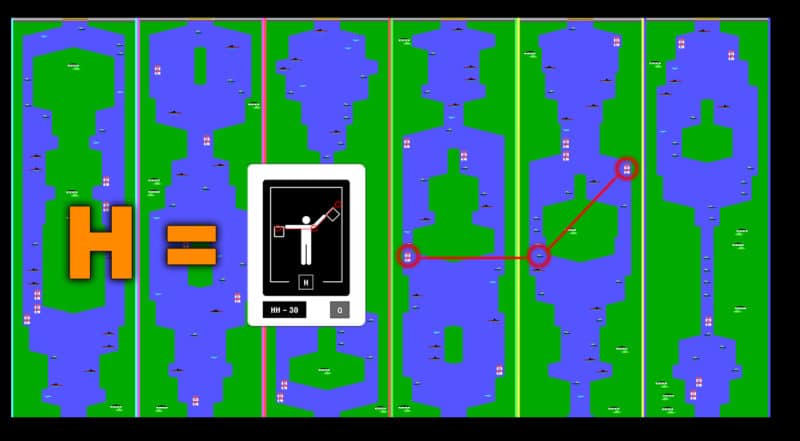
Since we've already gone through the same procedure with the red flag semaphore puzzle, we will skip showing the whole process and jump directly to the final letters we get for each coordinate, as shown below.

These letters are an anagram for a sentence 'NEVER GET OFF THE BOAT.' This is a new PawnTakesPawn URL, /nevergetofftheboat. This URL contains a handwritten letter by Joseph Bowman to Angela Bowman in response to the audio recording she sent.
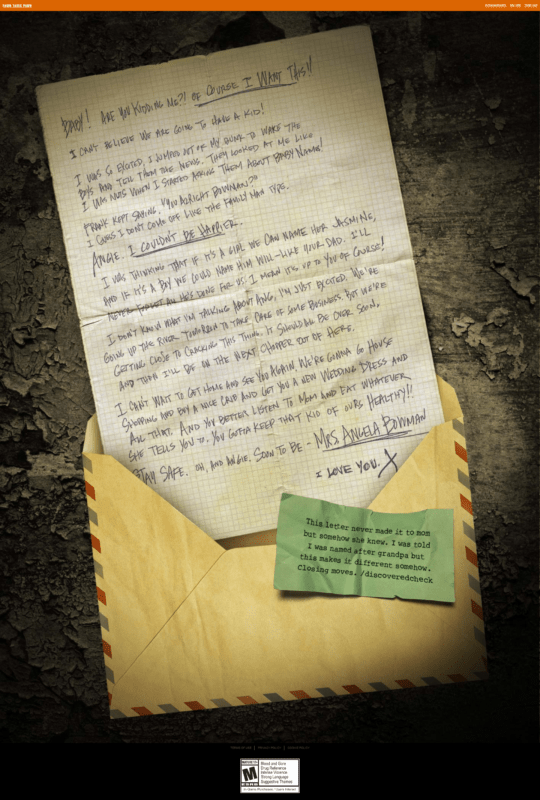
There is also a green self-note by William Bowman that contains yet another URL, /discoveredcheck. Upon going to /discoveredcheck, you will be asked to put in six passcodes. You can also see black flags in the background, hinting at the black flag semaphores.
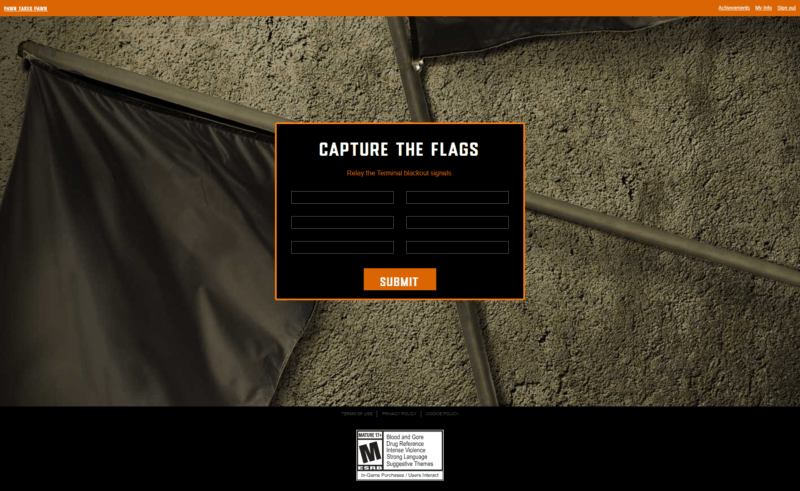
The six codes that go into this site are the words that the content creators got after putting in their terminal codes found on /harborofrefuge.
That means the six codes are:
AIREDALE
HEADWIND
WINDFALL
FREEBOARD
FATHOMS
SEACHANGE
After submitting the six codes, you will be redirected to a new page, /shoreleave containing some more intel, including an intelligence report and a letter to William Bowman from Bruce Harris (the same person who was being interrogated by William in the video earlier).
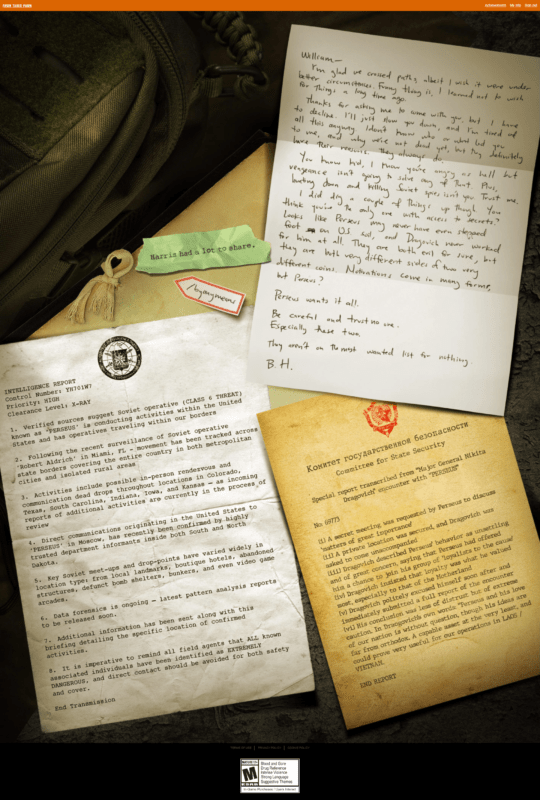
You will also get a new achievement called 'Discovered Check' that says, "You're nearing the endgame."

In addition to the intel documents and a letter, /shoreleave also contains a new URL. The new URL is /byanymeans. Landing on this page gives some more information regarding the new potential characters in the new Black Ops Cold War campaign.
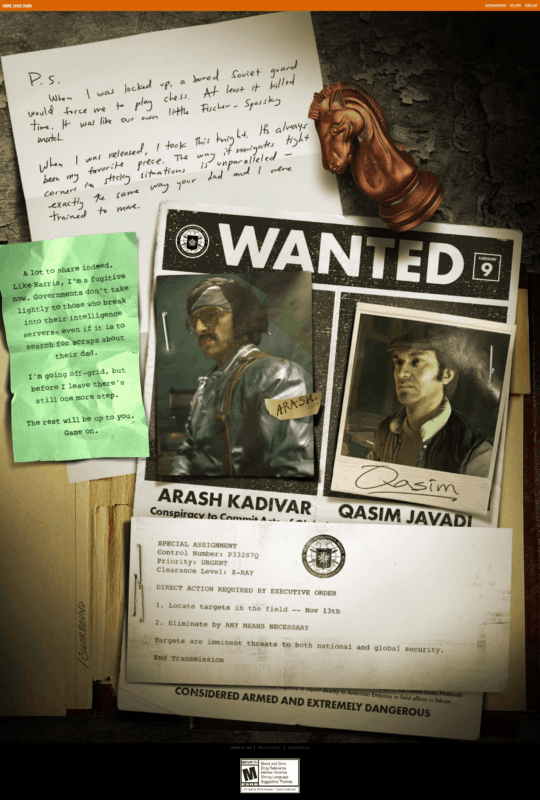
It is a bit hard to notice, but at the bottom left corner of the screen on the package, you will find another URL /colorbound.
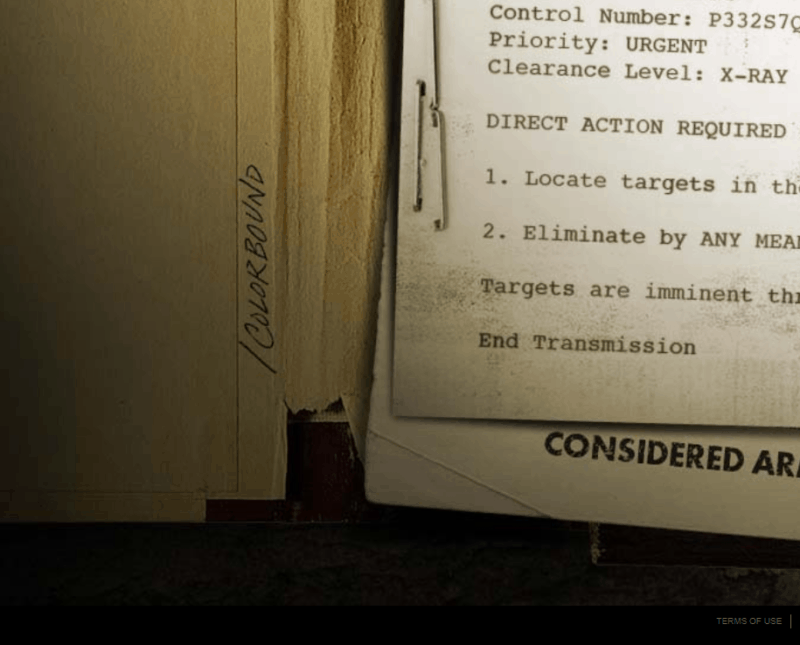
Tangram Puzzle
When you visit pawntakespawn.com/colorbound, you will be prompted to enter one last passcode. It also gives you a hint to find the color keys spread throughout Verdansk and Isolated. Verdansk, as you already know, is the Warzone map, and Isolated is the map of COD: Mobile Battle Royale.
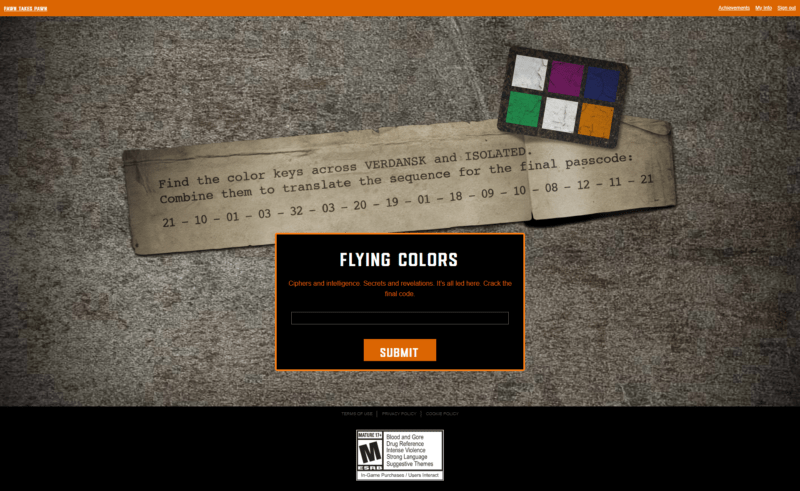
You can also click on the note to get the key that will be used to decipher each letter to get the final passcode.

Luckily, Geekypastimes and his discord community found these odd colors all around Verdansk and Isolated weeks before Phase 7 started. They have been collecting the color keys for weeks and assembled them.
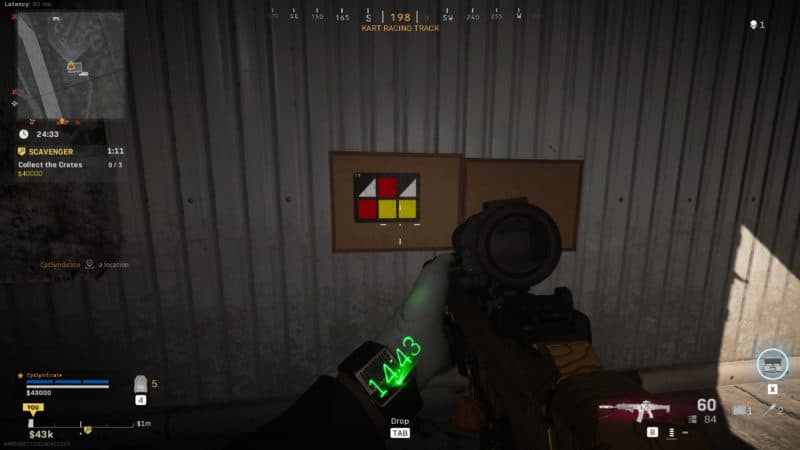
Below you can see the color keys found in Verdansk (left) and Isolated (right), as assembled by Maisdeux on Geekypastimes' discord.
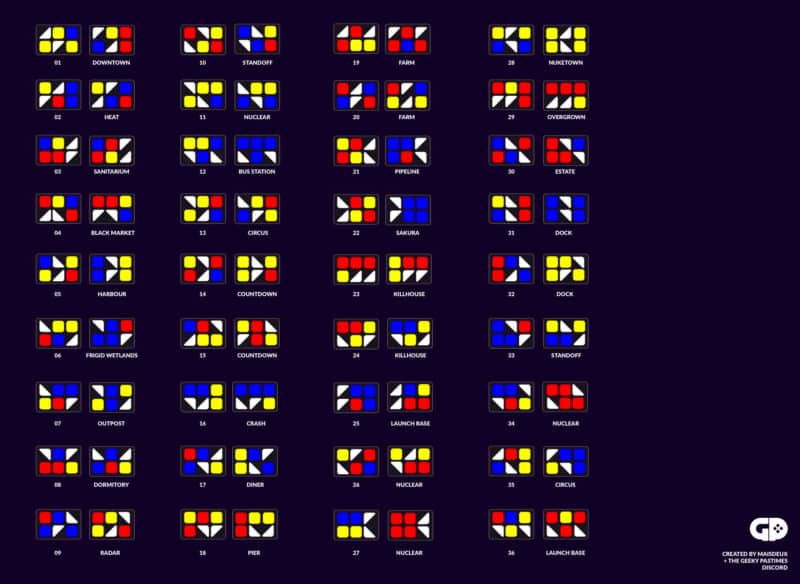
When you combine them as suggested by the note on /colorbound, you get the following final color keys. Once again, thanks to Cassianx on Geekypastimes' discord for the image.
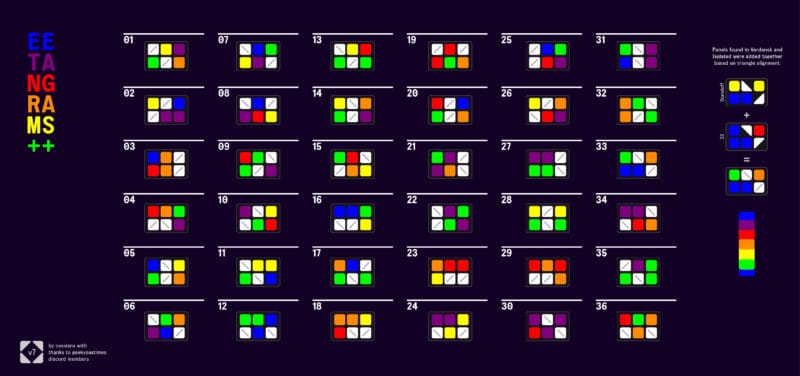
The note seen on /colorbound shows the numbers that we see on the combined version of the tangrams. To get the final passcode, we must use the combined tangrams with the color codes found on /colorbound. This will help us identify what letter/number each number on the note refers to.
For example, the first number is 21.
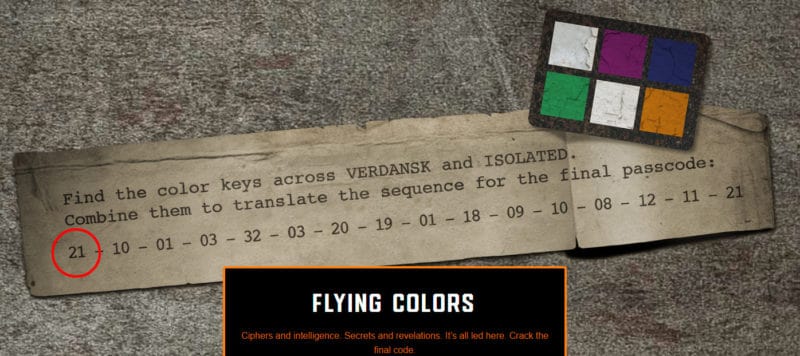
We will see what colors are represented by the number 21 on the combined tangram chart.

The colors represented by number 21 tangram are Green, Purple, Purple, and Orange. You can refer to the color codes from /colorbound and find this set of colors and the corresponding letter or number.

According to the color code sheet, the first number is '1.' The next one will be 'P', as shown below.
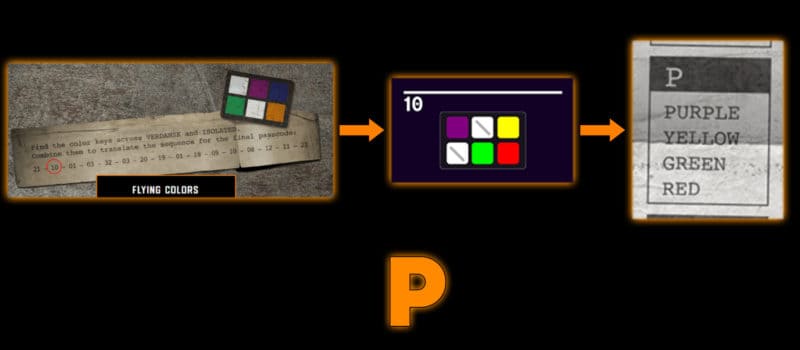
Once you've completed all the letters, you will end up with the following:
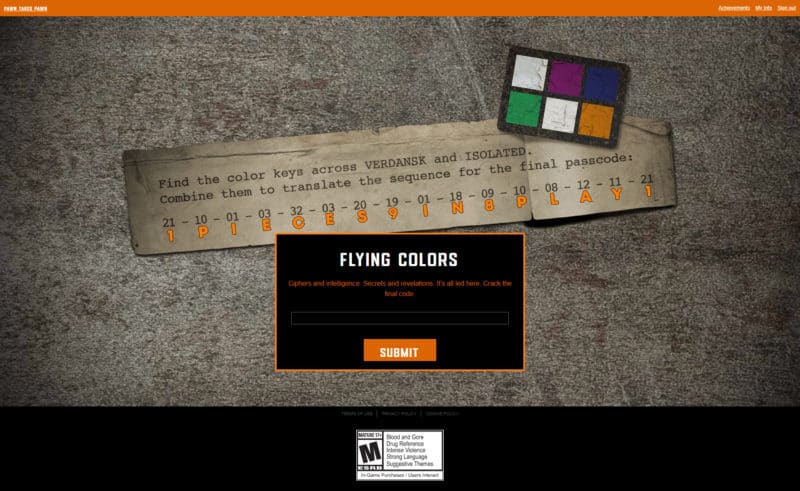
Your final passcode is 1PIECES9IN8PLAY1 that you must enter to crack the final code. Once you enter the passcode and submit, you will be redirected to one final URL, /perseusisoutthere. It's a video of William Bowman talking to the participants.
You will also get your final achievement called 'Dead Draw' that will also have a new page, /deaddraw, where you can receive redeem codes to obtain rewards in Modern Warfare & Warzone, COD: Mobile, and Black Ops Cold War.

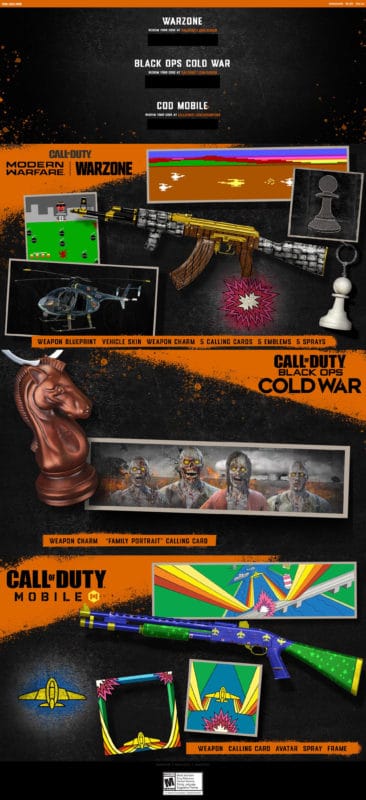
Claim Rewards
You can also claim exclusive rewards that can be used in all Call of Duty titles that this massive easter egg has touched - Modern Warfare, Warzone, Mobile, and of course Black Ops Cold War. Here's how to claim them:
Visit [the page](https://pawntakespawn.com/colorbound) and if you are prompted for a password, enter: 1PIECES9IN8PLAY1.
After viewing the video, and provided you are logged in, you should unlock an Achievement.
You will also get a button prompting you to claim the rewards below.
Call of Duty: Modern Warfare and Warzone
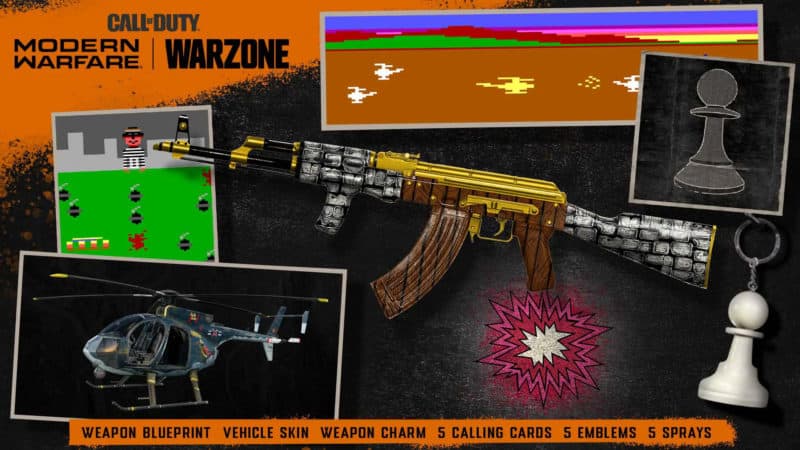
The rewards for use in both Call of Duty: Modern Warfare and Warzone are a new weapon blueprint, vehicle skin, weapon charm, calling cards, emblems and sprays.
Call of Duty Mobile
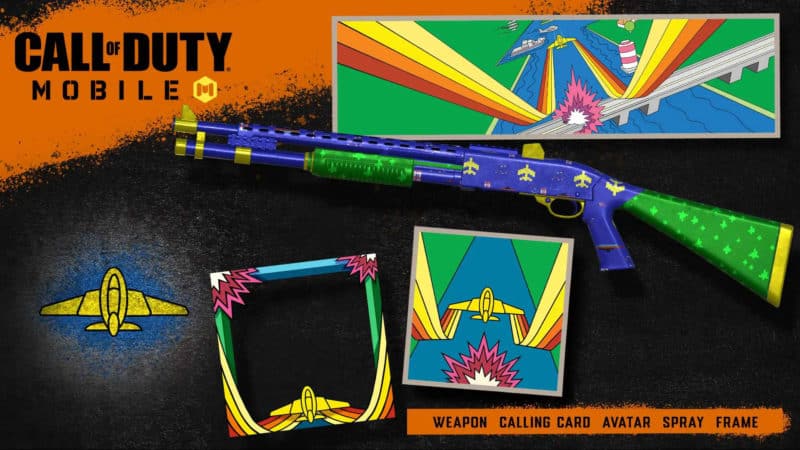
The Call of Duty Mobile rewards are a new weapon (shotgun), calling card, avatar, spray and frame.
Call of Duty: Black Ops Cold War
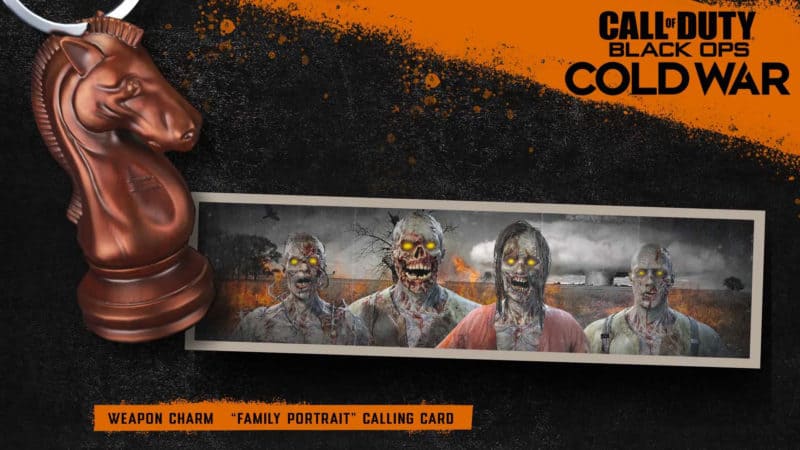
The rewards that you can take into Black Ops Cold War are a weapon charm and the "Family Portrait" (zombie) Calling Card.
Final List of Pawn Takes Pawn Achievements
After the completion of the full Pawn Takes Pawn easter egg, you should have a total of 66 achievements (65, if you haven't received the mail with a redeem code that allows you to get one more achievement). Below is a full list of achievements that you should have by now.
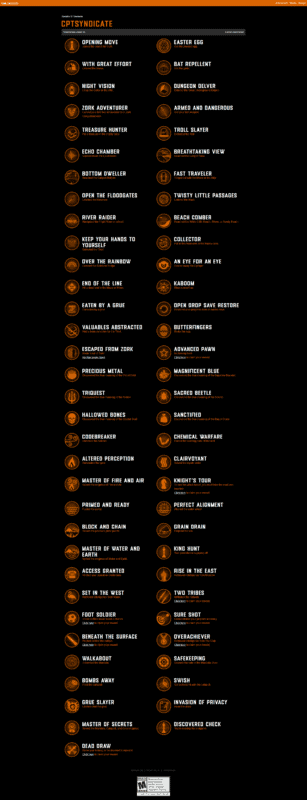
The above picture is a high-resolution image, click on the image for better visibility.
Phew! That concludes our Pawn Takes Pawn guide. If you have any questions regarding any of it, feel free to comment below, and we will try our best to answer you.