Firebase Z is the second map released for Black Ops Cold War Zombies. Firebase Z brings back several classic gameplay mechanics and features such as "soul charging" and round skipping to progress the main easter egg. This means that as more time passes since the map was released, players will certainly find additional "round manipulation" techniques to complete some steps during the early rounds, which might not be possible otherwise. We've adopted a similar strategy in our guide to obtain the power cell for the RAI K-84 in the early rounds.
Before proceeding with the main easter egg, ensure that you have turned on the main power by activating the three main Aether Reactors around the map. It is relatively easy as you can do it by following the on-screen indicators to reach each reactor. You also need to build the pack-a-punch machine, which is done by returning to Ravenov after turning on power by activating all three reactors. You may check out our guide on how to turn on the power and build the pack-a-punch machine here.
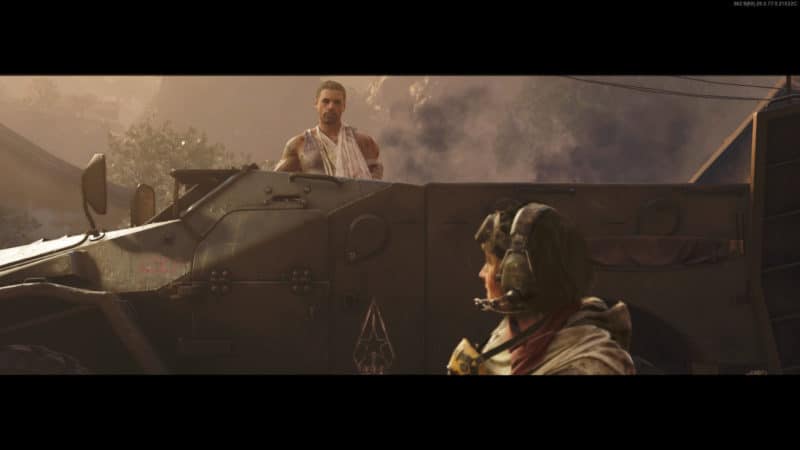
The Dark Aether story continues in Firebase Z where you unveil the story further by performing a brand new easter egg that leads up to the rescue of Samantha Maxis, who is no stranger to the zombies community. In this easter egg, you (the Requiem team) are tasked to find Samantha and rescue her from the Dark Aether. You and the team visit the Firebase to find her only to discover she has been sent to the Dark Aether.
You are then tasked to retrieve her from the Dark Aether by opening a portal that takes you to it. You have a new ally named Ravenov who is a Spetsnaz but against the Omega (enemy) group. You also have Dr. Peck who was leading the zombies research at Firebase for the Omega group. You will need to carry out certain steps to create a truth serum that is used on Dr. Peck, so that he may spill the truth about reopening the portal.
According to Dr. Peck, you need the memories of three fellow colleagues to open the portal and locate Samantha in the Dark Aether. The names of the three scientists are Brahms, Sokolov, and Zhabin. These scientists have turned into Mimics (a new elite zombie in Firebase Z) who can disguise as different salvage drops on the ground. You have to use an essence trap to trap these Mimics and bring them back to the Data Center to reveal the information via Memory Transference Station.
After collecting all the information, the mainframe is activated and the portal is opened, only to then destabilize. After talking to Dr. Peck he reveals that there are three Aetherium crystals around the map that can power up the portal. You find them, one of which requires the wonder weapon RAI K-84, and insert them into the three Aether Reactors to reopen the portal. Once the portal opens, it shuts off once again thanks to Dr. Peck's cunning plans.
Finally, the Satellite dish at the base is used as the medium to power the facility and reopen the portal after which Samantha comes out of the portal. As Samantha is leaving with the Requiem team, they are faced by the giant Orda who is the final boss on the map Firebase Z. Defeating Orda will finish the main easter egg of Firebase Z.
Video Guide
The Truth Serum
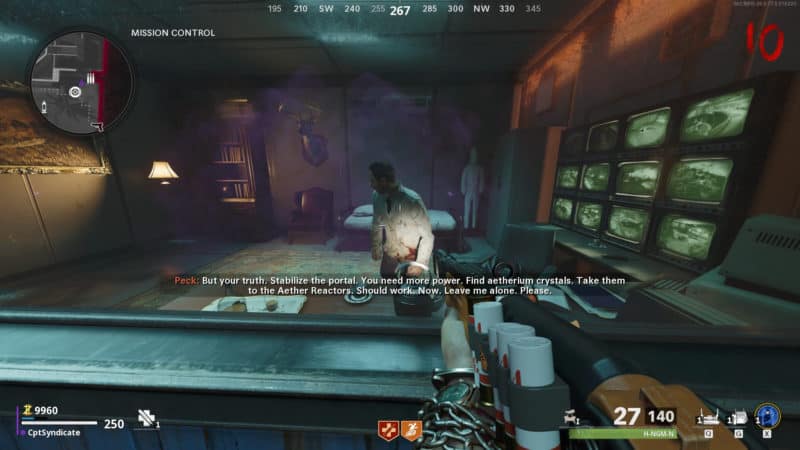
Assuming you've already turned on the power and built the pack-a-punch machine, we will proceed to the easter egg's truth serum step. After turning on the power, wait for Peck to call you to speak to him at Mission Control. This is where one of the Aether Reactors is located to the far left of the map next to Scorched Defense.

Go to Peck, and interact with him to speak to him. Wait for Peck to finish talking, and you will notice that he doesn't hold his end of the bargain to return Samantha Maxis upon turning on the power, hence the reason we need the truth serum.

After he's done talking to you, Ravenov will ask you to meet him. Head back to the spawn and talk to Ravenov again. Once he is done talking, he will give you his ID card that can be used to open up various lockers containing the compounds for the truth serum that are located around the map.


Take the ID, and make your way across the street from Ravenov and enter the building with the purple arrow. This building is called Equipment Storage. You will find your first locker here. You will see a keycard access point on these lockers, so they are not hard to identify.

Interact with the locker to swipe the card, open the locker door, and reveal the first compound called 'Compound S16.'

The second locker is located in the Engineering building next to the OPC dome when you go through the left gate from the helipad area once you go through the portal. This compound is called 'Compound 36.'


The third and final locker is located in Colonel's Office in the Military Command Control Room building. This compound is called 'Compound P65.'


After getting all three compounds, make your way to the Field Hospital past the Barracks (reached via a middle gate from the central helipad area).

You will find a chemical mixer on one of the tables inside. Use it to mix the compounds.

As the mixing comes to an end, several hellhounds will spawn, so be careful when dealing with them as they do quite a lot of damage.

After taking care of the hellhounds, interact with the mixer to transfer the mixture to the Gas Dispersal Device.

After transferring, you will be able to pick up the whole device.

Pick it up and take it to the OPC platform. You will find an Air Conditioning unit that will be directly above Peck's room. Place it on top of the air conditioning unit.


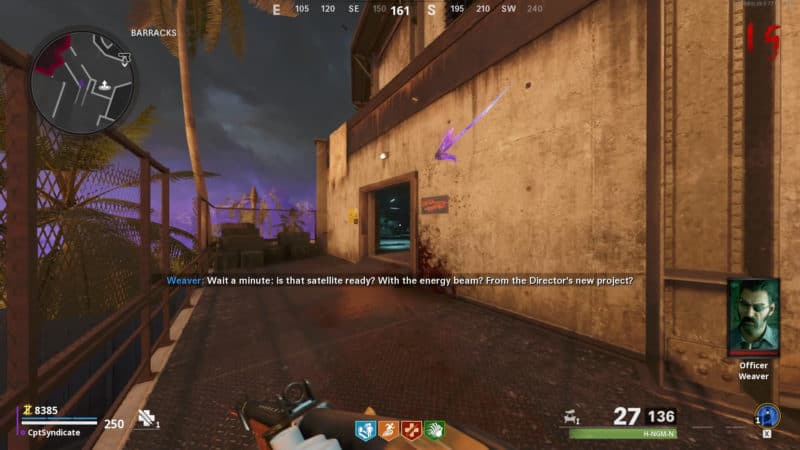
After putting the device on the air conditioning unit, return to Peck, and he will have a long conversation with you (including some dancing). He will mention the names of some scientists. The names are Zhabin, Brahms, and Sokolov. You need to find them as they have been turned into Mimics. More on that in the Mimic step below.


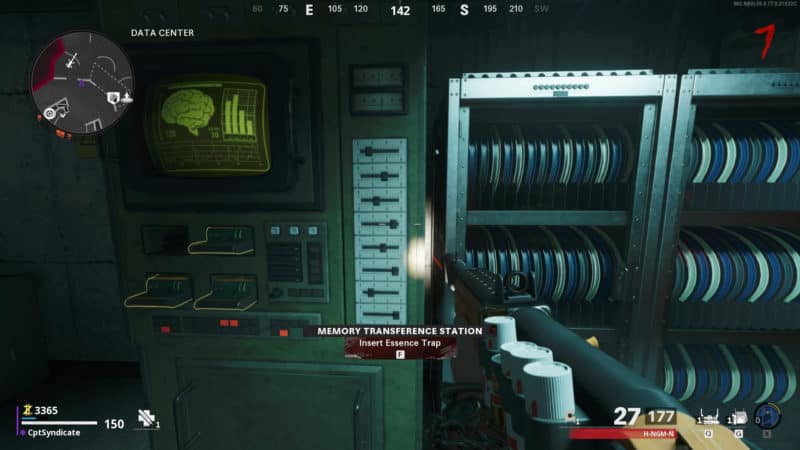
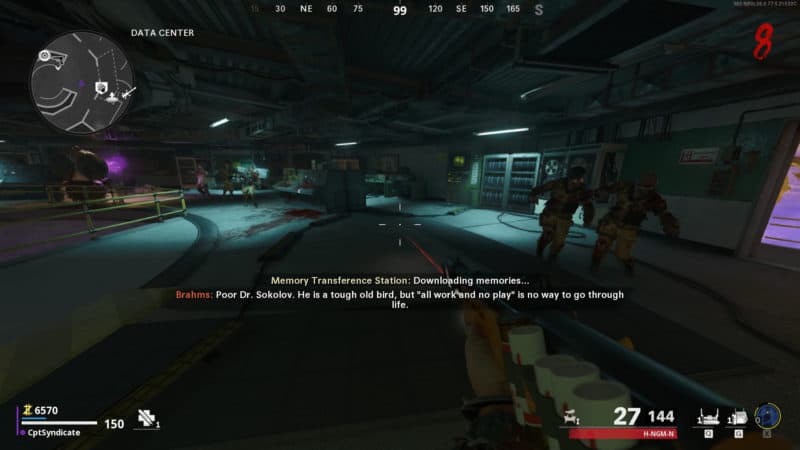
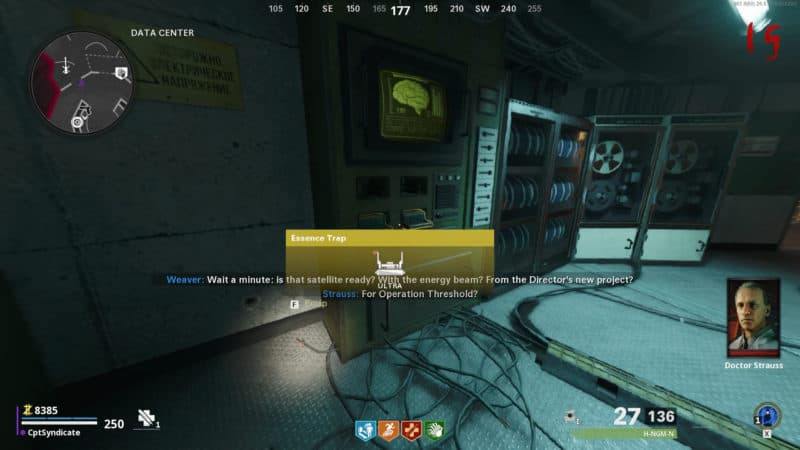
Once he is done talking, he will ask you to go to the Data Center. Make your way to the Data Center and interact with the Memory Transference Station to unlock it.


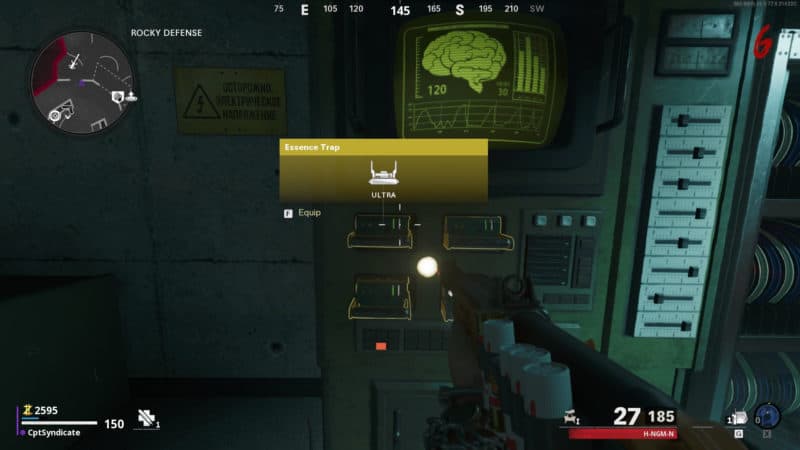
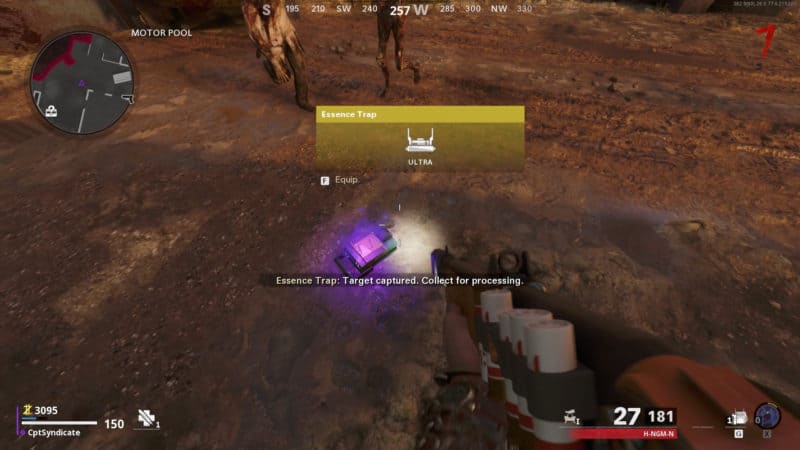
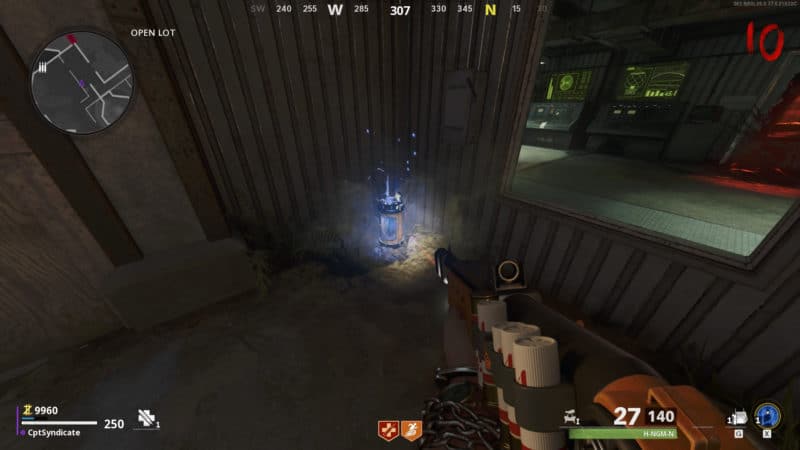
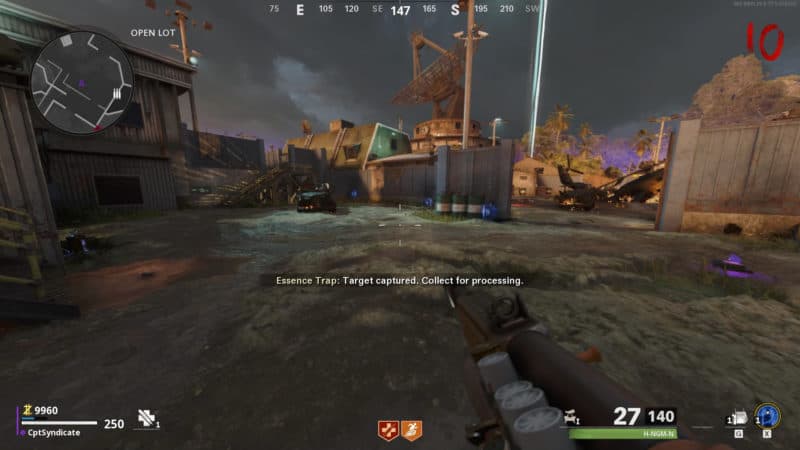
Once unlocked, you will be able to pick up the Essence Trap that can be used to trap the zombies to download their memories. There is also a side easter egg associated with the essence trap called the Safe Easter Egg.

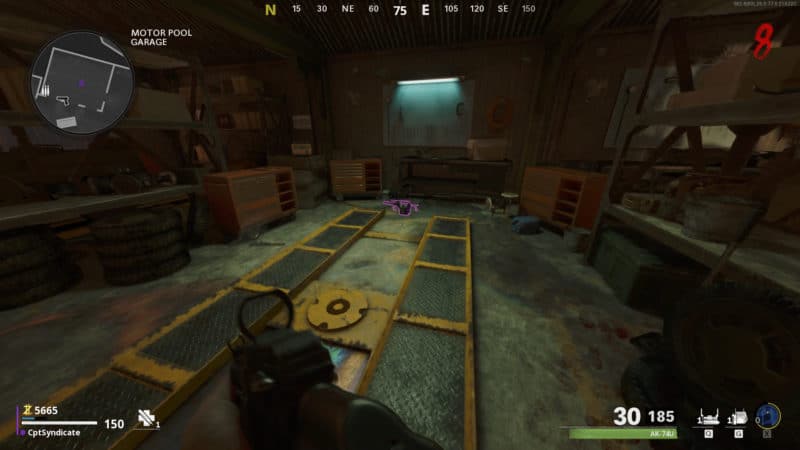
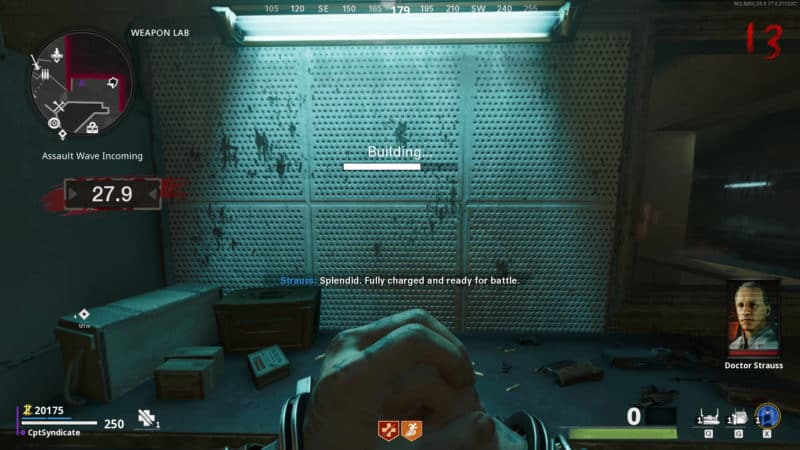
Now, as far as the main easter egg goes, the essence trap is used to collect three scientists' memories (Zhabin, Brahms, & Sokolov), but we will do that after collecting some RAI K-84 wonder weapon parts. We do this first, in order to get the power cell early, or else it doesn't spawn until after Round 15. The Mimic step will be done after the RAI K-84 wonder weapon parts collection. RAI K-84 Wonder Weapon Make your way to the Weapon Lab and collect the RAI K-84 blueprint off the wall.

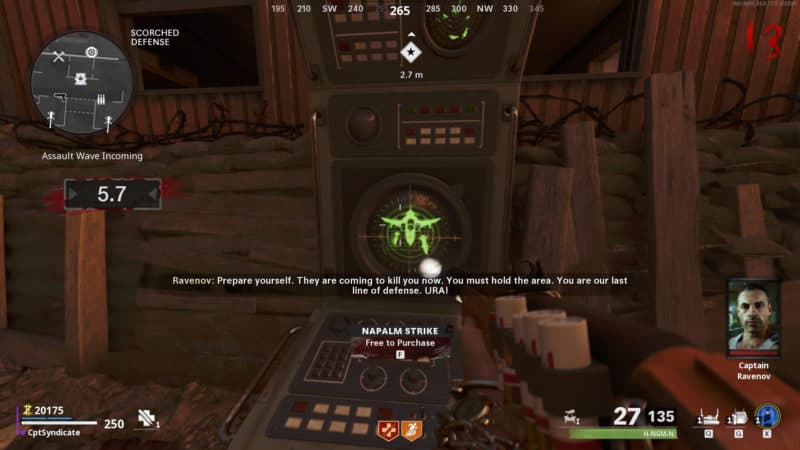
Then make your way to the Scorched Defense area next to Mission Control, and get Dimitri's eyeball by gauging it out. Dimitri's body will be resting next to the crashed tank to the rightmost section of the Scorched Defense area.

Interact with the body, and a mini cutscene will play where your operator will gauge the eye out. Don't worry - the zombies won't attack you during the cutscene.

Return to the Weapon Lab, but before proceeding, keep one zombie alive at the end of the round and trap him using the essence trap to make the next steps more manageable for you. When the essence trap turns purple that means that you've successfully captured the zombie. The zombies stay in the trap for 3 minutes before escaping and destroying the essence trap in the process.


Now, use Dimitri's eye on the Retina Scanner to unlock the computer, and the computer desk drawer will open up, revealing a locker key.


Pick up the key and make your way to the Barracks area once again. You will see two green buildings labeled '1' and '2.'

You will find locked lockers inside the Barracks. Keep opening up the lockers until you hear a Mimic spawn.

Once a Mimic spawns, kill him, and he should drop the Barrel Assembly for the RAI K-84. Sometimes you need to open multiple lockers to get the right Mimic. Multiple Mimics can spawn.


nextpage
Dartboard Puzzle
This is also part of the RAI K-84 wonder weapon, but we've separated this under its own heading for your better understanding. After getting the Barrel Assembly, make your way back to the Weapon Lab and use the computer.
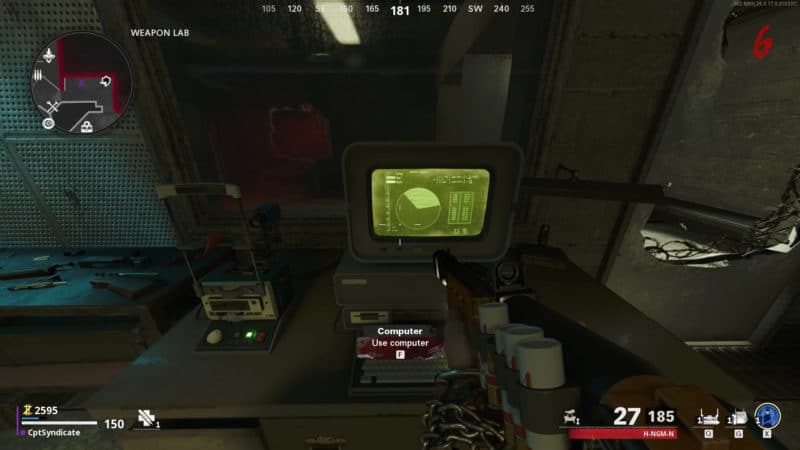
You will notice a small section moving in the clockwise or anti-clockwise direction. Earlier, we trapped the zombie using the essence trap specifically for this step, so as to see where the section stops every time.
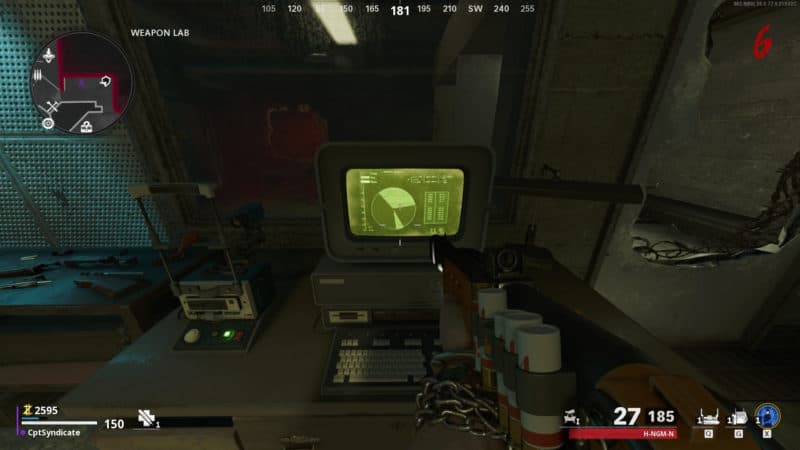
The section will keep going in a clockwise motion and stop at a certain point before moving back in an anti-clockwise direction. You need to take note of the points where the section stopped before it changed the direction. It will do this three times. So, you will get clockwise - anti-clockwise - clockwise motion.
When the section stops, you will hear a very distinct and unique sound. It is useful if you haven't trapped zombies and running around avoiding them. Whenever you are avoiding the zombies, you can quickly check the computer screen upon hearing the sound.
The circle represents a Dartboard. You will notice that the section keeps changing its shade to light and darker shade when moving in the clockwise or anti-clockwise direction. For us, the section moved to 7 (clockwise direction) and stopped for a bit, then started moving in an anti-clockwise direction until it stopped at 9. Finally, it kept moving in a clockwise direction until it stopped at number 18.
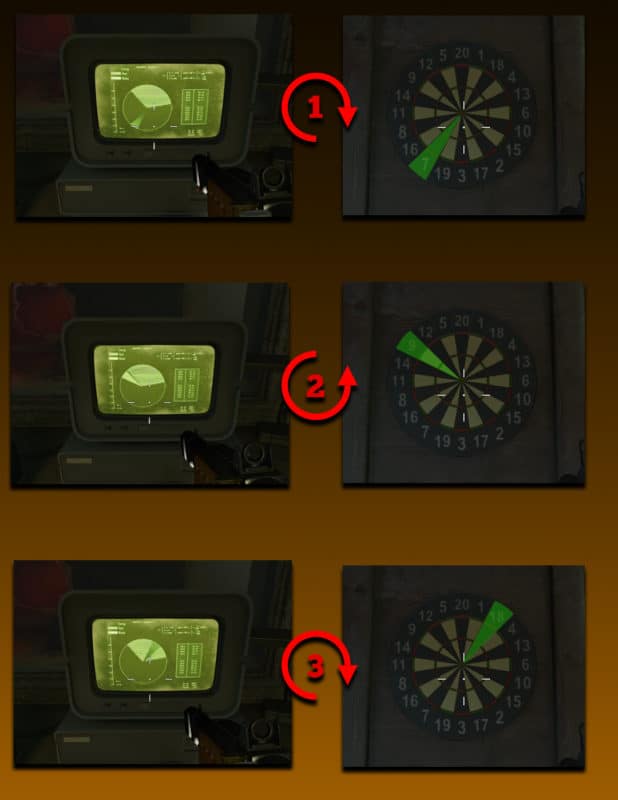
After noting down your section positions, make your way to the Village Mess Hall located to the left of the pack-a-punch machine. You will find a Dartboard on the wall.
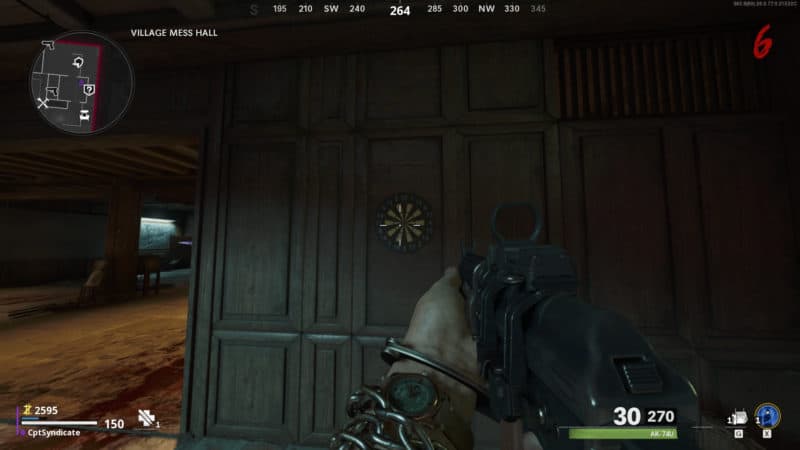
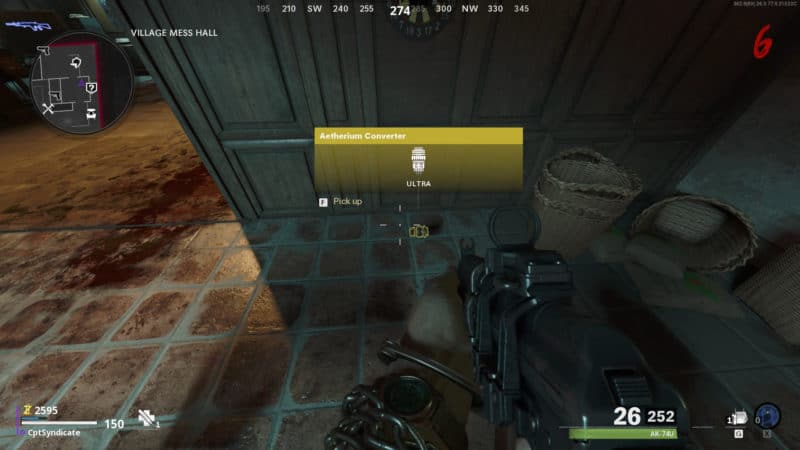
Shoot the numbers or sections in the order you saw on the computer screen in the Weapon Lab. Do not use any burst-fire rifle or a shotgun. You need to be precise. After shooting the numbers/sections, shoot the bullseye to open a hidden compartment revealing an Aetherium Converter.
Those are all the parts we need for the RAI K-84 for now. There's one more part which we will get to shortly after. Now we need to do the Mimic step we talked about earlier. The Mimic Step As mentioned before, we need to find three Mimics in three specific locations. The spawn order of these Mimics is completely random in terms of scientists, but they always spawn in specific locations. There's also one more location where you will always get a wrong Mimic.
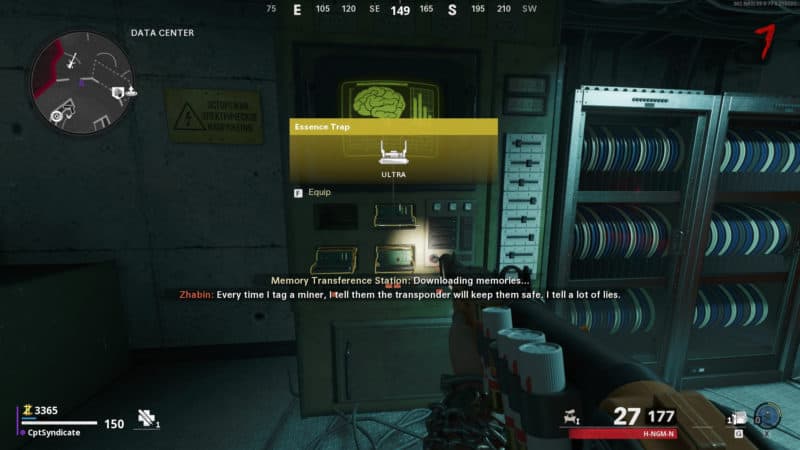
Before proceeding with this step, we highly recommend turning on the captions as when you insert the essence trap in the Memory Transference Station after collecting the Mimic, the dialogue will show the name of the character speaking. If the name is one of Peck's scientists (Zhabin, Brahms, or Sokolov), you captured the correct Mimic.
Head back to the Data Center and grab another essence trap from the Memory Transference Station. These essence traps spawn infinitely until you've captured all the correct Mimics. After that, you will be able to get the essence traps but they will run out.
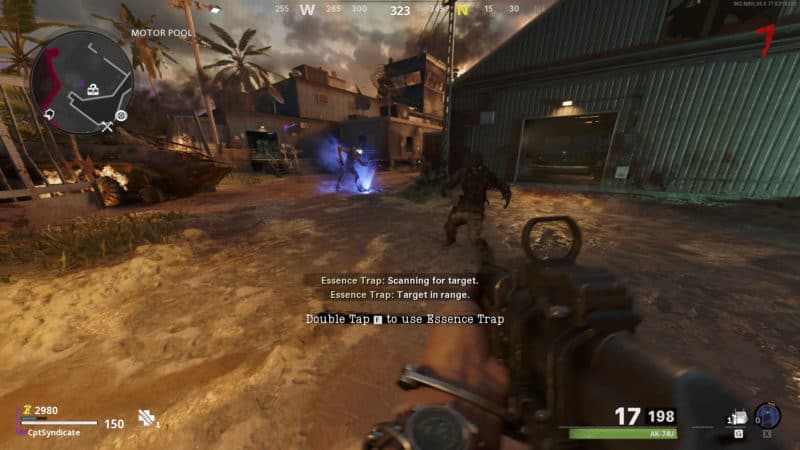
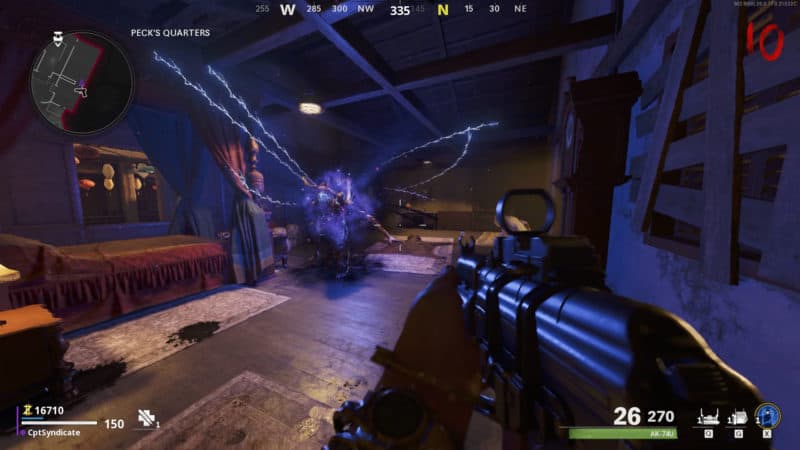
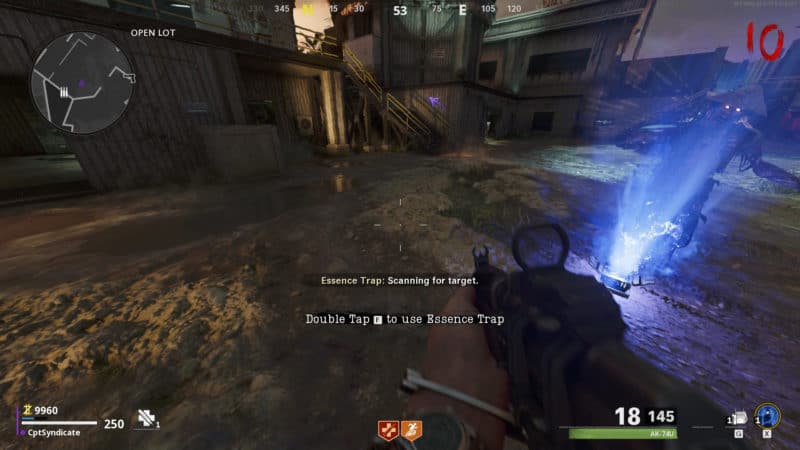
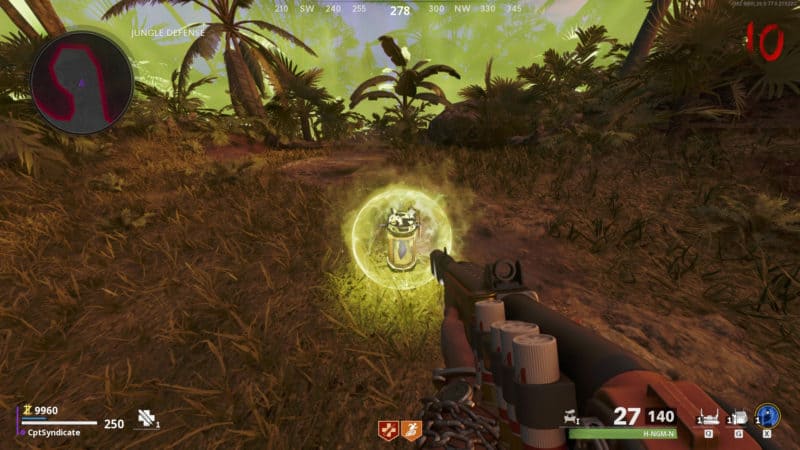
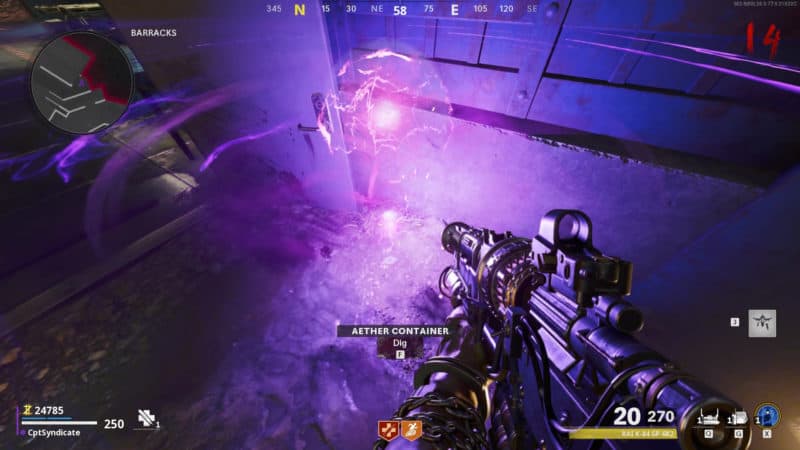
Now we will find the Mimic in three specific locations. You need to lower the health of the Mimic to almost one-shot before you can capture it. So, it would be best if you also buy a low DPS rifle to shoot them with. Also, only one Mimic spawns in every round. This means you will need to skip a round after every catch. One more thing to be careful of is to only capture the Mimic that is disguised as an item. Do not catch the one that spawns out of the map. You will just waste your essence trap. You can see in the following image a Mimic spawning from an item on the ground.
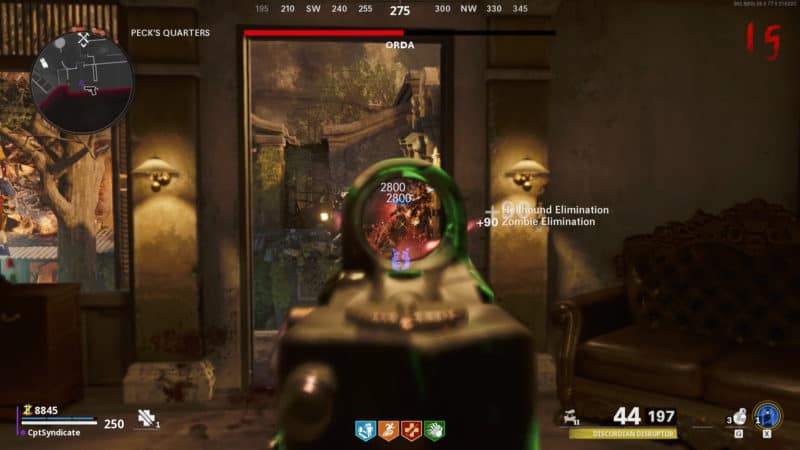
When you go to the correct locations, you will see a bunch of items on the ground, and only one of them will be the Mimic. It is mostly the Epic or Legendary items that are the Mimics. You will know that you are in the correct location by looking at the ground. There will be a lot of salvage that you won't be able to pick. Approach all the items, and the Mimic will spawn as soon as you are close to the correct one. Mimic Spawn Locations Mimic Spawn Location 1 The first location is the Military Command Control Room area. It can also spawn in the Sky Bridge and Colonel's Office, both of which are in the same area interconnected.
As mentioned before, use a low DPS weapon to lower the health of the Mimi. Once the health is low enough, capture the Mimic and take it back to the Data Center.
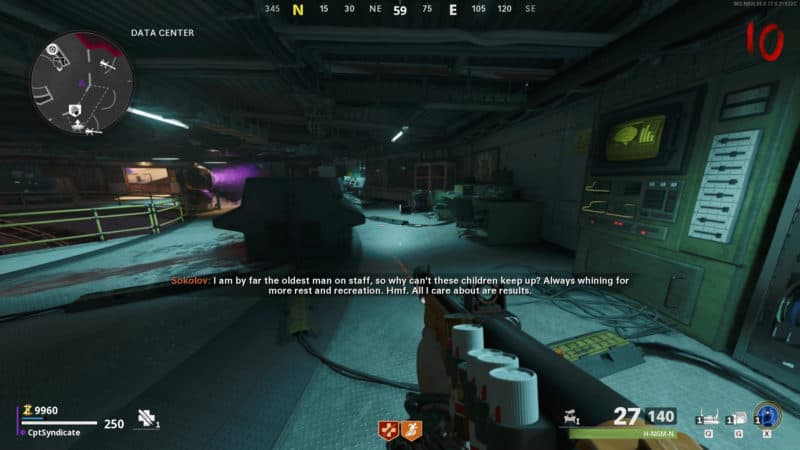
Put the essence trap inside the Memory Transference Station, and you will hear voice recordings of the scientists. When the scientists start speaking, look at the name of the character in the captions. If you get Zhabin, Brahms, or Sokolov, then you have collected the correct memory. We were able to capture Zhabin's memories from the Military Command. Even if you don't have the captions on, at the end of each message, Weaver confirms whether it was the correct memory or not.
Mimic Spawn Location 2
After collecting the first Mimic, end the round and move onto the next round before going to the next location. The second location is the Motor Pool area right next to the Weapon Lab. The Mimic can be anywhere in this area, including the garage. We managed to capture Brahms' memories from the Motor Pool area.
Mimic Spawn Location 3
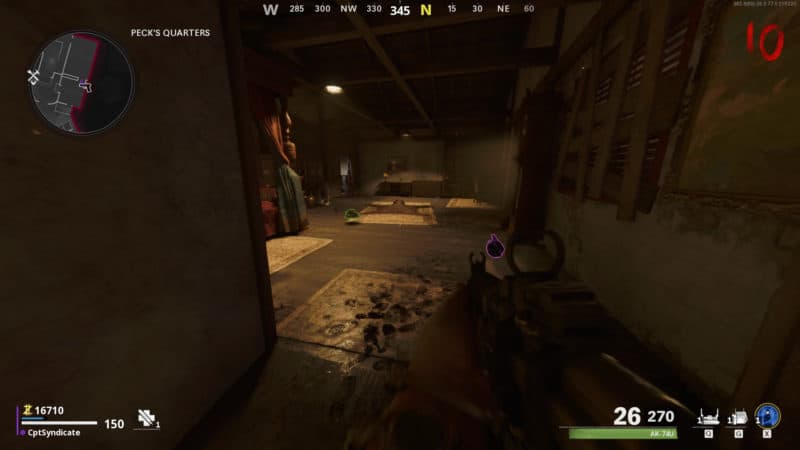
The last location is Peck's Quarters at spawn. It will mostly be inside the office on the upper floor. You will see a bunch of items on the ground, and as always, one of them will be a Mimic. We managed to capture Sokolov from Peck's Quarters.
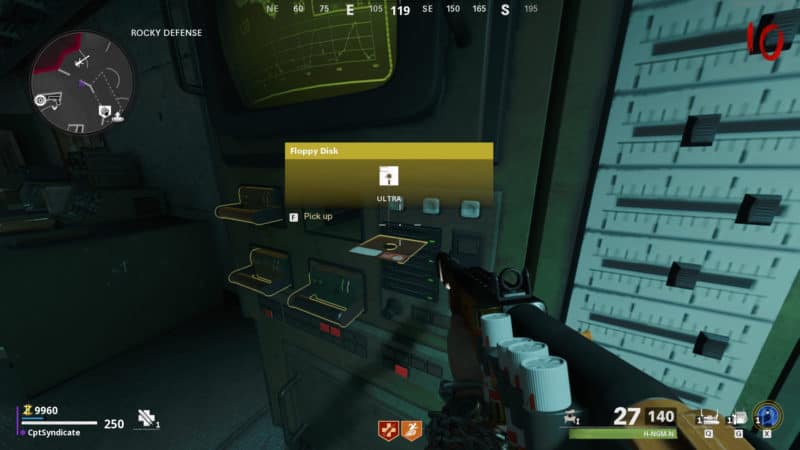
After inserting the last memory, wait for the dialogue sequence to finish, and a floppy disk will come out of the Memory Transference Station.
Another location is the Helipad area or the surrounding area where a Mimic can spawn, including the Barracks and Field Hospital. This one is always the wrong one.
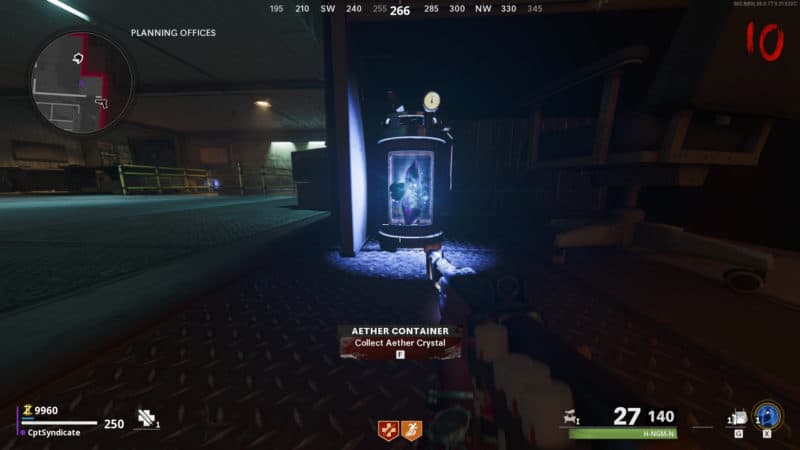
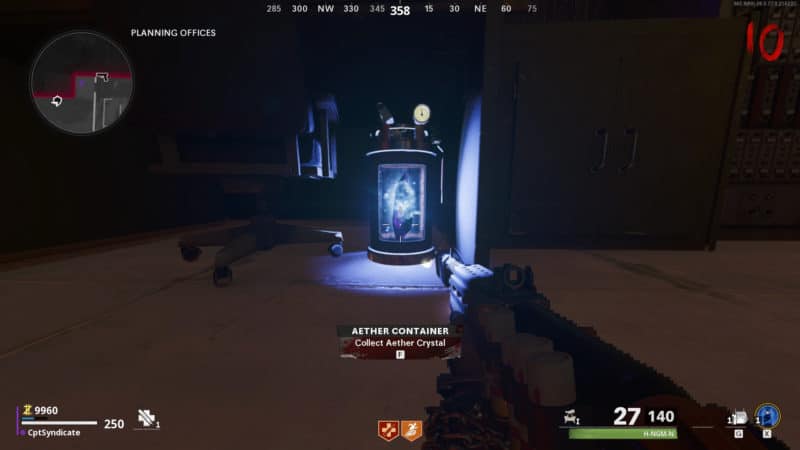
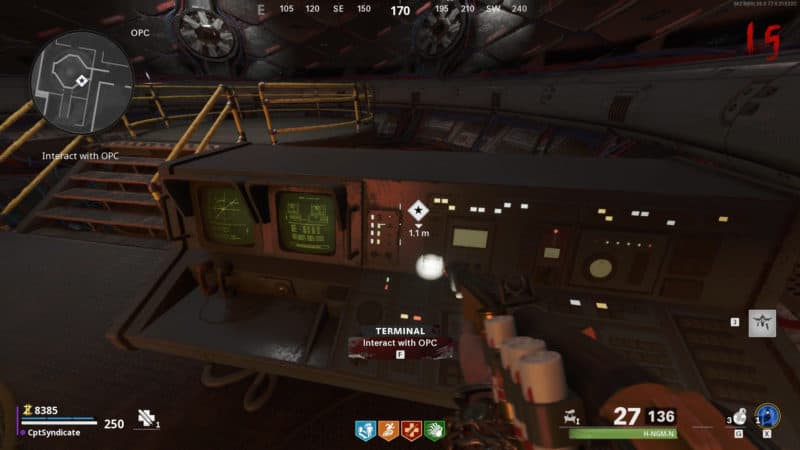
Collect it and make your way to the Planning Offices, the upper floor of the Engineering building next to the OPC Dome. Head inside the building and insert the floppy disk in the Quantum Main Frame.
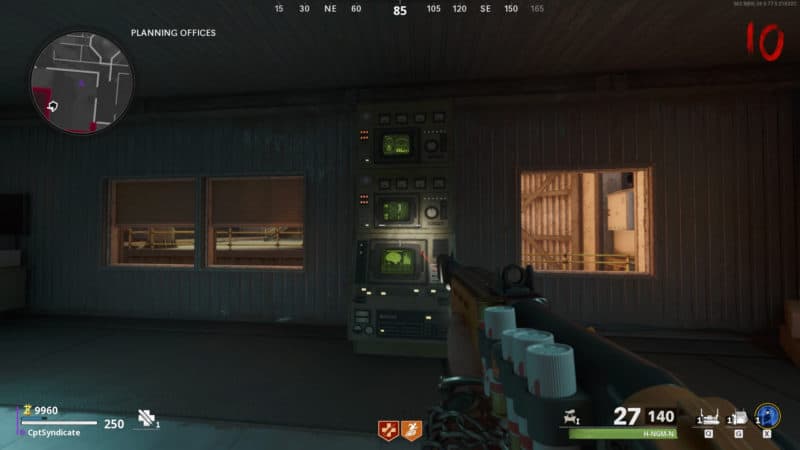
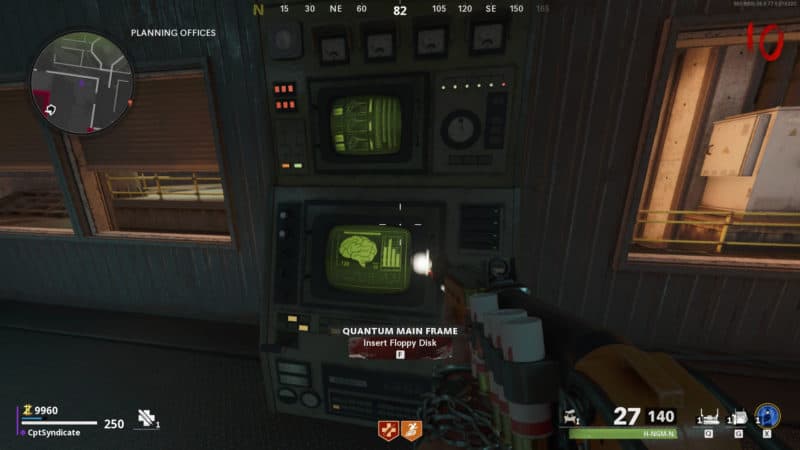
It will open the dome door that you can enter. Once you enter the dome, a portal will appear and start to stabilize.
After about 75% stabilization, the portal stabilization will stop, and the portal will close. Weaver will then ask you to speak to Peck for his help in stabilizing the portal.
Go to Mission Control and speak to Peck once again. This takes us to our next step, which is the Aetherium Crystals step.
nextpage
Aetherium Crystals
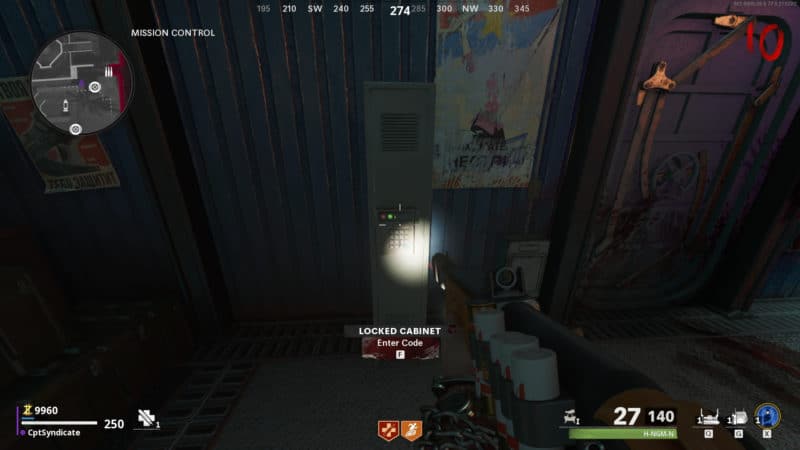
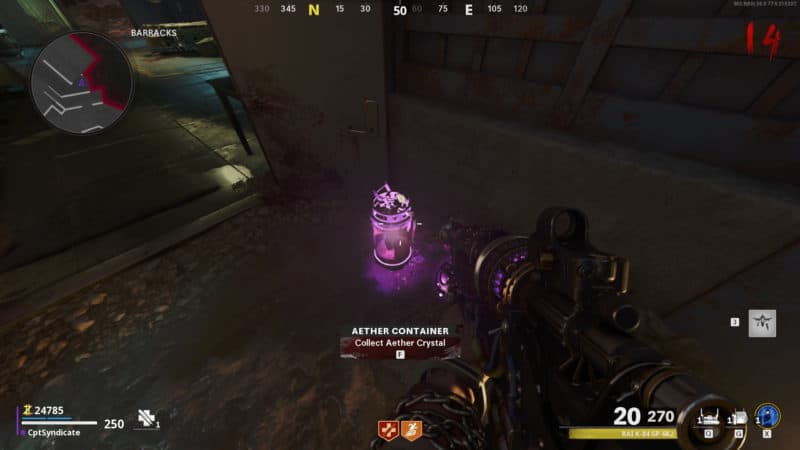
After talking to Peck, you will need to collect three Aetherium crystals scattered around the map to power the portal. The crystals are inside the canisters that are buried in the ground around the map. You will need an Aethermeter and a shovel to find the canisters holding the Aetherium crystals.
The Aethermeter is literally right outside Peck's room. Wait for Ravenov to tell you the passcode, then interact with the locked cabinet right outside Peck's office to get the Aethermeter.

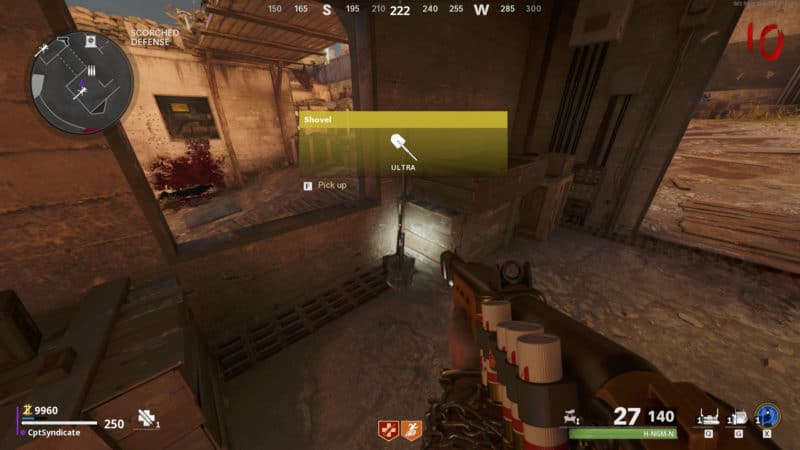
Afterward, run right outside to the Scorched Defense area via the left exit and enter the bunker right outside to acquire the shovel.
Aetherium Crystals Locations
We will only get two Aetherium crystal canisters in this step. The last canister requires the RAI K-84 wonder weapon. So, we will collect that one once we've built our RAI K-84. One of the two crystals in this step will help us acquire the 'power cell,' which is the last part for the RAI K-84 wonder weapon. More on that shortly.
Aetherium Crystal Canister 1
The first canister is found in the Open Lot right by the OPC. You must check outside in the ground by the Planning Offices window. The canister will be in the corner under the platform.
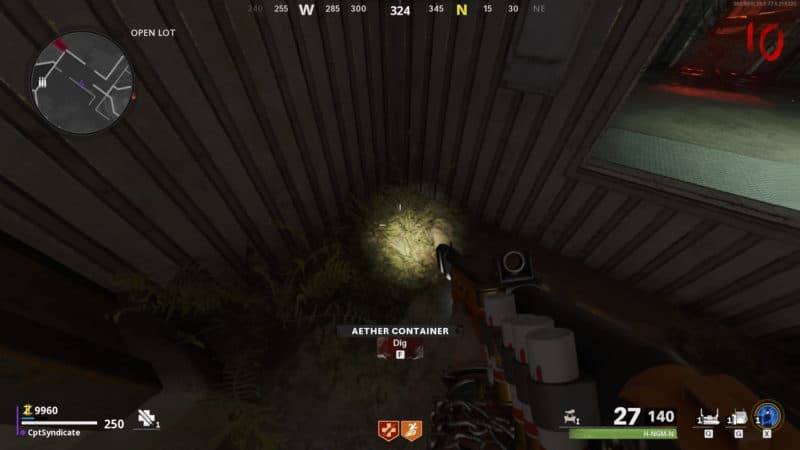
Before you dig out the canister, get the essence trap from the Data Center and trap one zombie at the end of the round. Do this step at the end of the round to make it easier for you.
After trapping the zombie, dig out the canister. It will instantly disappear with a number of the same canisters spawning around the lot, inside the planning offices, and the engineering area.
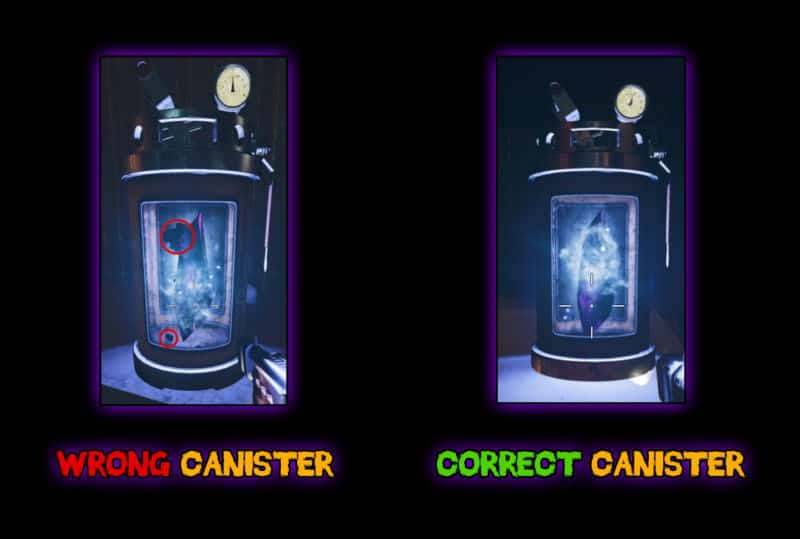
At first glance, all the canisters will look the same. But, the difference is that one of them will not have black smoke around the crystal inside. All of them will have black smoke, except one canister.
Look around at all the canisters until you find the one without the black smoke, and pick it up. That will be your first canister. Although the canisters spawn in the exact same locations, the one without the black smoke is always in a random location but, of course, in only one of these fixed locations.
If you collect the wrong canister, a number of Mimics will spawn.
Aetherium Crystal Canister 2
The second canister can be found in the Jungle Defense area next to the Military Command building. Go to the middle dirt pathway, and you will get a prompt to dig out the canister.
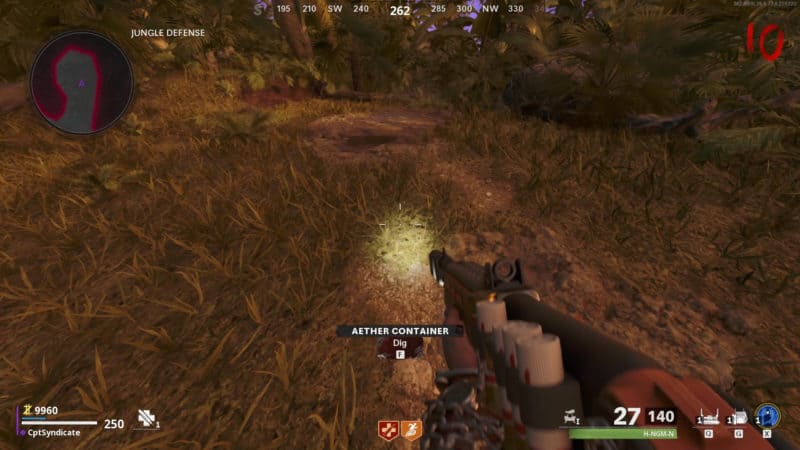
Once you dig out the canister, a yellow-colored force field will develop around you. You won't be able to leave this area now.
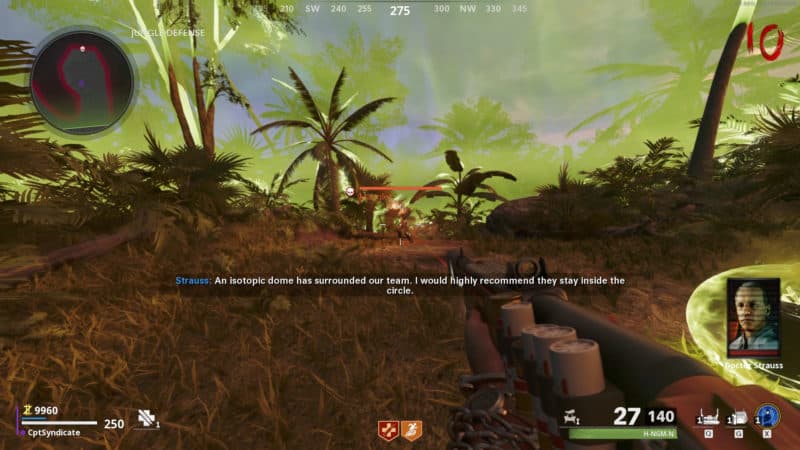
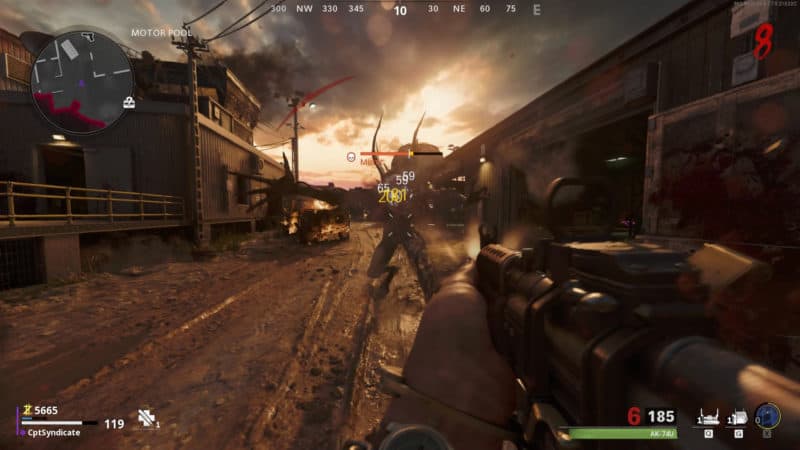
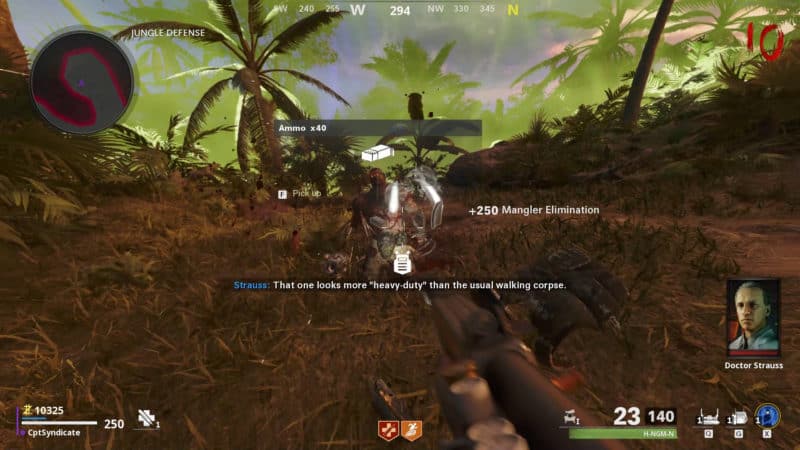
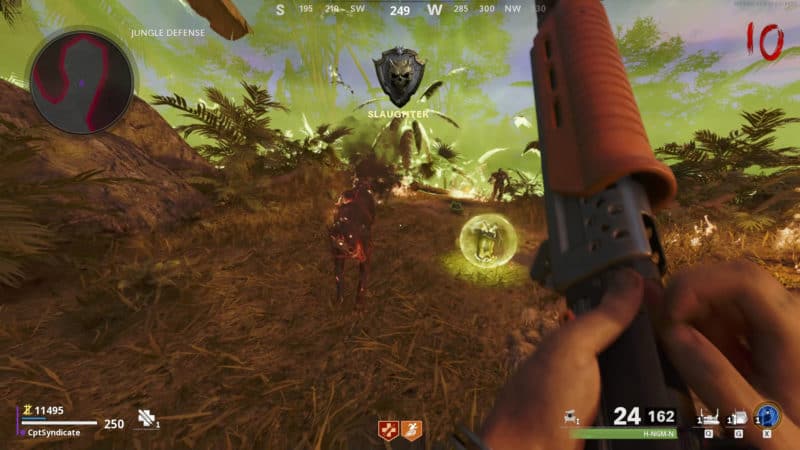
A number of hellhounds will spawn. In addition to the hellhounds, two Russian Manglers will also spawn. And this is where you can obtain the last part for the RAI K-84, the power cell.
Naturally, the Russian Manglers spawn on Round 15+. This is an easy trick to get it early. The only pre-requisite is that you must have collected all the other parts before collecting this second canister. This was the reason we did the RAI K-84 part collection early on.
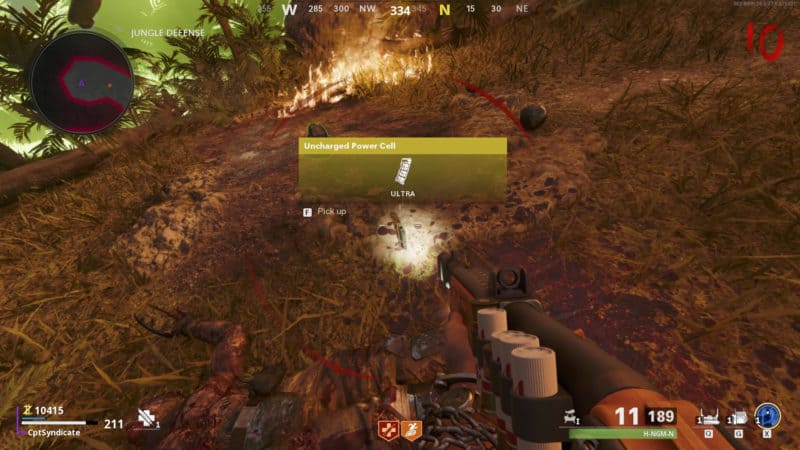
First, the Mangler will spawn. Prepare to shoot at his arm to get the power cell. If you don't get it the first time, try it with the second Mangler. But, you should get it on your first try.
Now, continue to survive the rest of the attack from the hellhounds and the Mangler. Be very careful of the hellhounds, they try to dodge your shots, and they do a lot of damage. They also leave a pool of fire where they die, which also does serious damage. Make sure you kill them as soon as they spawn in.
After clearing the area, the yellow force field will disappear, and you will be able to collect the yellow canister.

RAI K-84 & Third Aetherium Crystal
Now that you have the power cell, you will be able to build the RAI K-84 wonder weapon and use that to collect the last Aetherium crystal. First, make your way to the Weapon Lab, and plug the uncharged power cell into the charger and play through two rounds for it to be charged.
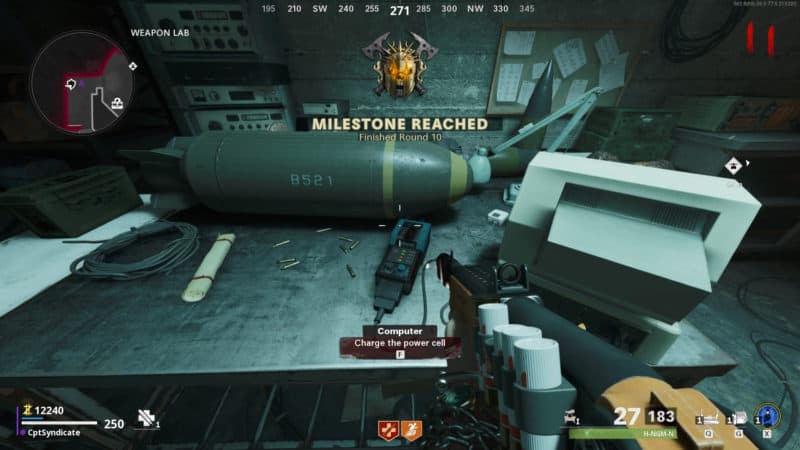
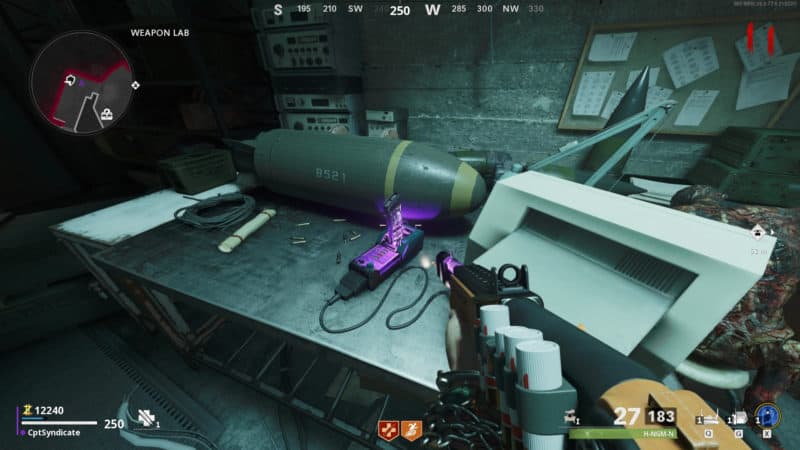
Once the second round finishes, head back to the Weapon Lab, and you will see that the color of the power cell will change to yellow. You will also be able to collect it.
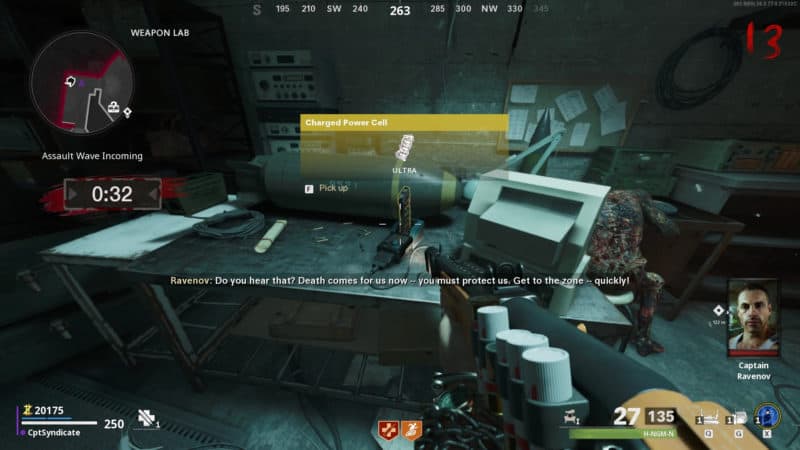
You can now build the RAI K-84 at the workbench where you collected the blueprint from.

Quick Tip:
If you are on round 12-13, you will get an assault round. You always get a free scorestreak from the computer at the defense site. When you get to the assault round, get the free scorestreak and save it for the final boss. It will help you reduce his health bar to almost half.
Back to the final canister. It is right by the stairs leading up to the Data Center from the Field Hospital and Barracks area. Go to the farthest exit of the Field Hospital by the barrier window.
It'll be right by the exit door. Before digging out the canister, use your RAI K-84's alternate ammo type first to shoot the dig site and then dig it out so that the canister doesn't teleport. Usually, if you dig it out, it will quickly teleport to some other location, such as inside the Barracks or in the Field Hospital. You will always be able to find it within the same area, though. The "energy mine" ammo type of the RAI K-84 slows the canister down, allowing you to pick it up.
nextpage
Satellite Step
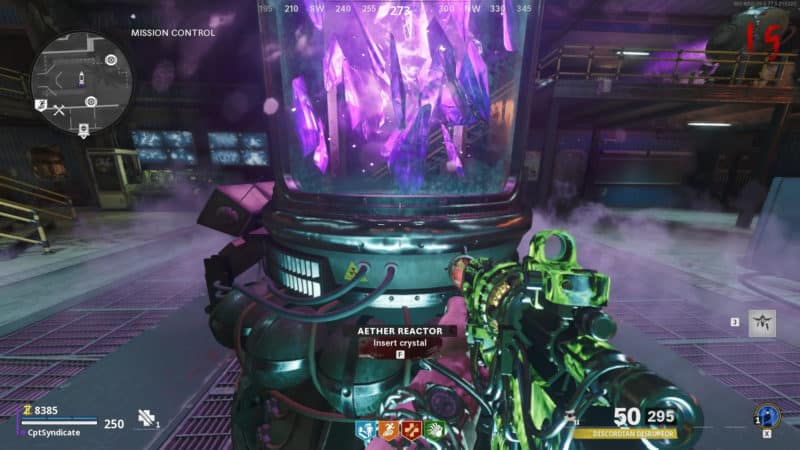
After collecting all three crystals, you need to make your way to each one of the Aether Reactors and insert the crystals into them. Make sure you insert in all three reactors.
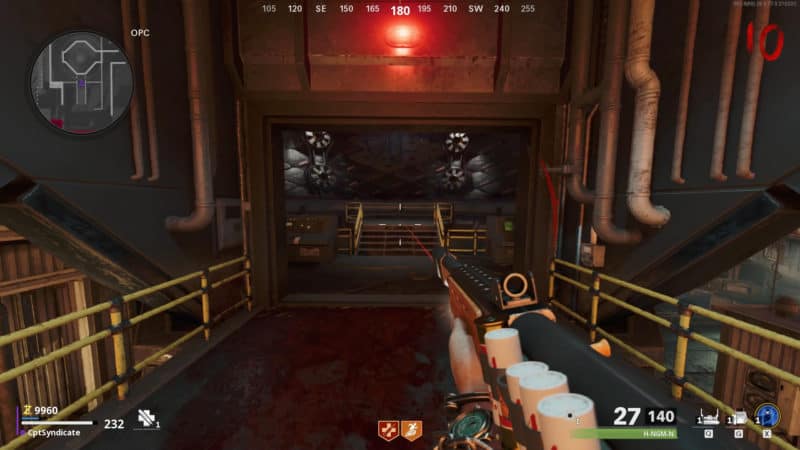
Then make your way back to the OPC dome and enter the dome to start the next portal stabilization process.
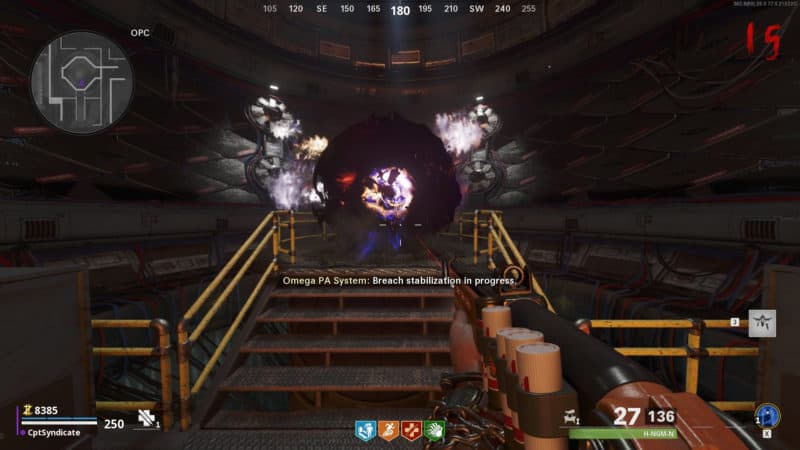
The portal will once again close, and the system will shut down due to system overload.
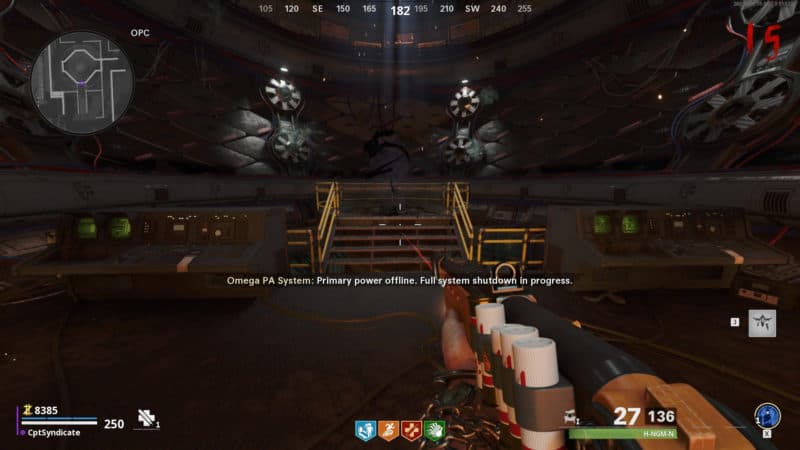
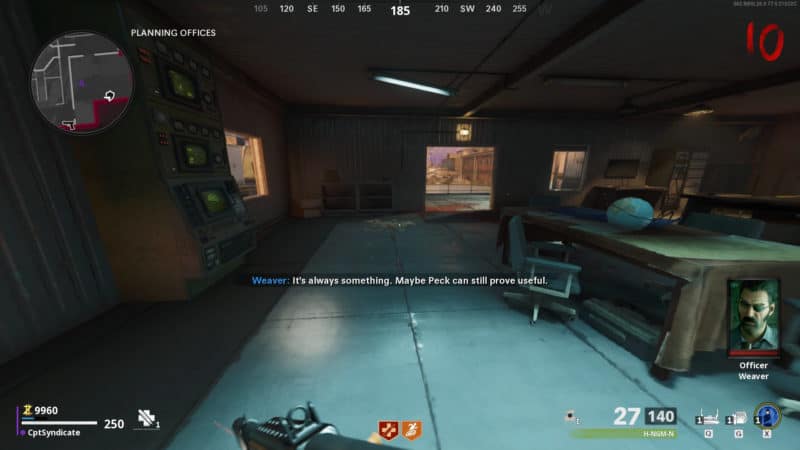
After a dialogue between Weaver and Peck, Weaver will again talk to you and propose using the facility's Satellite dish as a medium to power the OPC dome for the portal reopening.
For this step, head back to the Data Center and get another essence trap. It will help you out a lot and save you a ton of time when realigning the Satellite dish.
Before realigning the Satellite dish, leave one zombie at the end of the round and trap him using the essence trap so that he won't be able to annoy you when realigning. The controls are a bit confusing when realigning, so it takes a minute to get used to the controls, especially on PC.
Head to the planning offices and interact with the computer by the door. The controls will be shown on screen, but where they move the dot won't be indicated. You will have to figure it out on your own by pressing each key or button.
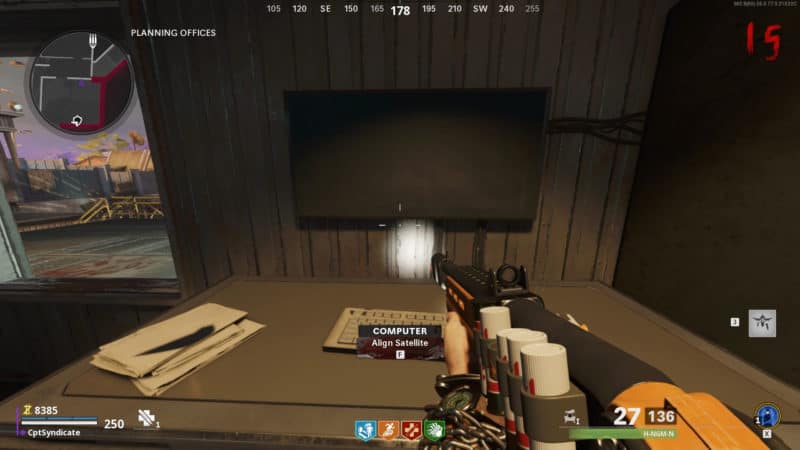
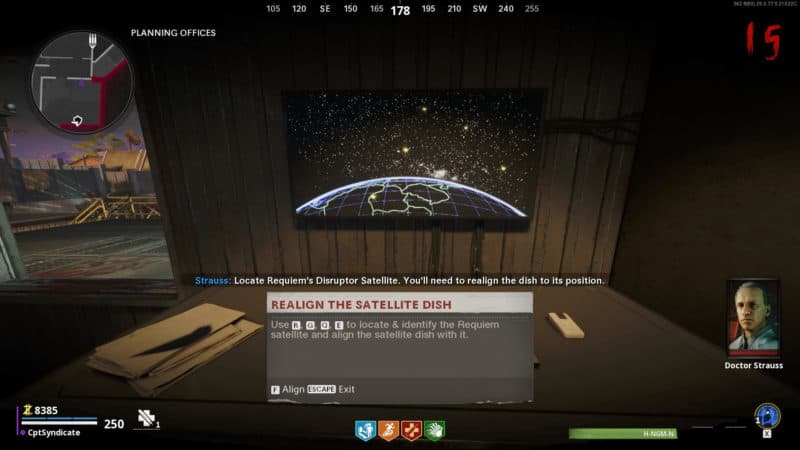
Move the small white dot to all the yellow orbs to find the correct alignment called the Requiem Disruptor Satellite. There will be yellow orbs with an American flag and even a Russian flag. You need to look for an orb with a "?" on it, instead of a country flag. You can see these flags appear at the bottom right corner of the screen when hovering the white dot on these orbs.
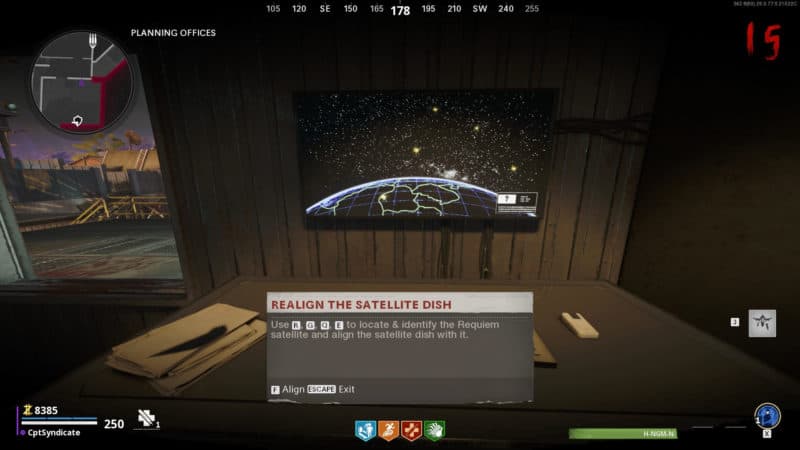
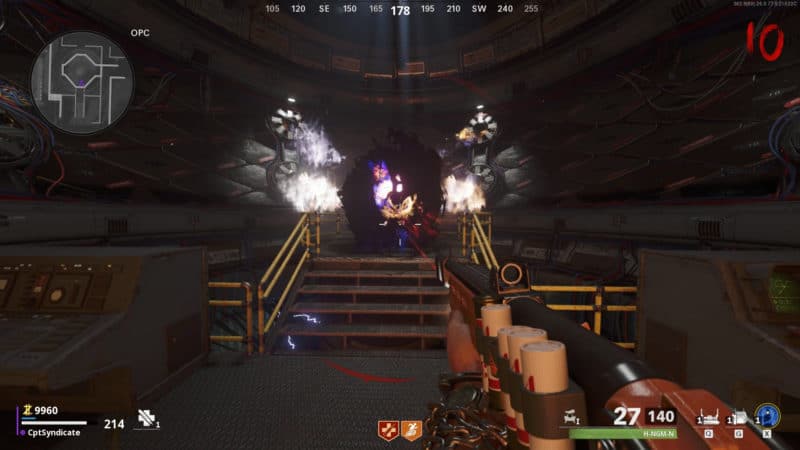
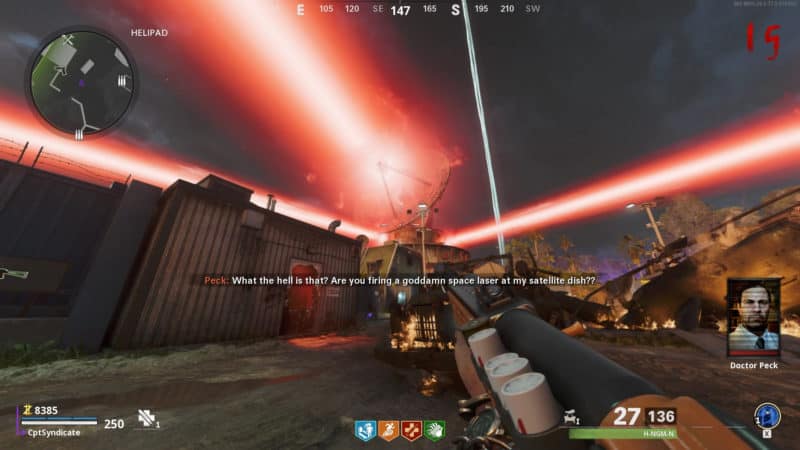
Once you're on the correct orb, align the Satellite dish, and you will see the main Satellite dish at the Firebase rotate. After the alignment, Requiem will fire a laser beam at the dish that will allow you to open the portal.
At this point, you should have all your important perks and your RAI K-84 pack-a-punched at least twice. The most important perks you must have are Stamin-Up, Jugger-Nog, Speed Cola, and Quick Revive. Make sure to have a long-ranged weapon for the boss fight as you cannot attack the boss 'Orda' at close range. If you have the RAI K-84 wonder weapon double or triple pack-a-punched, you should be fine.
If you have enough salvage, it is highly recommended that you buy Monkey Bombs to distract the zombies while taking on the final boss. You are going to be swarmed by the zombies during the boss fight. One monkey bomb costs 1,000 uncommon salvage.

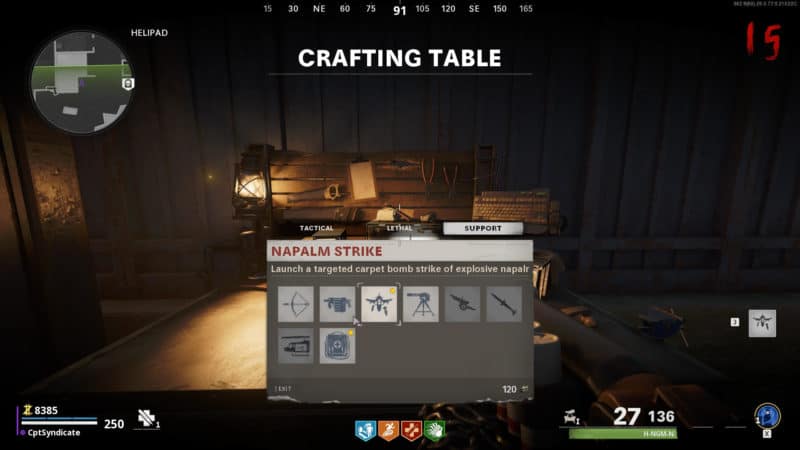
Also, make sure you switch your class to the one having Aether Shroud for sticky situations. Don't forget you saved up a scorestreak during the assault round that can be used on the boss. You can also buy an artillery strike from the crafting table if you have enough high-grade salvage.
Wait for Weaver's signal and run to the OPC dome where the portal is and interact with the control panel, which will initiate a cutscene that will show Samantha coming out of the portal.

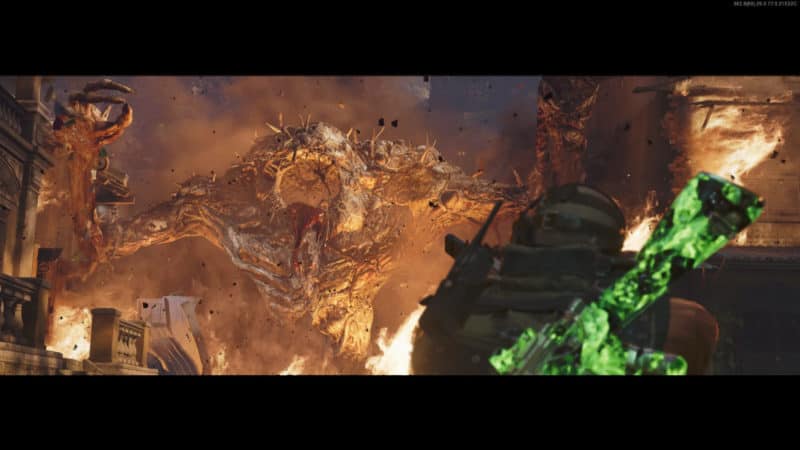
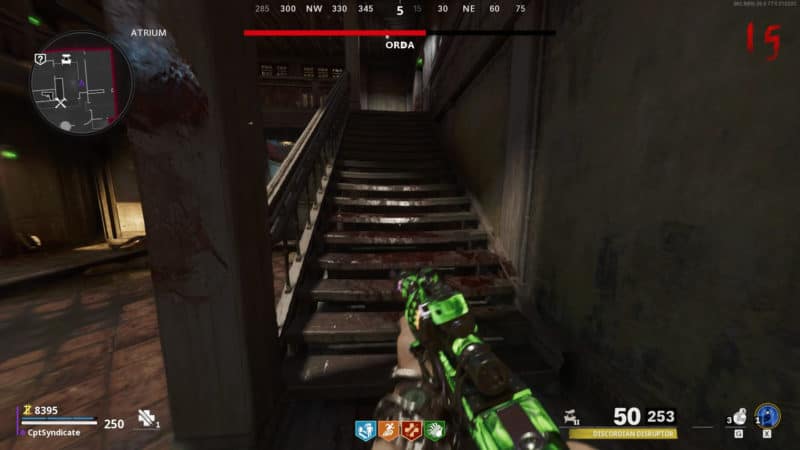
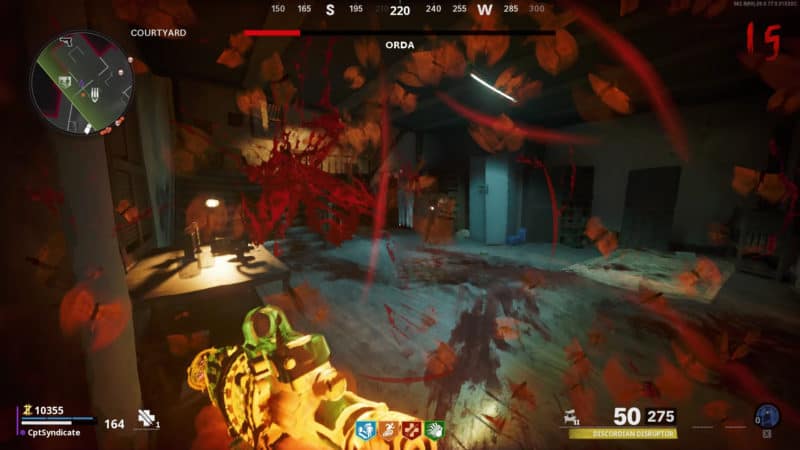
Final Boss Fight
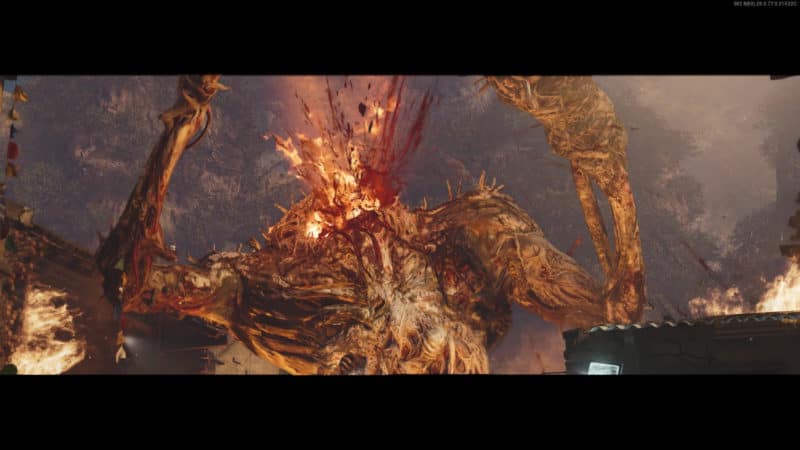
Once the cutscene ends, you will directly be put against the final boss called 'Orda,' also known as the "Elder God." We first saw Orda during the high rounds of Die Maschine lurking outside the map in the woods. We also saw the hand of Orda when solving the
on Die Maschine.
Now, coming to the final boss fight, as soon as you jump into the fight, start spamming your RAI K-84 at Orda.
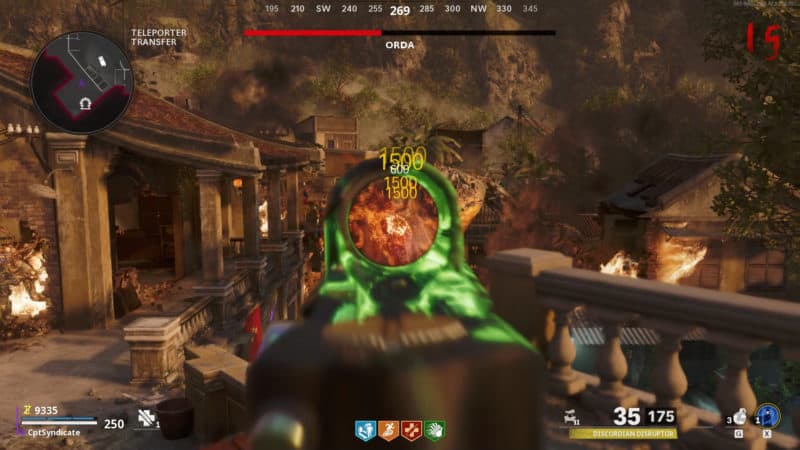
Quickly use your scorestreak, whether it's an artillery strike or a napalm strike, use it on Orda, and you will see his health decline significantly.
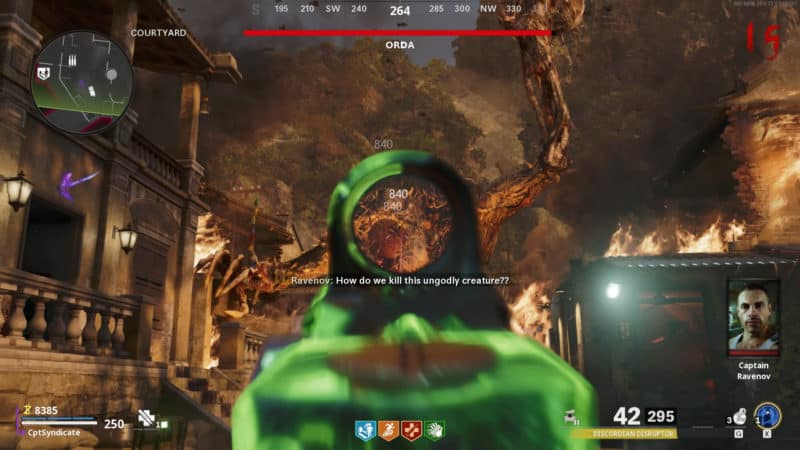
Always aim for the head and mouth, especially when he opens his mouth for an attack. That's when you can deal some serious critical damage.
Do not go near the Orda, or he will instant-down you with his big "hammer" hand.
Always loop around buildings and kill zombies if necessary. You will find that killing zombies is better than just avoiding them as it will give you some room and a chance to shoot at Orda. If you leave the zombies, more spawn, and they can easily overrun you in such a small spawn area.
Whenever you get hit by Orda's fire attack, quickly take cover inside one of the buildings and try to keep as much distance as possible between you and the zombies. This fire attack is one of the reasons why you should have the Quick Revive perk for quick health recovery. Always be on the move and never stop.
After you've drained Orda's health to zero, another cutscene will play that will show Orda dying and Samantha joining the Requiem to return to Weaver after bidding her farewell to Ravenov.